In this part of the lab you will trigger the CD pipeline to automatically build the entire production fabric using GitLab
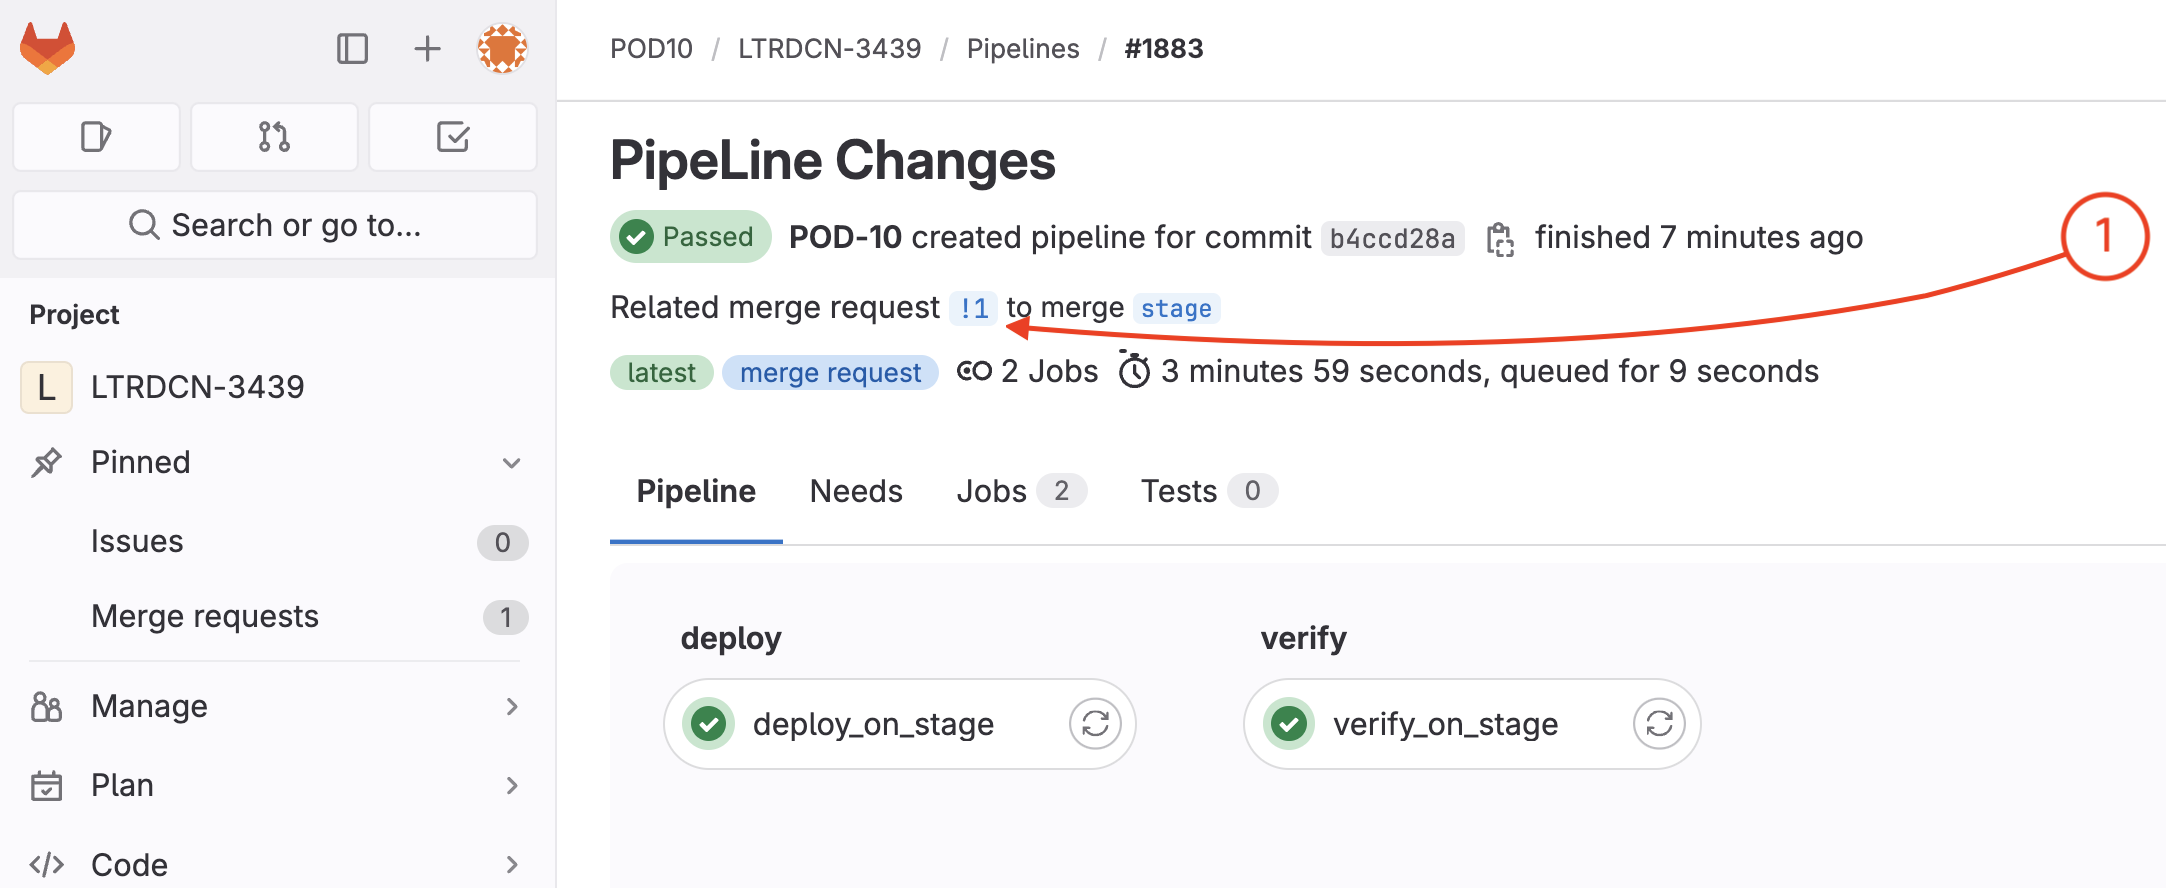
Step 1 - Navigate to the Merge Request
To open the merge request page:
Click !# in the text Related merge request !# to merge stage
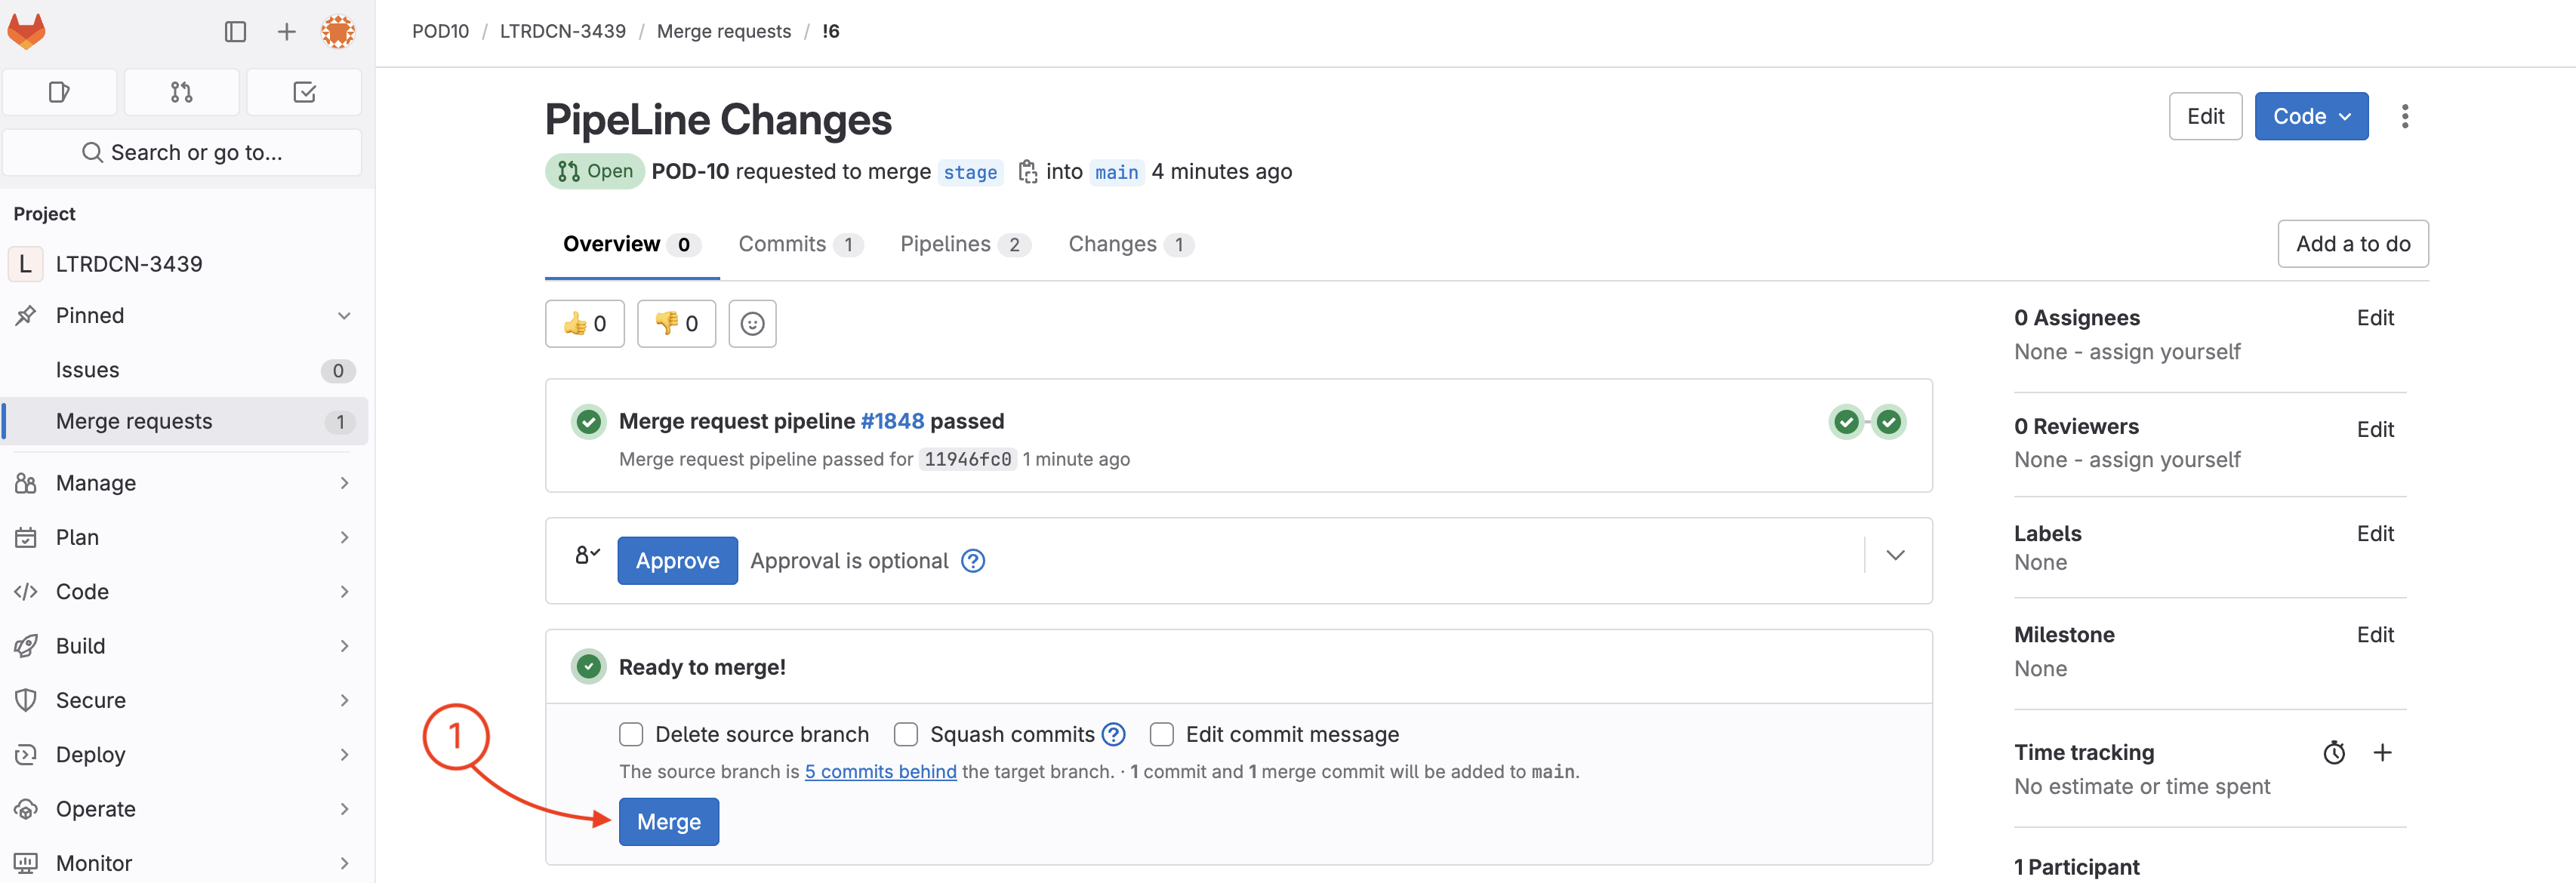
Step 2 - Merge the Request
On Merge Request details page:
Click Merge
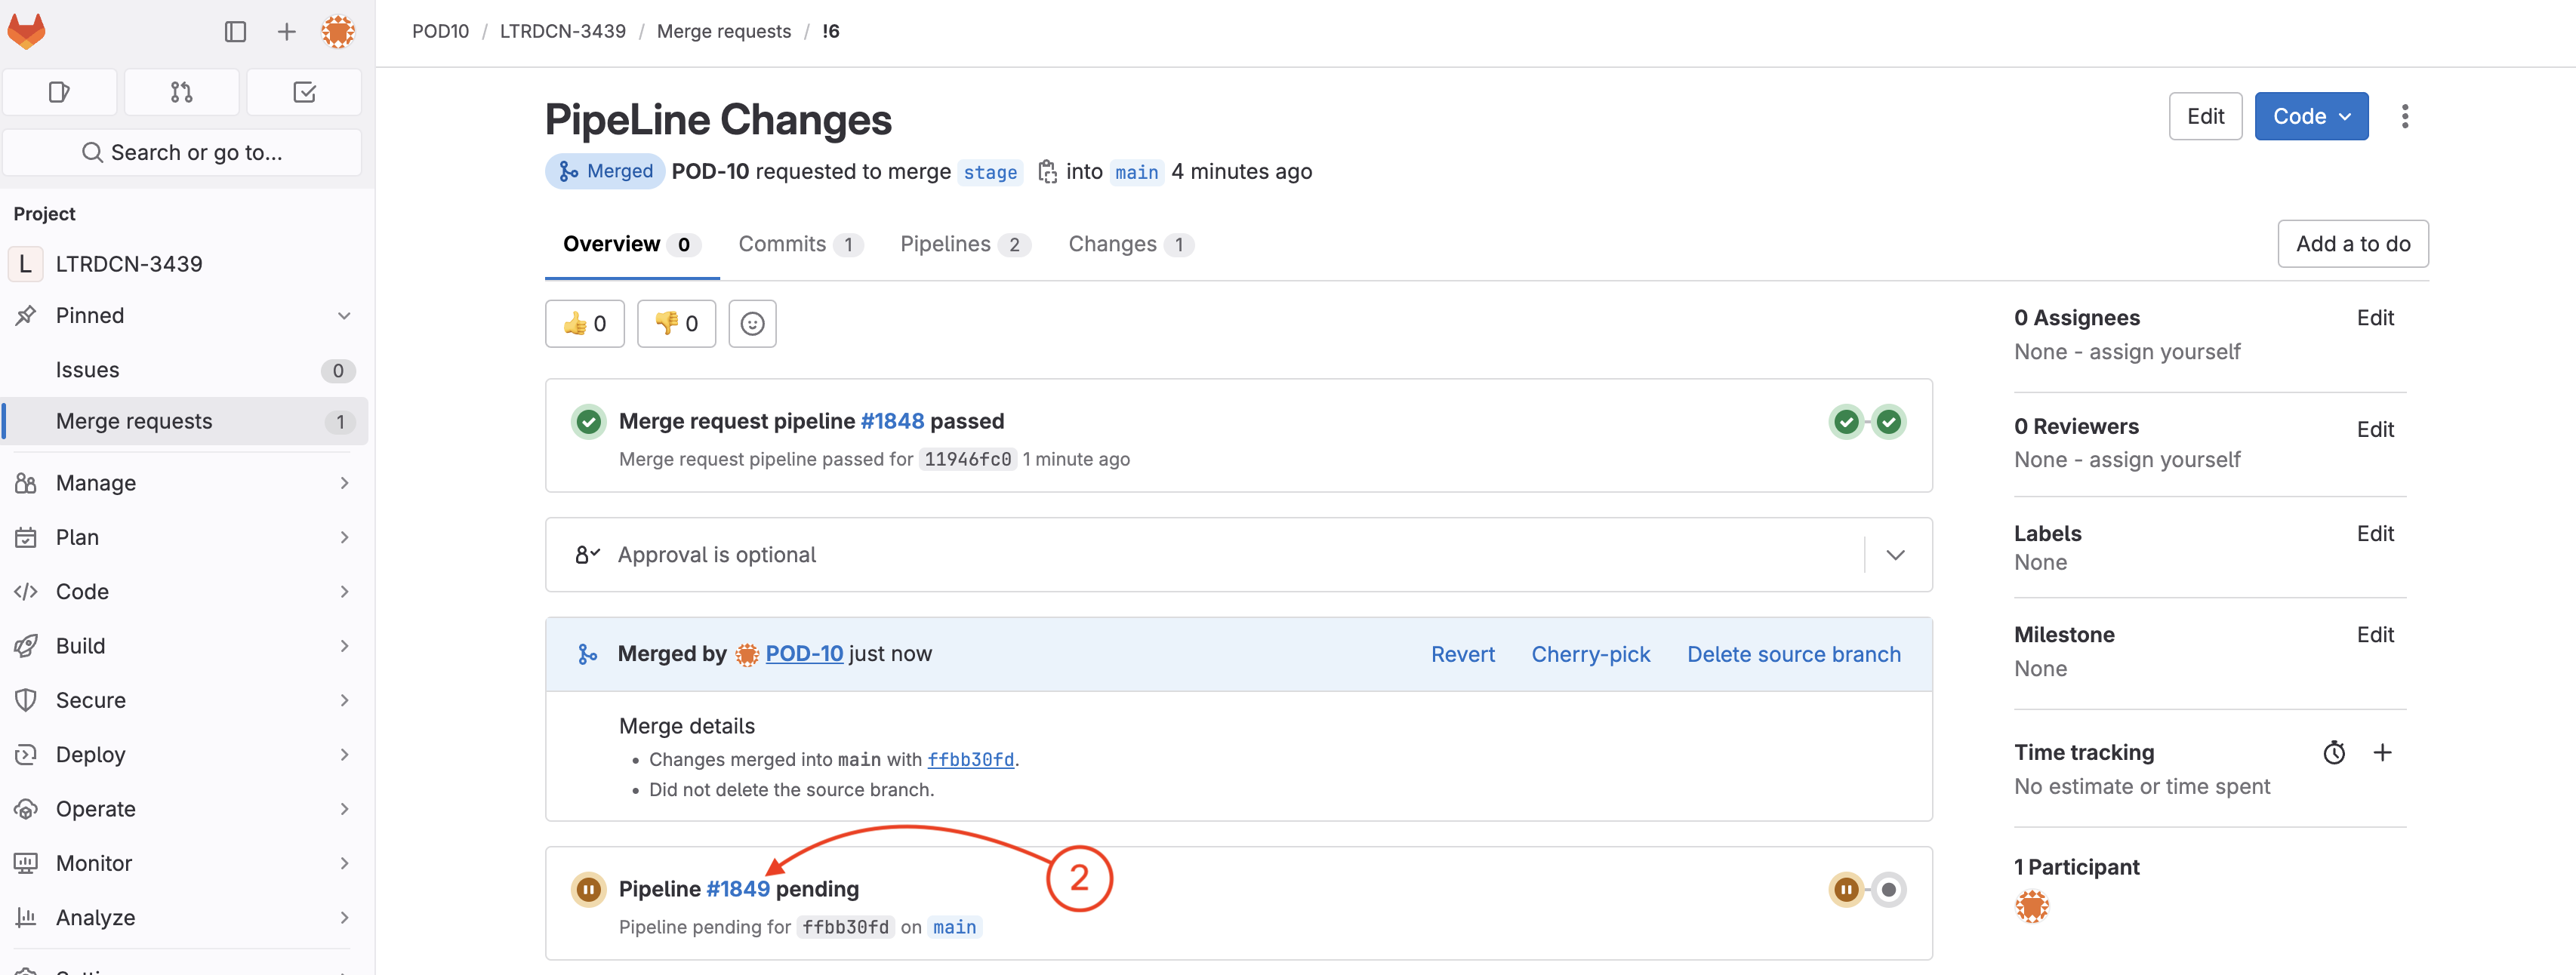
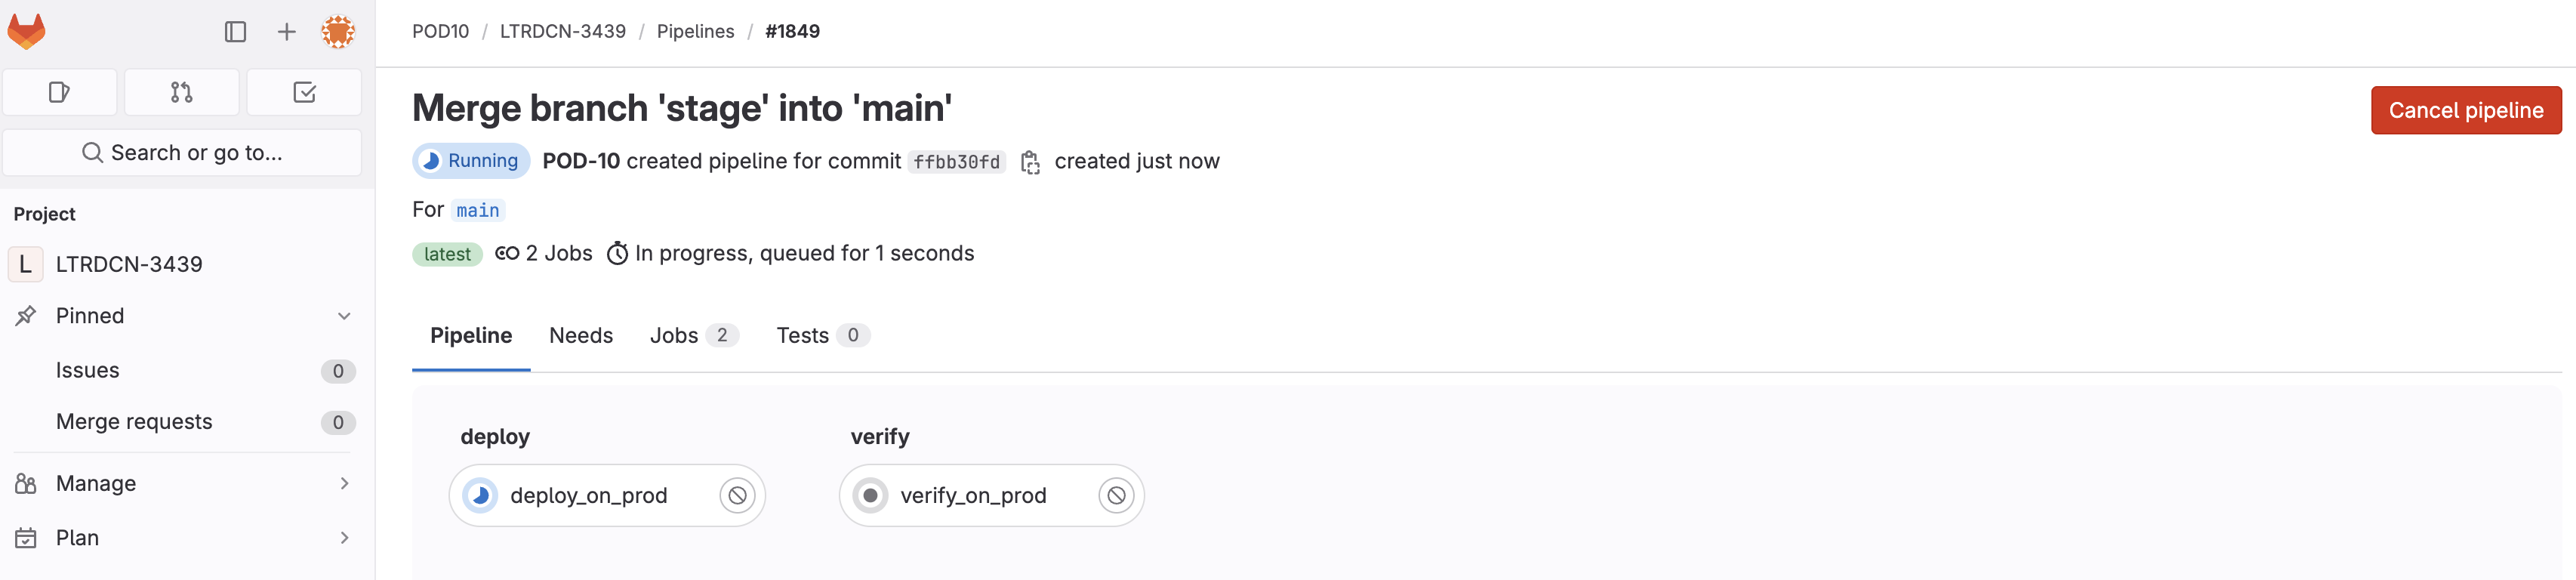
Step 3 - Navigate to Continuous Delivery Pipeline for Prod
Once code is merged, a new CD pipeline is triggered:
Locate the new pipeline that was triggered
Click the Pipeline number
Step 4 - Wait Until Pipeline is Finished
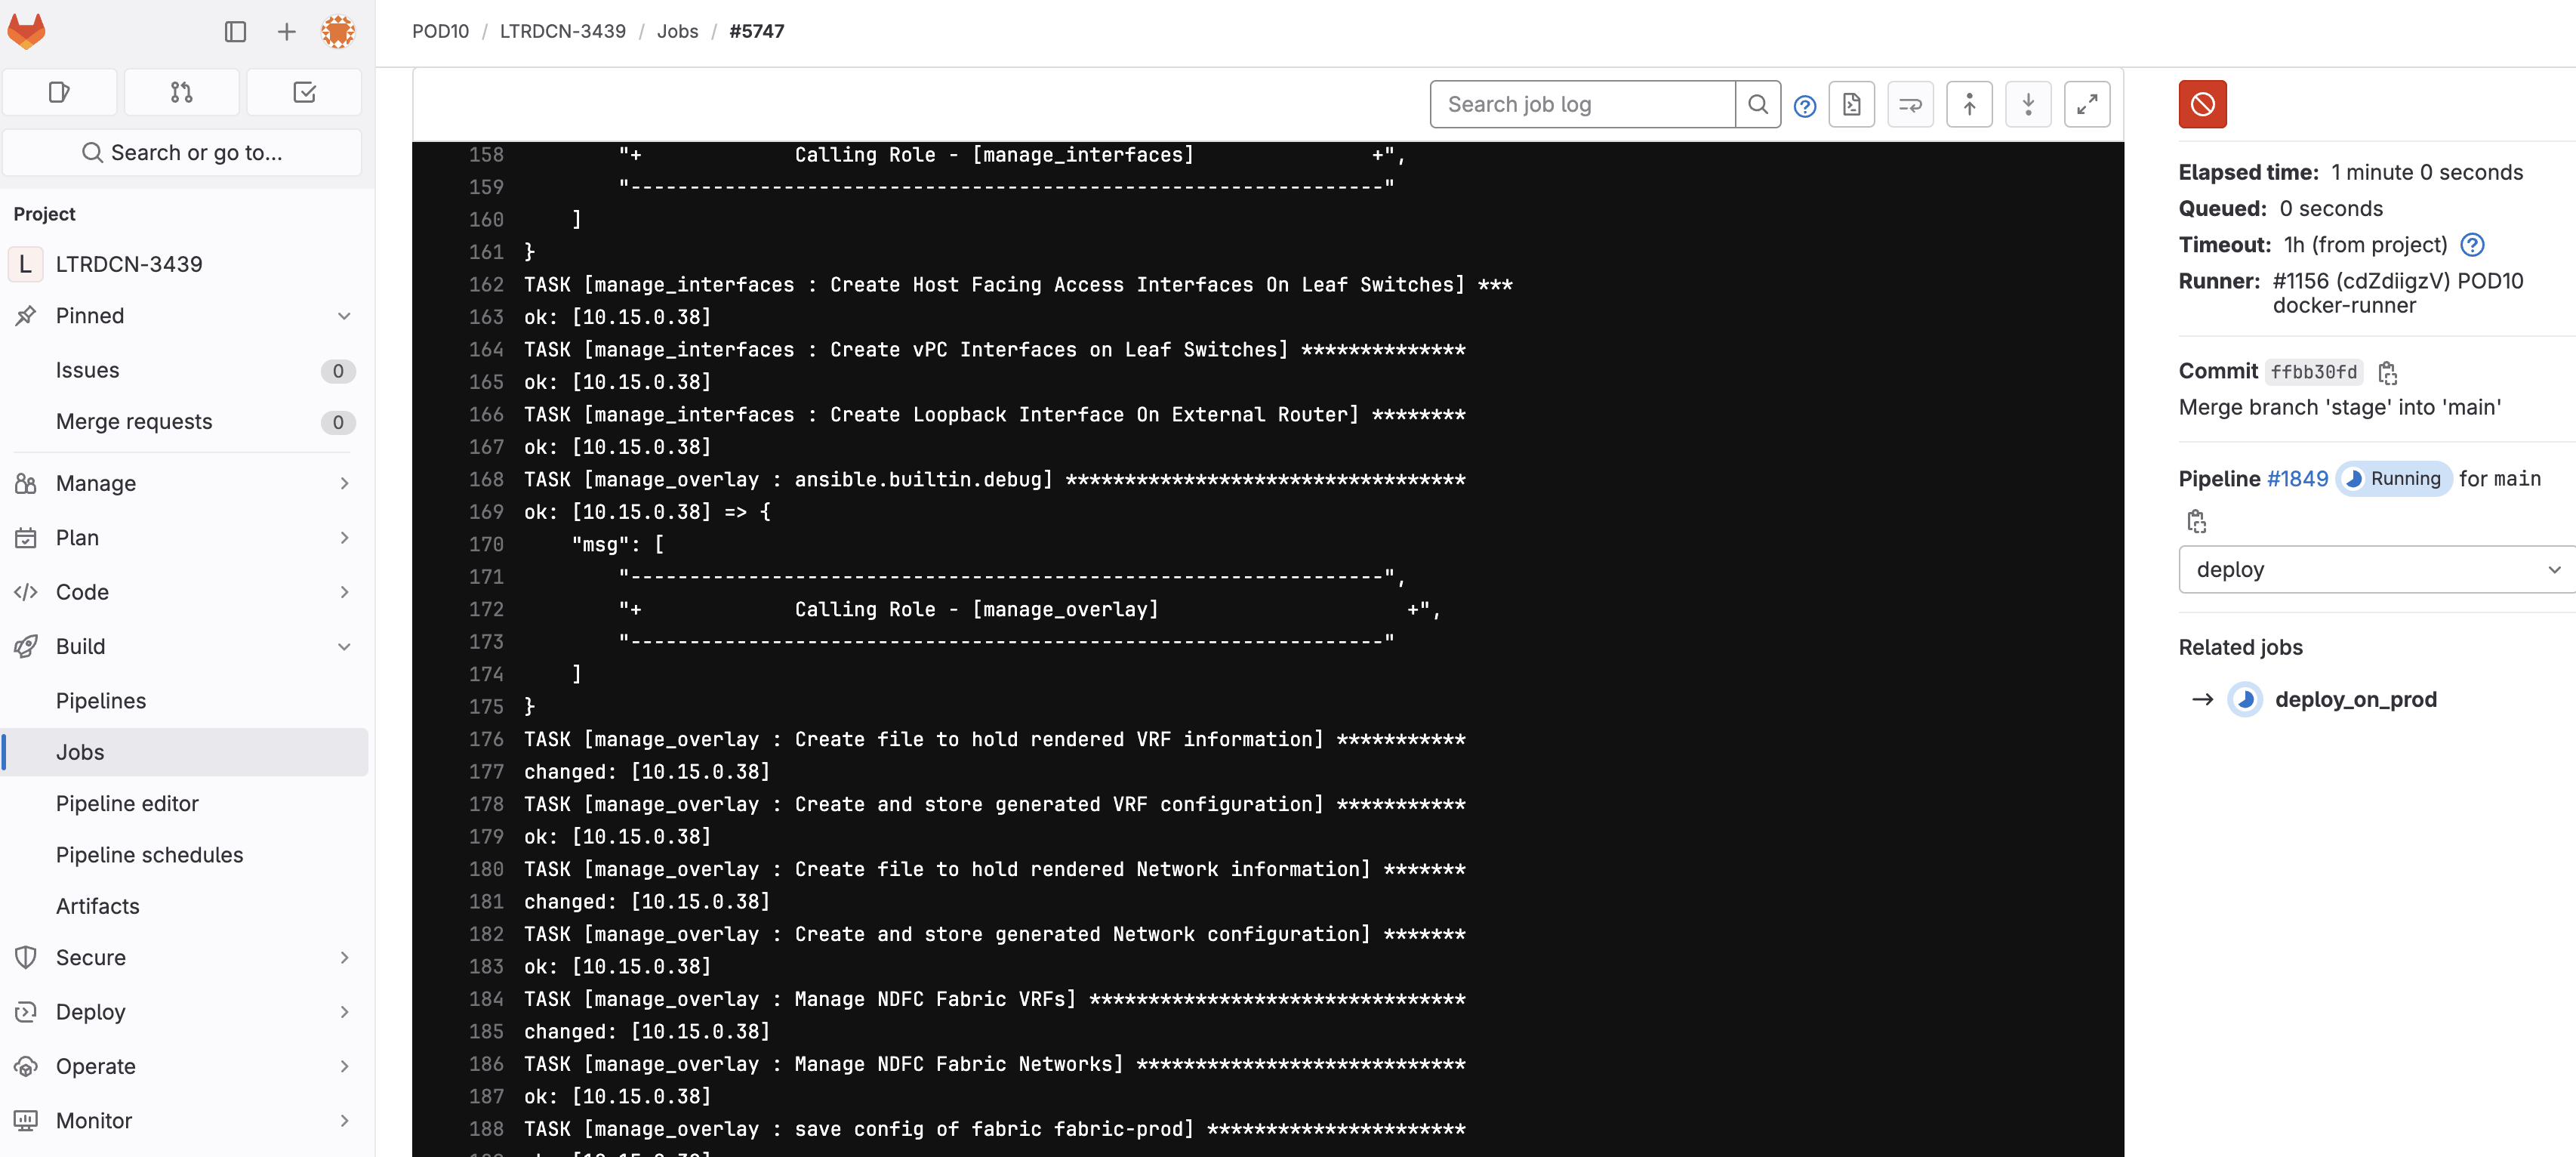
While the pipeline is running click on deploy_on_prod to see the various Ansible
roles run against the Production Fabric to build it out using the CD Pipeline!
Click on deploy_on_prod
This step will take around 14 mins to complete
This deploy_on_prod and verify_on_prod are doing the following:
The deploy_on_prod runs the build_fabric.yml script against the production fabric.
The verify_on_prod runs the verify_fabric.yml script against the production fabric.
This is effectively taking all of the scripts you built earlier for the staging fabric and runs them against a new target host file for the
production fabric to build out your new production fabric using the CD pipeline in GitLab!
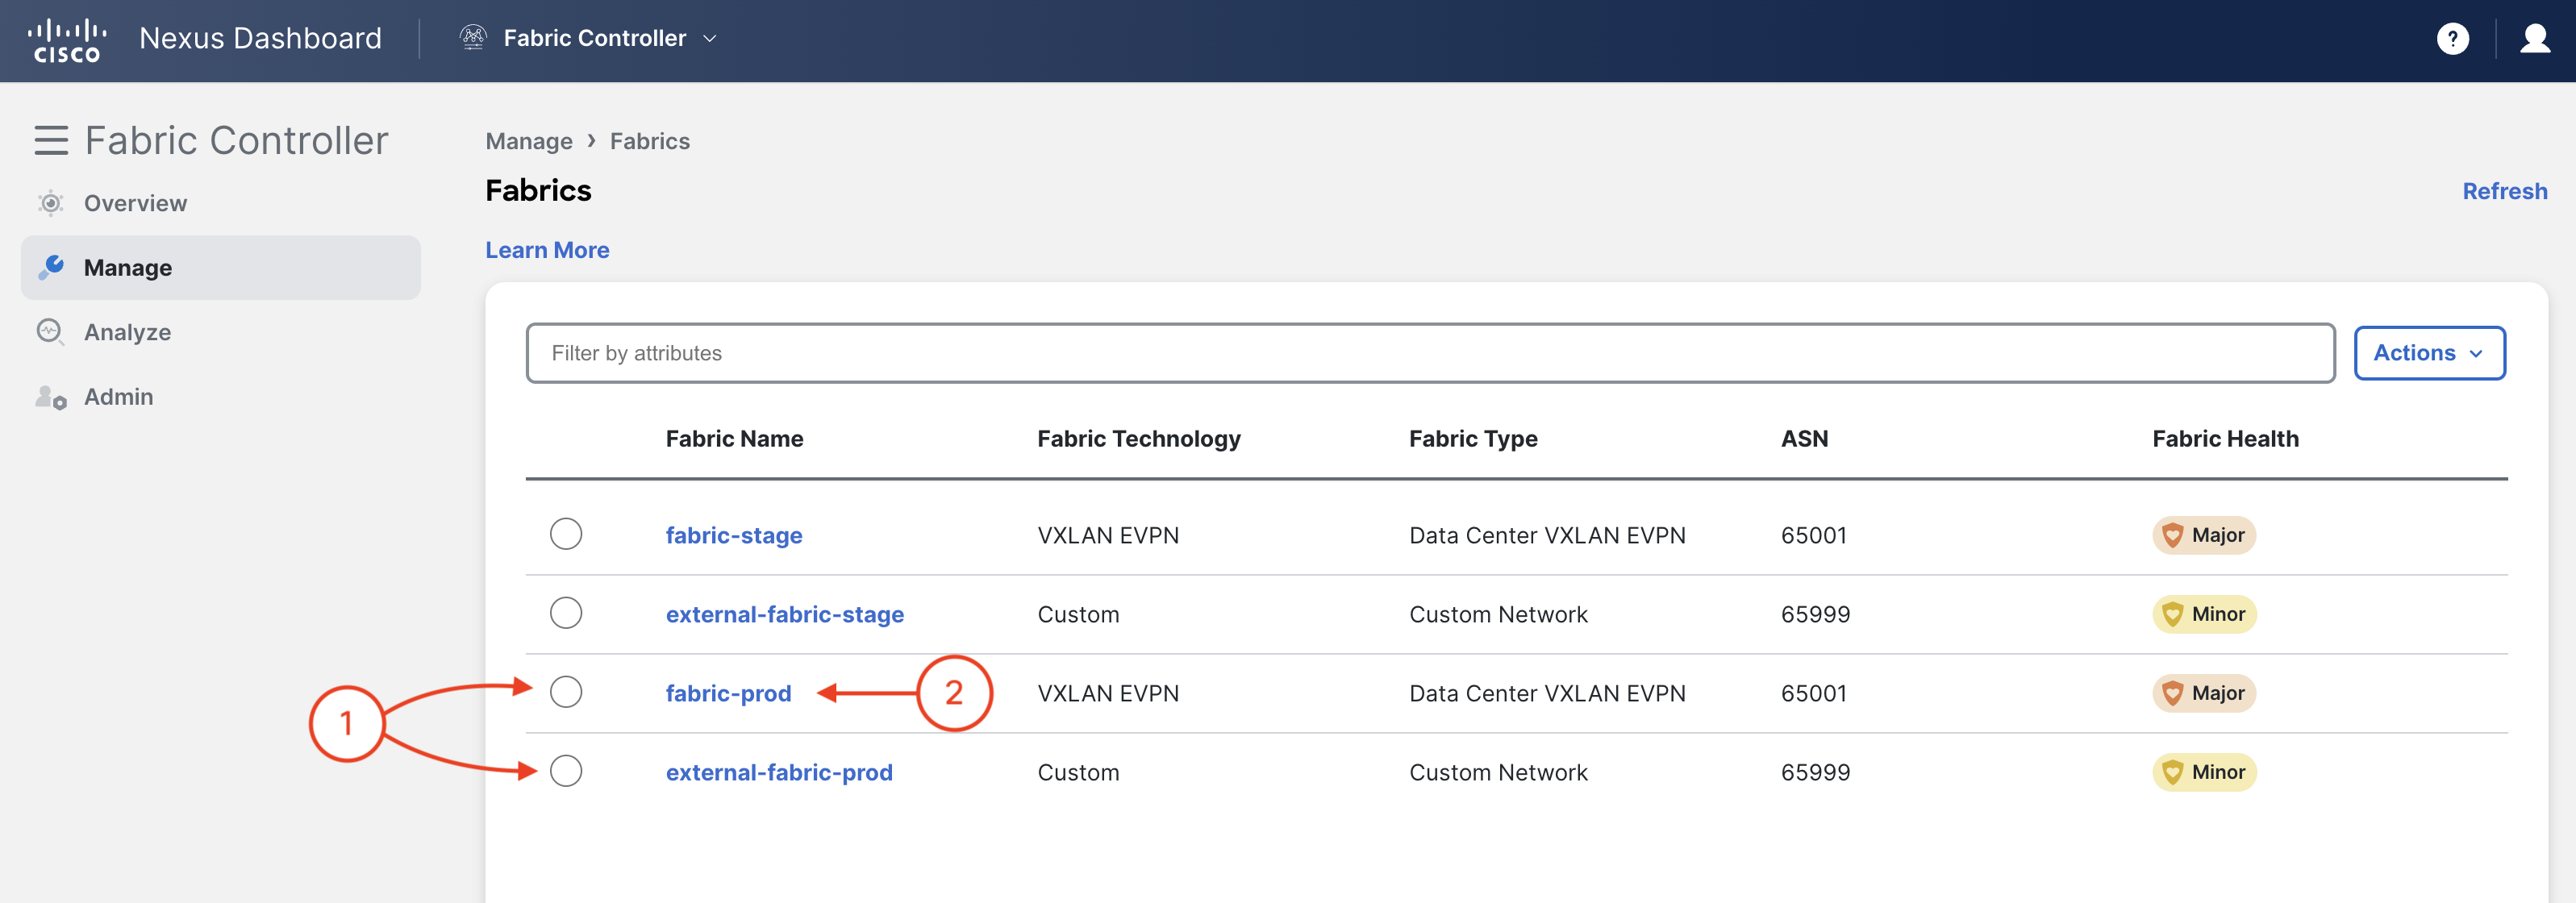
Step 5 - Login to Nexus Dashboard and Verify the New Production Fabric
In your browser, navigate back to your NDFC instance. If needed login using your username and password:
Username:
admin
Password:
cisco.123
Check fabric-prod
This time open the fabric page and check fabric-prod, NOT fabric-stage.
Remember the CD pipeline pushes changes to the production fabric.
Navigate to LAN Fabrics page and Click fabric-prod, and verify production fabric is configured:
Verify fabric-prod and external-fabric-prod have been created by the pipeline execution
Double-click on fabric-prod
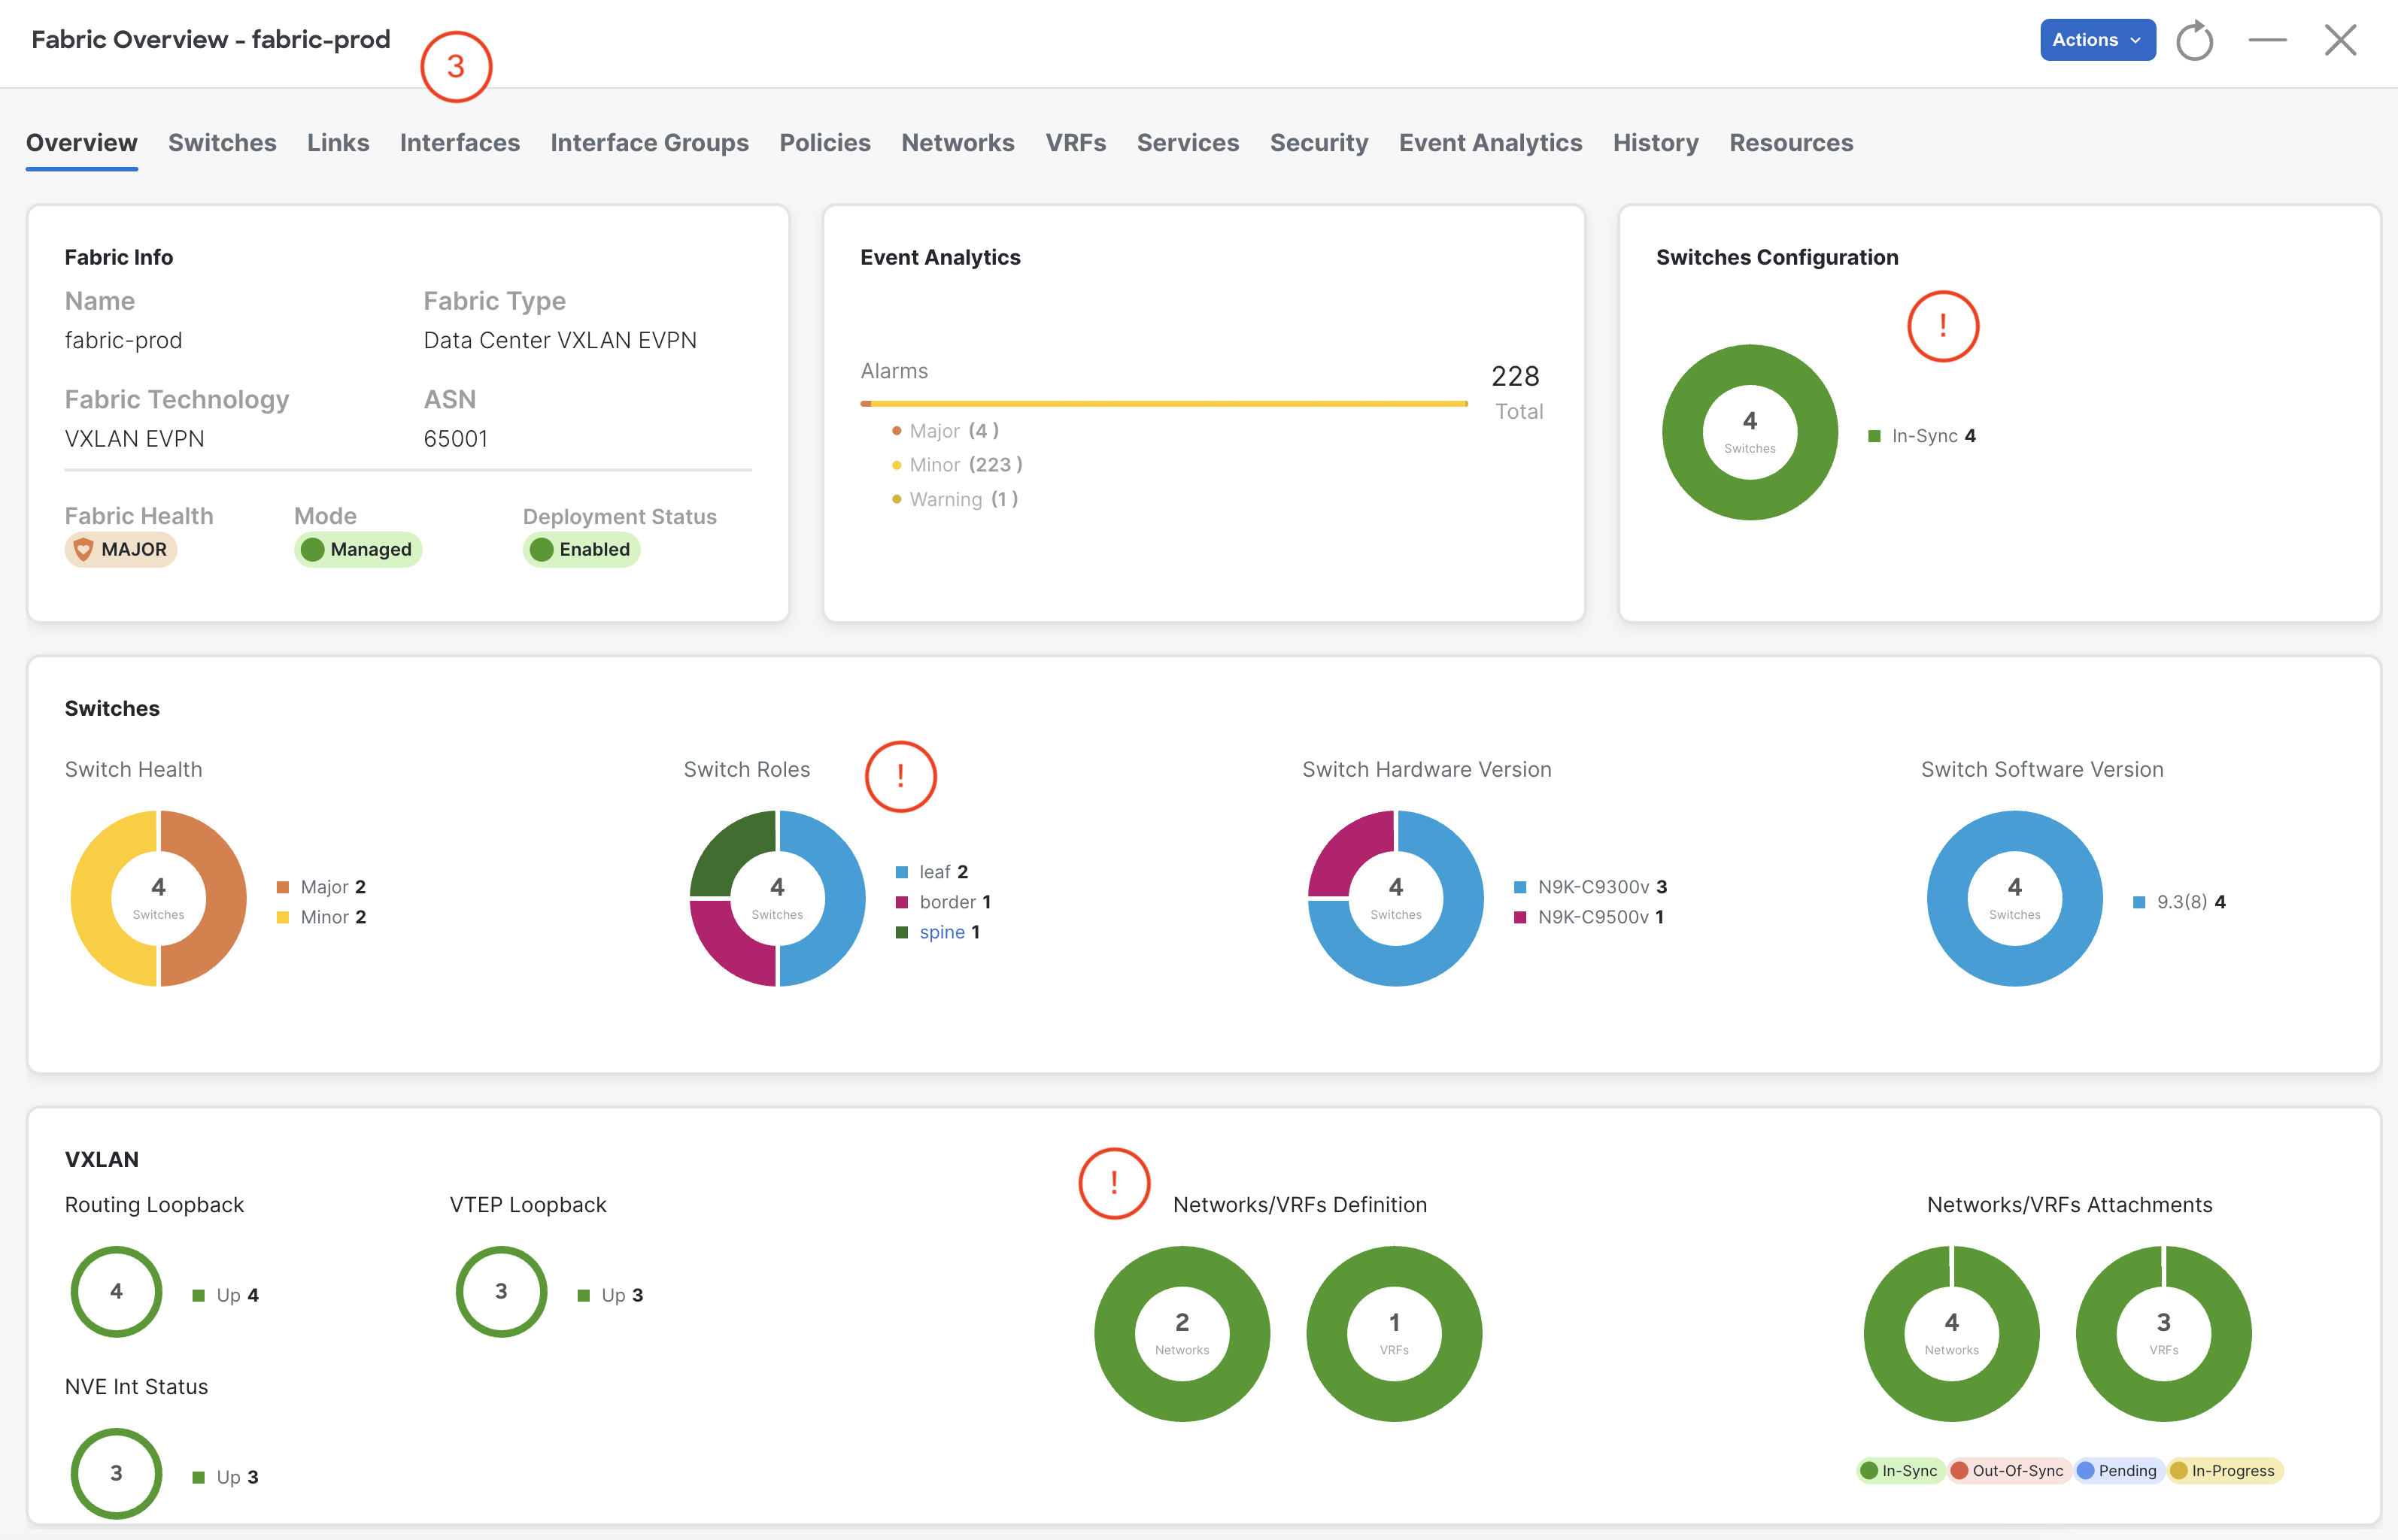
Examine your prod fabric's Overview page. You should see a total of 4 switches, 2 L2VNIs (Networks), and 1 VRF.
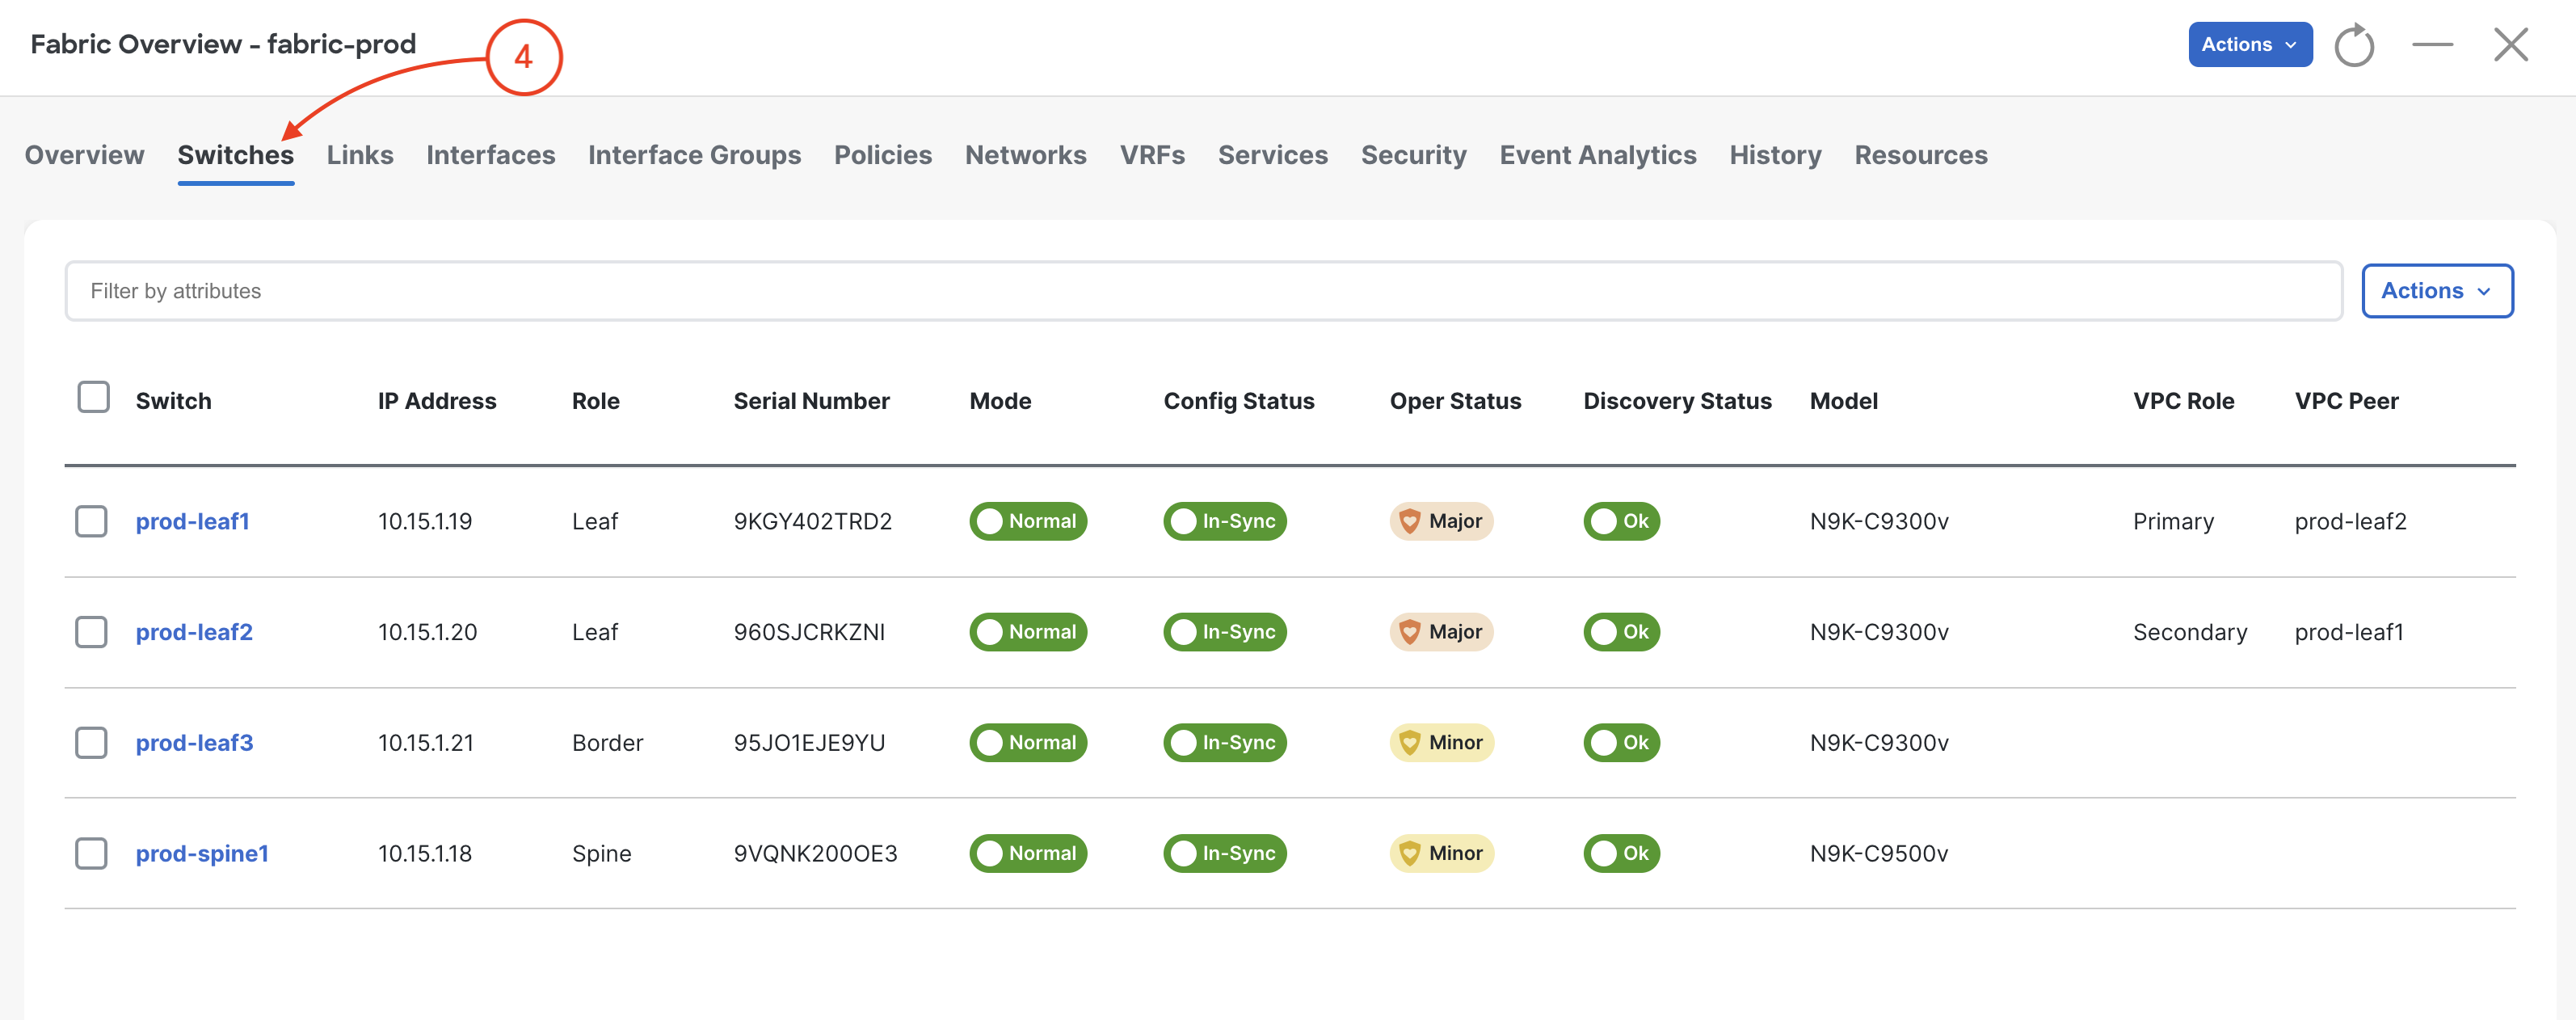
Click on Switches to view the switches added to your prod fabric and where the overlay configuration was configured
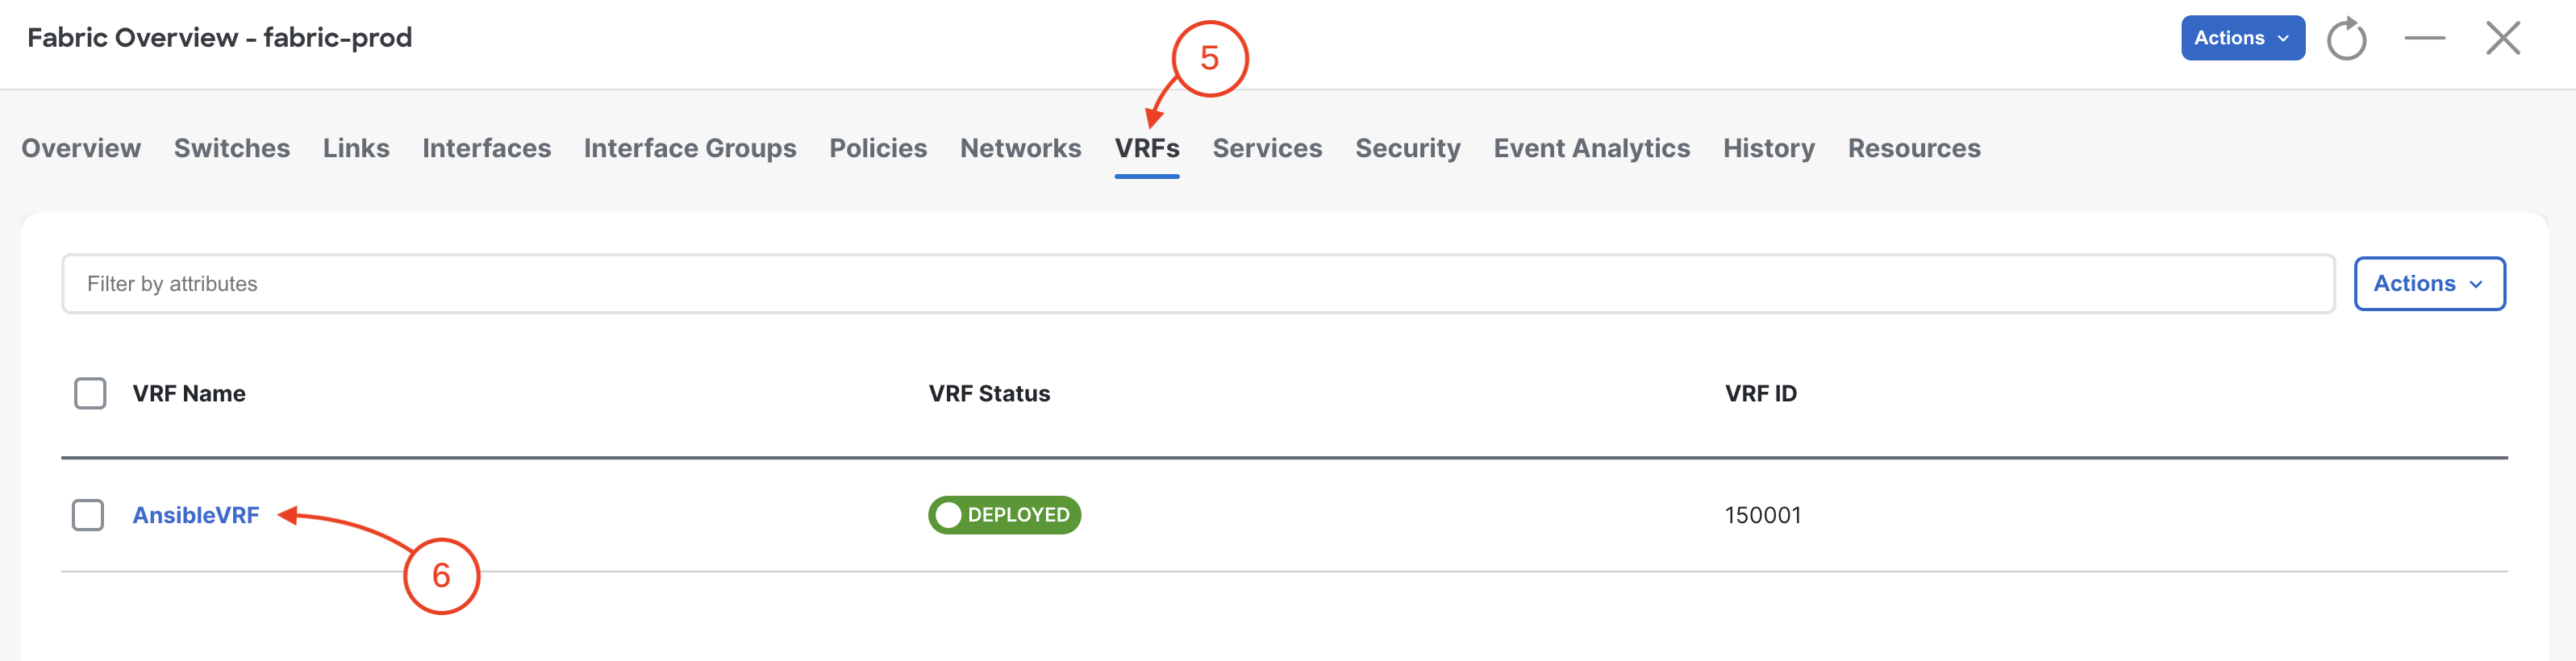
Click on VRFs to view the VRFs added to your prod fabric. As you can see, it is the identical configuration intent you tested with your staging fabric.
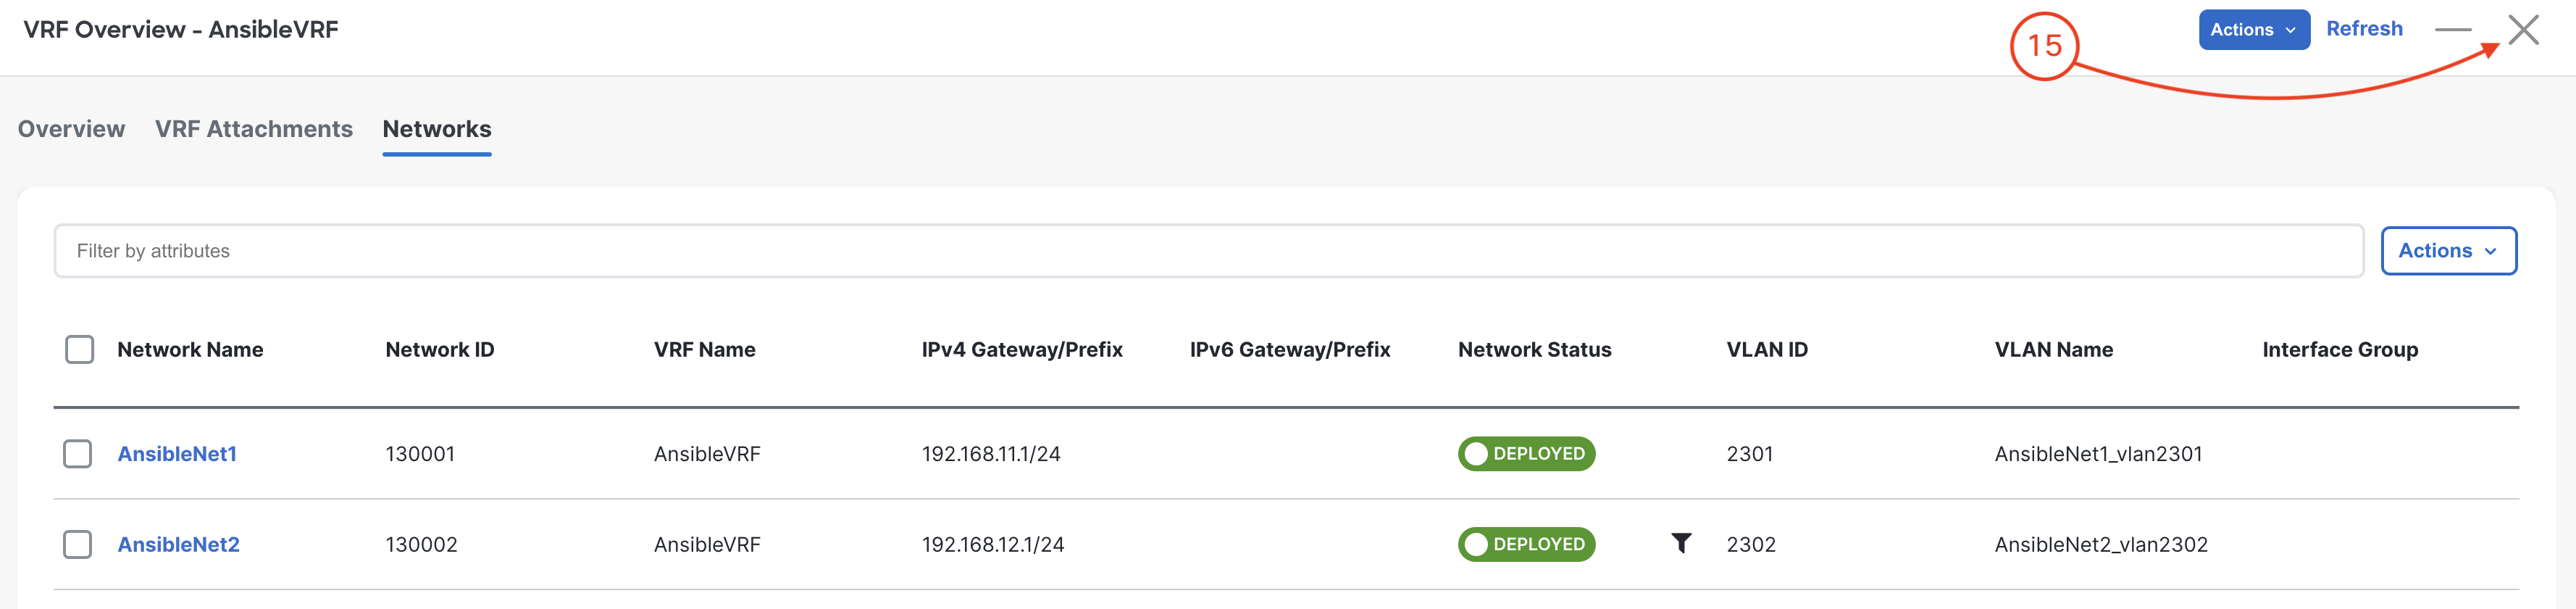
Double-click AnsibleVRF
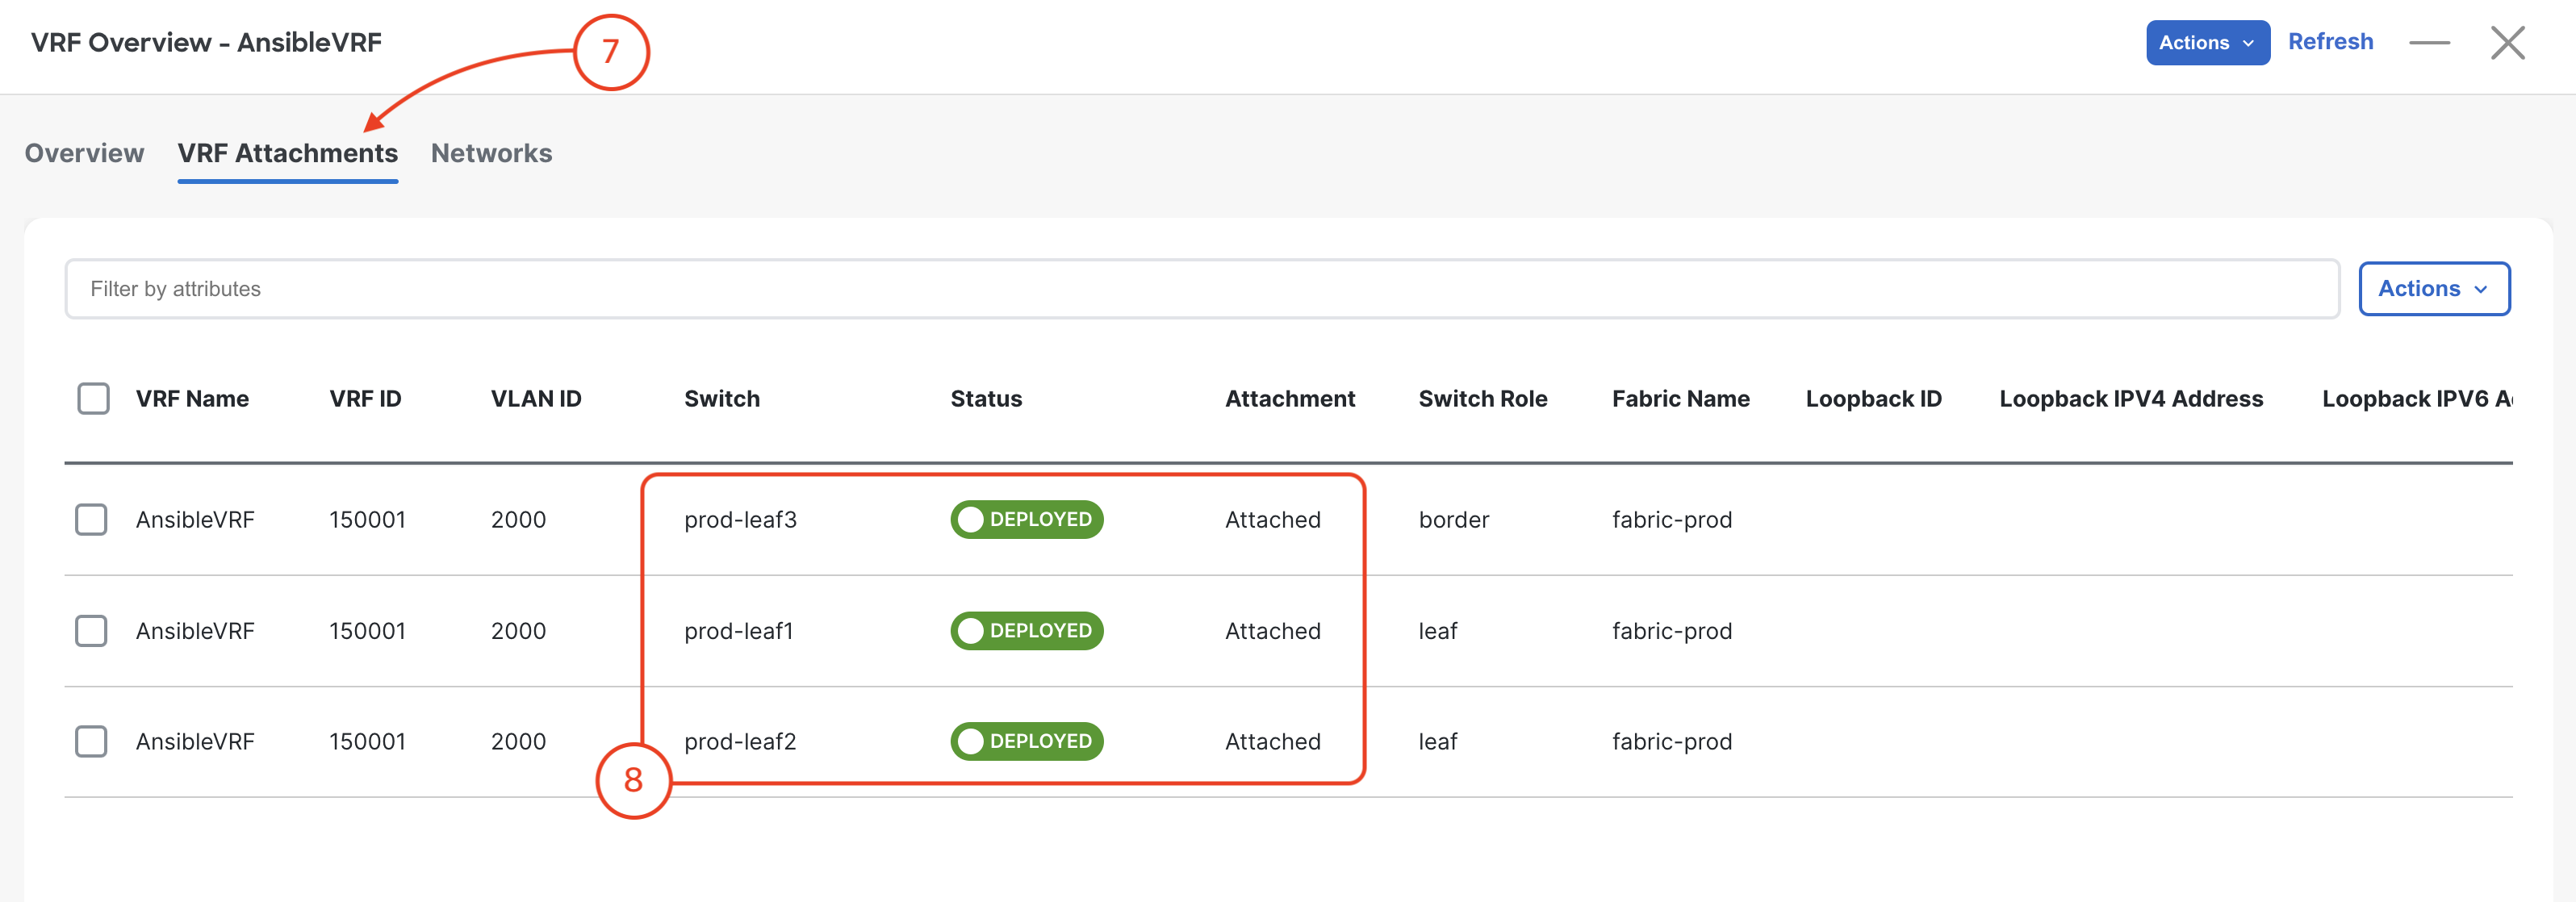
Click on VRF Attachments to view the VRF attached to your prod leaf switches.
Verify VRF deployment to your three switches
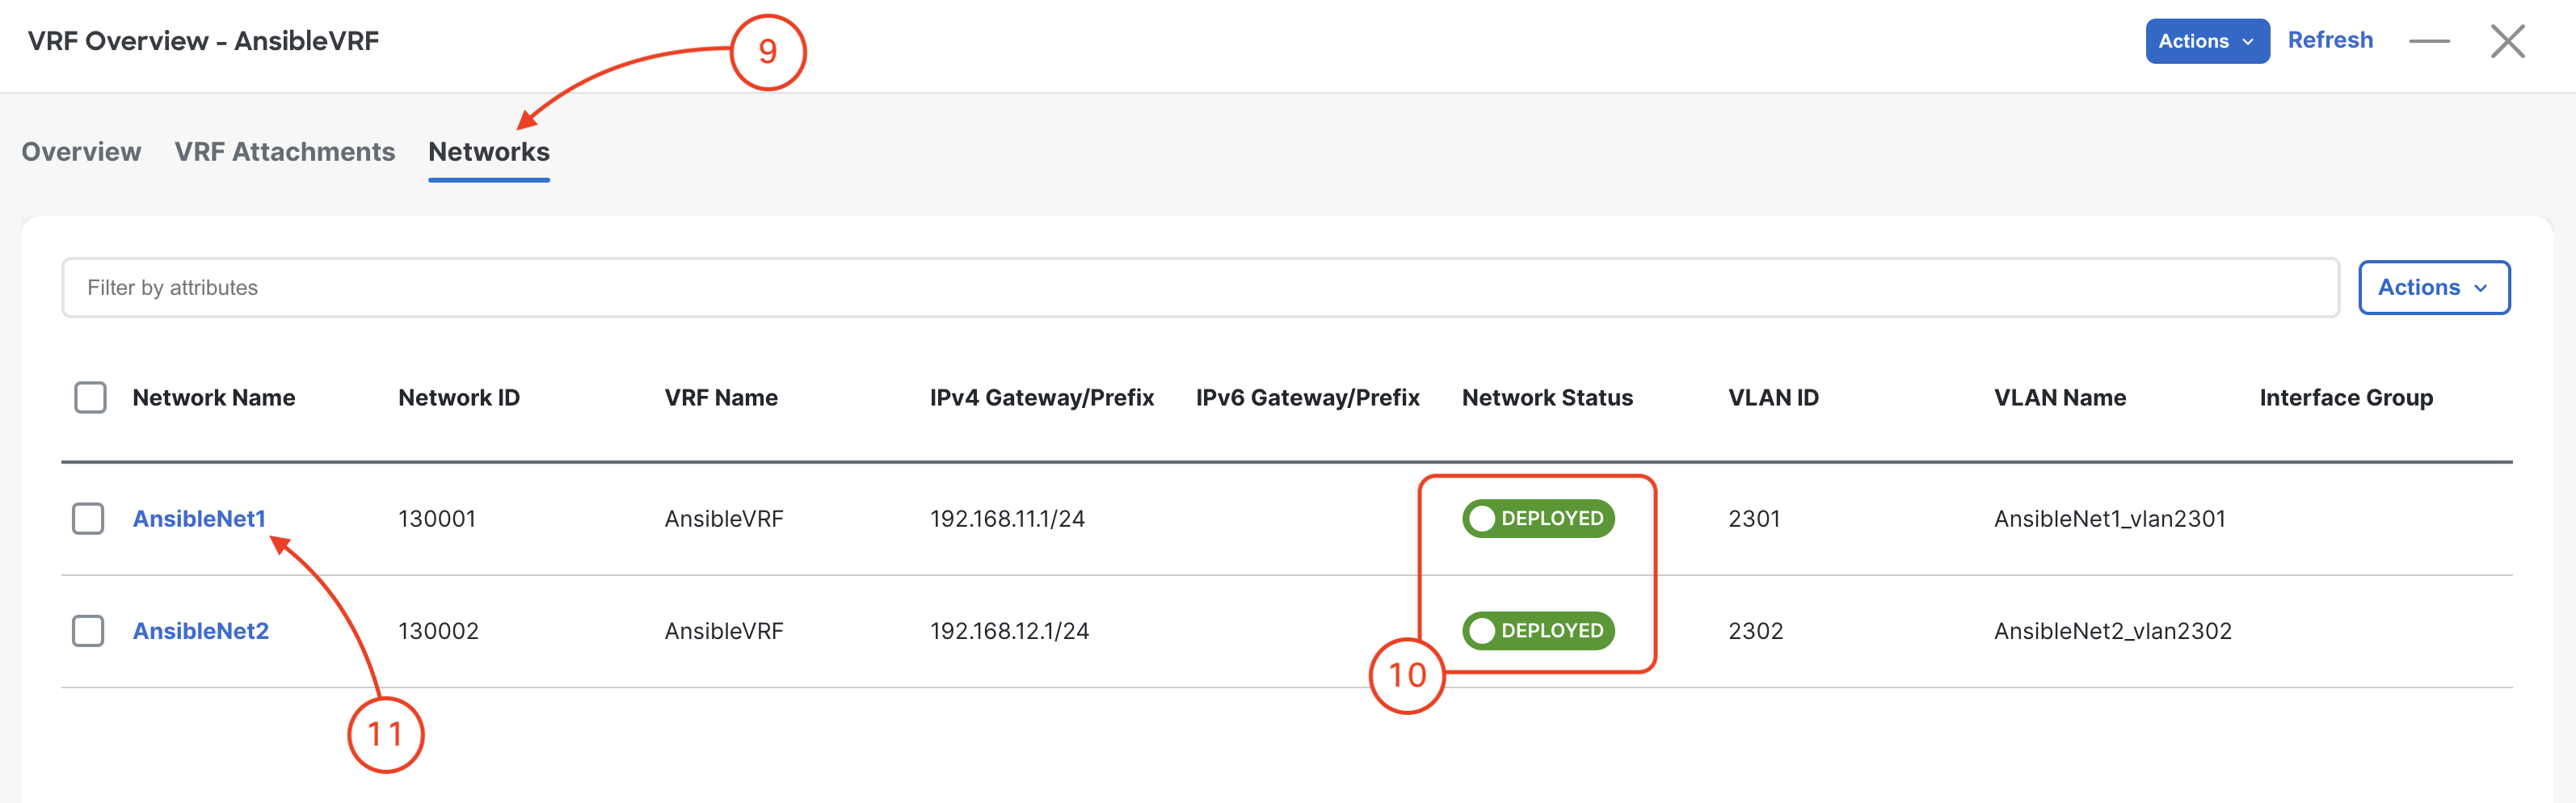
Click on Networks to view the Networks added to your prod fabric.
Verify the networks deployed to your swithces
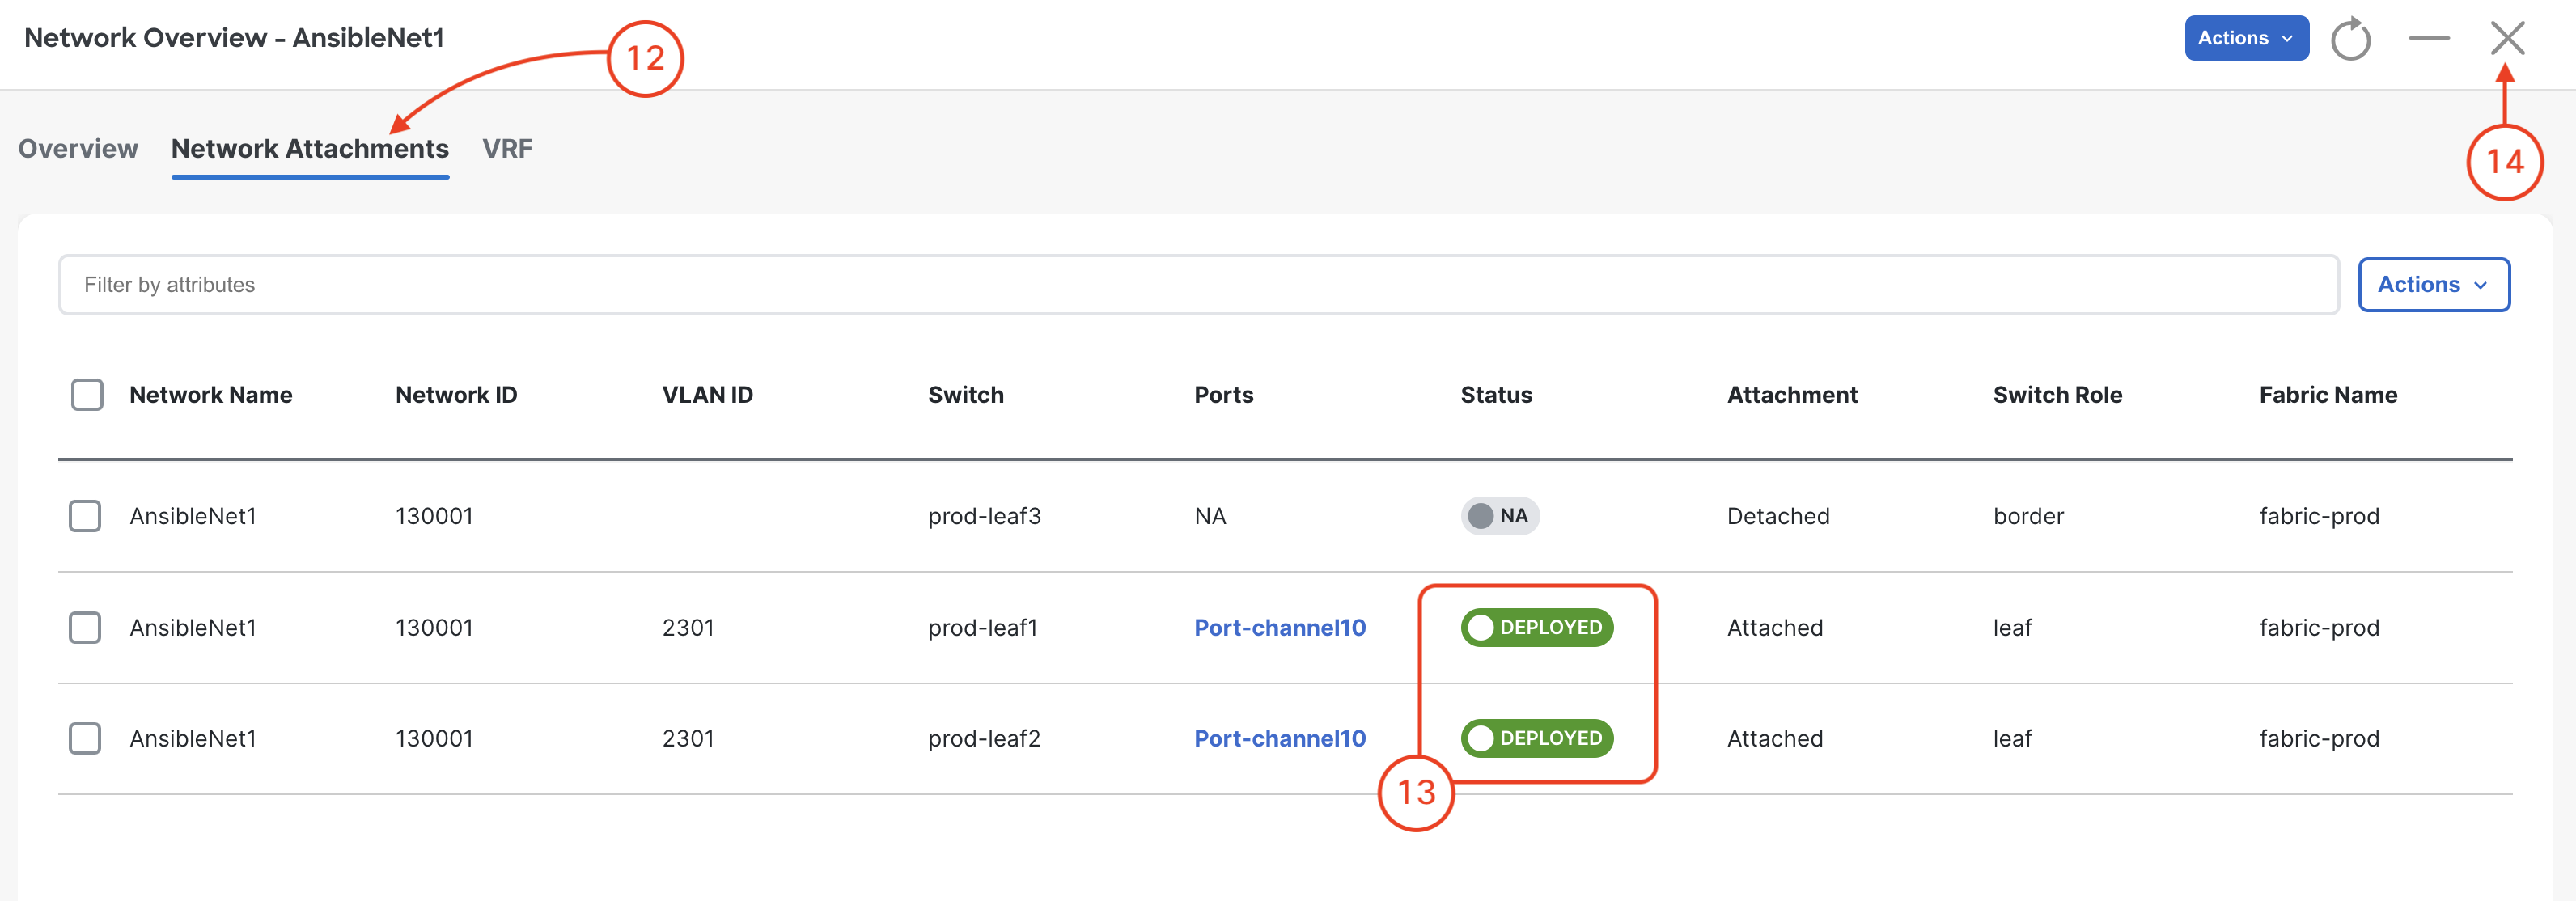
Double-click AnsibleNet1
Click on Network Attachments to view the Networks attached to your prod leaf switches.
Verify networks deployed to your leaf switches
Close your Network Overview
Close your VRF to return back to the main prod fabric