
In this final section for Ansible you are going to use your newly built pipeline to add two new Networks. This demonstrates how easy it is to make changes to your Network stored in GitLab as code and validate those changes against your staging fabric before pushing the changes to your production fabric.
Since you have a central variable file for all of your VRFs and Networks, all you need to do is modify the file to add the new data. Normally you would open this file and add the new Networks but to make it easy we are going to replace the file you created ealier with the new Networks added in.
touch ~/workspace/ndfclab/ansible/group_vars/all/overlay.yml
cat << EOF > ~/workspace/ndfclab/ansible/group_vars/all/overlay.yml
---
vrfs:
  - vrf_name: &refvrf_ansible AnsibleVRF
    vrf_id: 150001
    vlan_id: 2000
    attach: []
    attach_group: all_leaf
networks:
  - net_name: AnsibleNet1
    vrf_name: *refvrf_ansible
    net_id: 130001
    vlan_id: 2301
    vlan_name: AnsibleNet1_vlan2301
    gw_ip_subnet: "192.168.11.1/24"
    attach: []
    attach_group: esxi
  - net_name: AnsibleNet2
    vrf_name: *refvrf_ansible
    net_id: 130002
    vlan_id: 2302
    vlan_name: AnsibleNet2_vlan2302
    gw_ip_subnet: "192.168.12.1/24"
    attach_group: esxi
# -------------------------------------
# New Networks Added Below
# -------------------------------------
  - net_name: GitLabNet1
    vrf_name: *refvrf_ansible
    net_id: 130003
    vlan_id: 2303
    vlan_name: GitLabNet1_vlan2303
    gw_ip_subnet: "192.168.13.1/24"
    attach: []
    attach_group: esxi
  - net_name: GitLabNet2
    vrf_name: *refvrf_ansible
    net_id: 130004
    vlan_id: 2304
    vlan_name: GitLabNet2_vlan2304
    gw_ip_subnet: "192.168.14.1/24"
    attach_group: esxi
EOF
overlay.yml for Committing to the GitLab Repo
git add .
git status .
The following file is staged for commit. Make sure your list matches the output below!
    On branch stage
    Your branch is up to date with 'origin/stage'.

    Changes to be committed:
      (use "git restore --staged ..." to unstage)
            modified:   group_vars/all/overlay.yml
git commit -m "Add new Networks Overlay"
stage Branch
git push -u origin stage
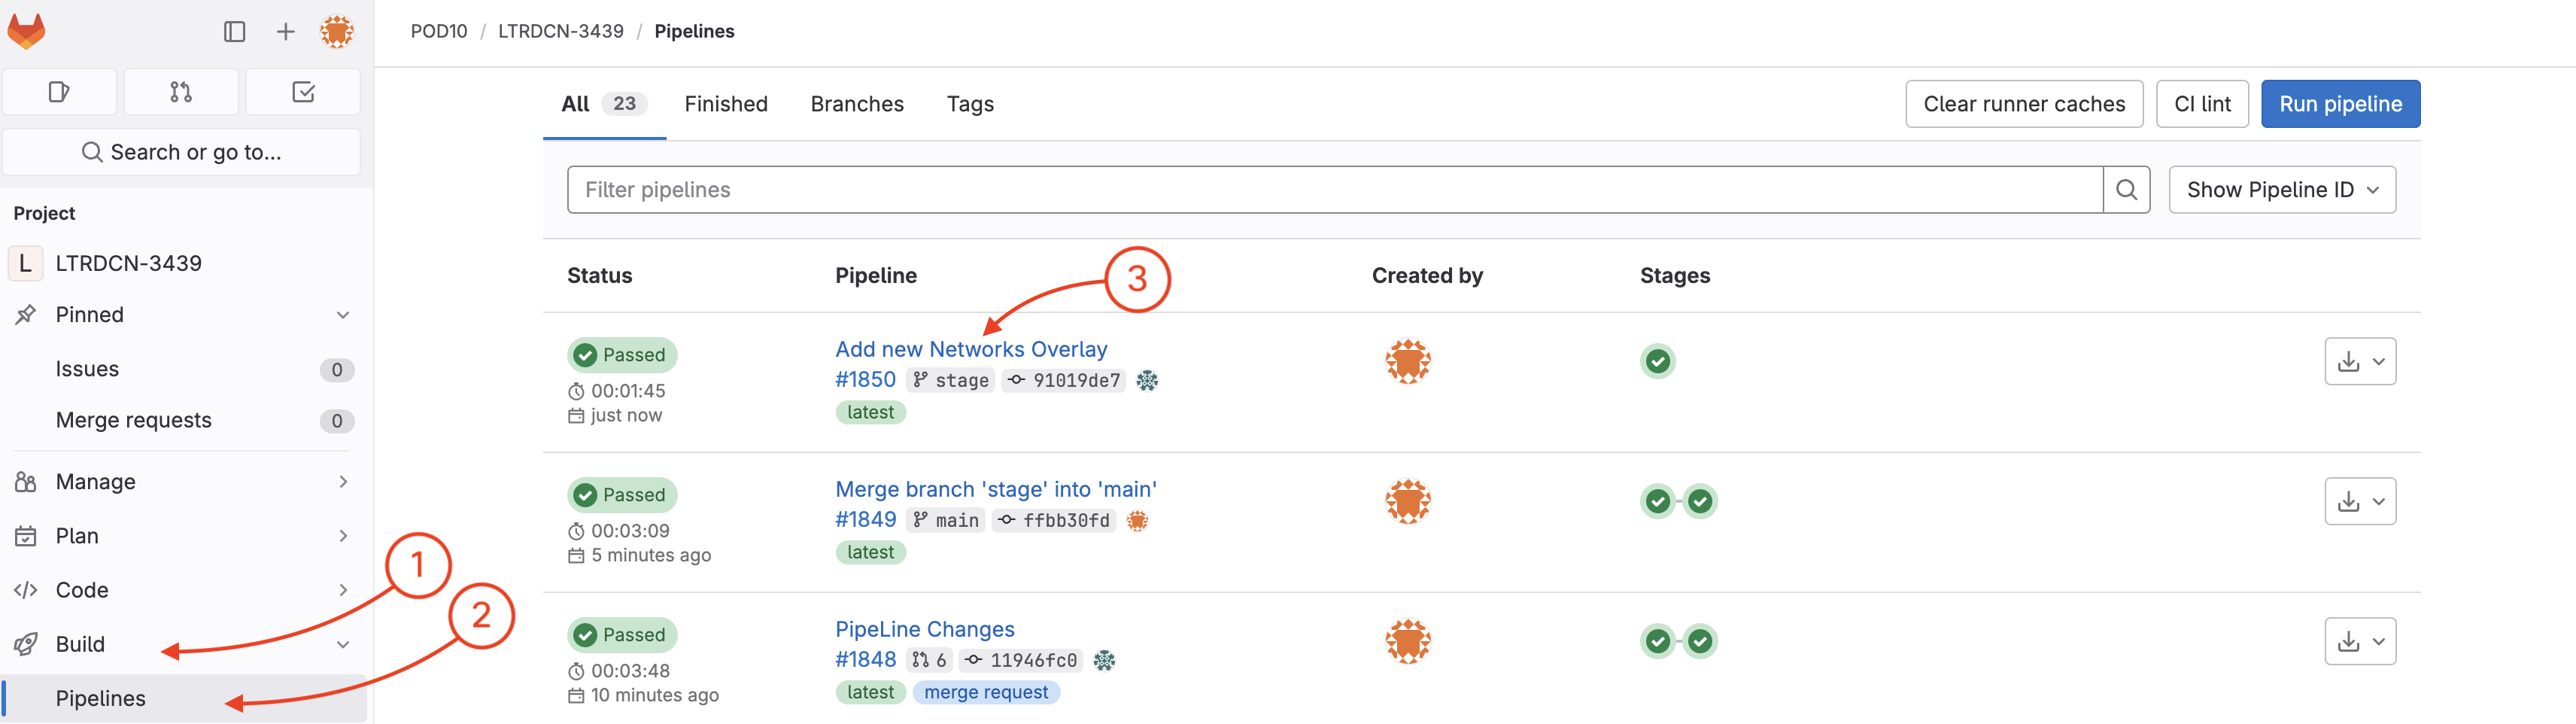
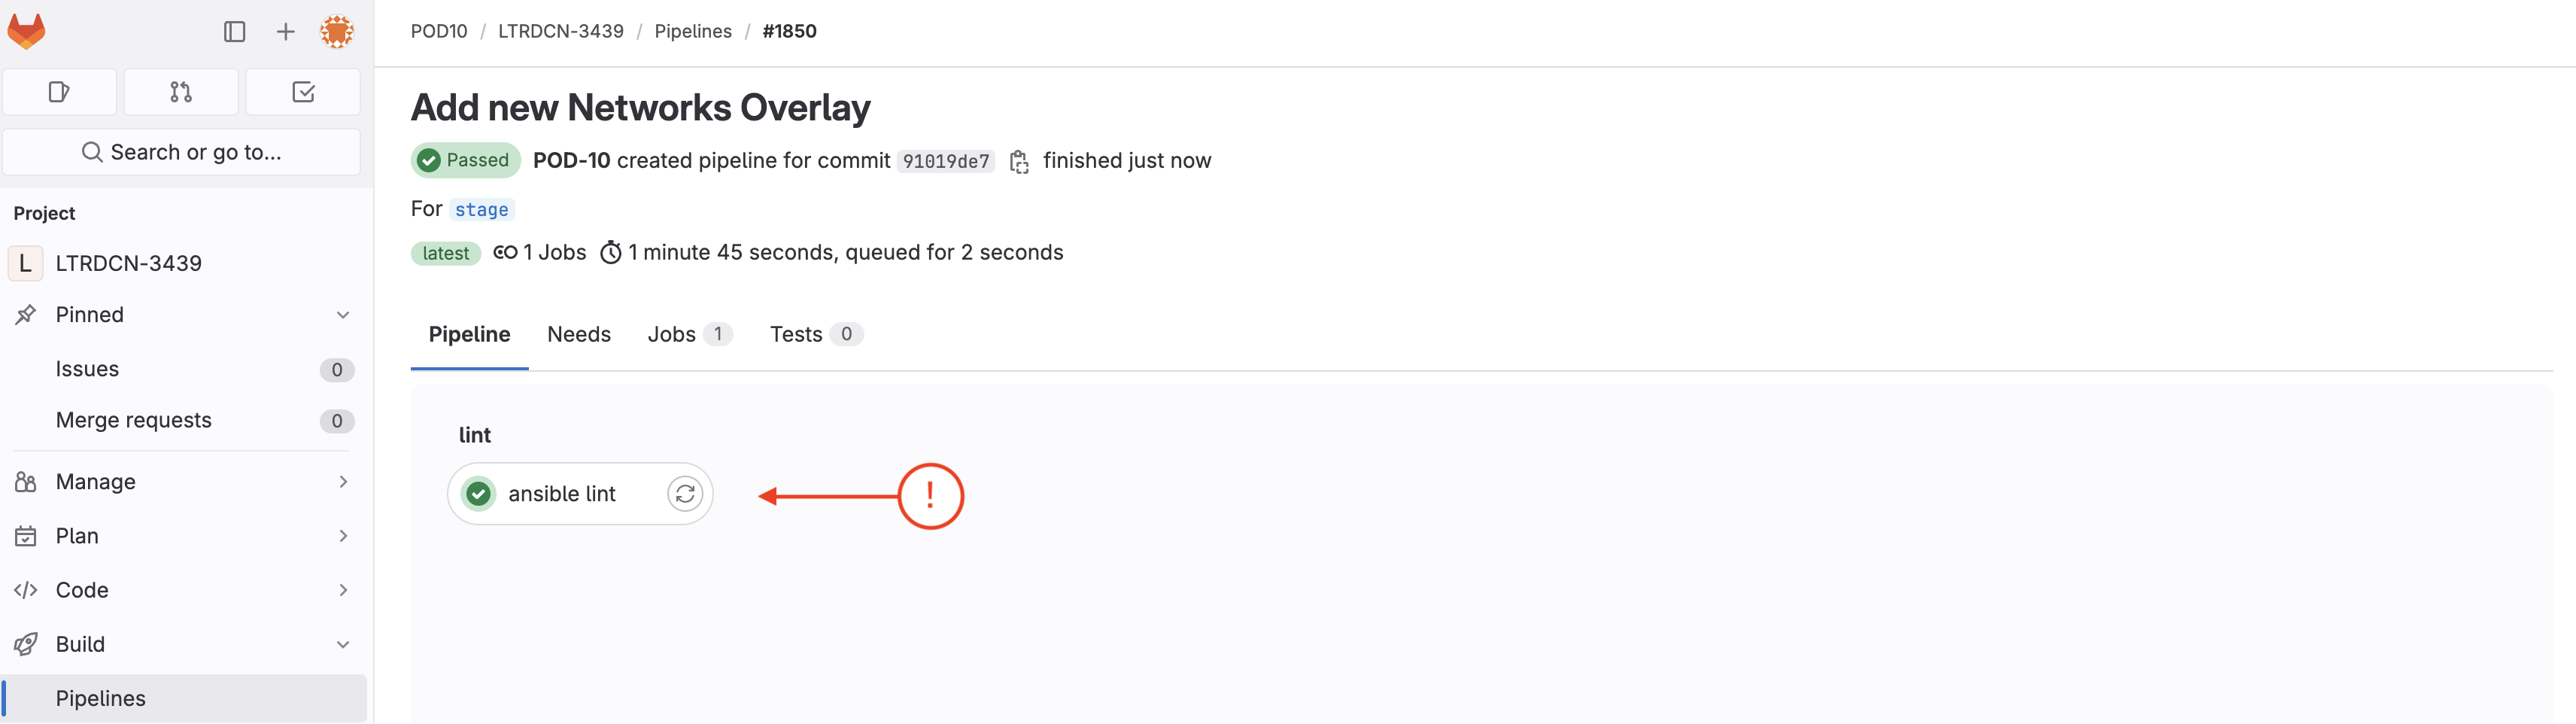
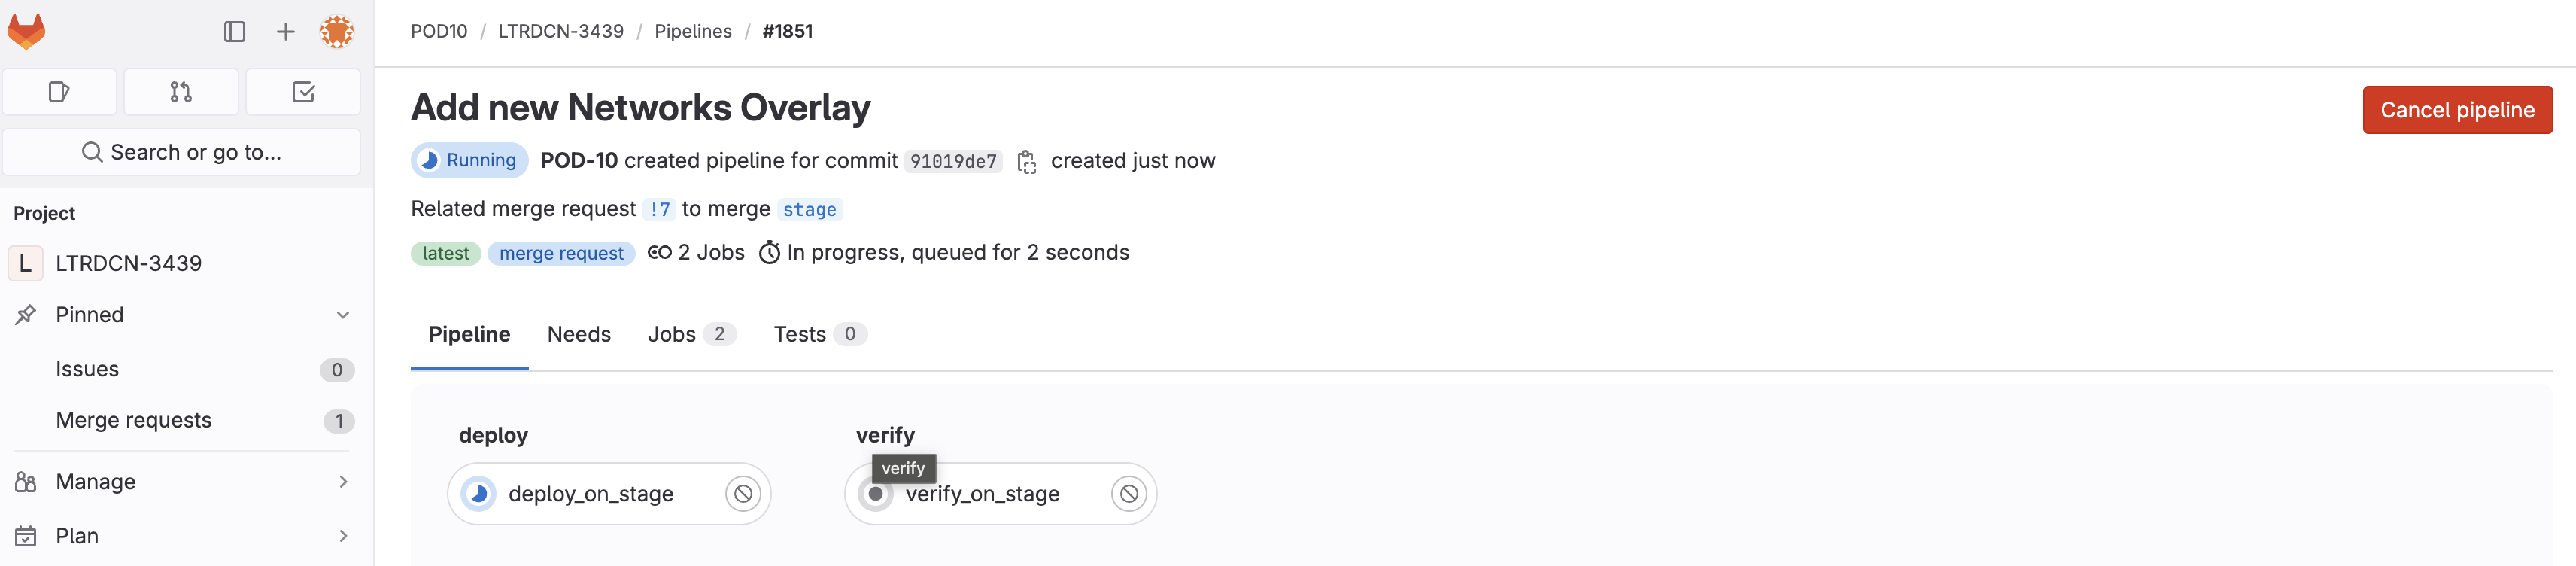
As soon as the code was committed to the stage branch, Ansible Lint validation was triggered. Return to your GitLab and navigate to Pipelines:

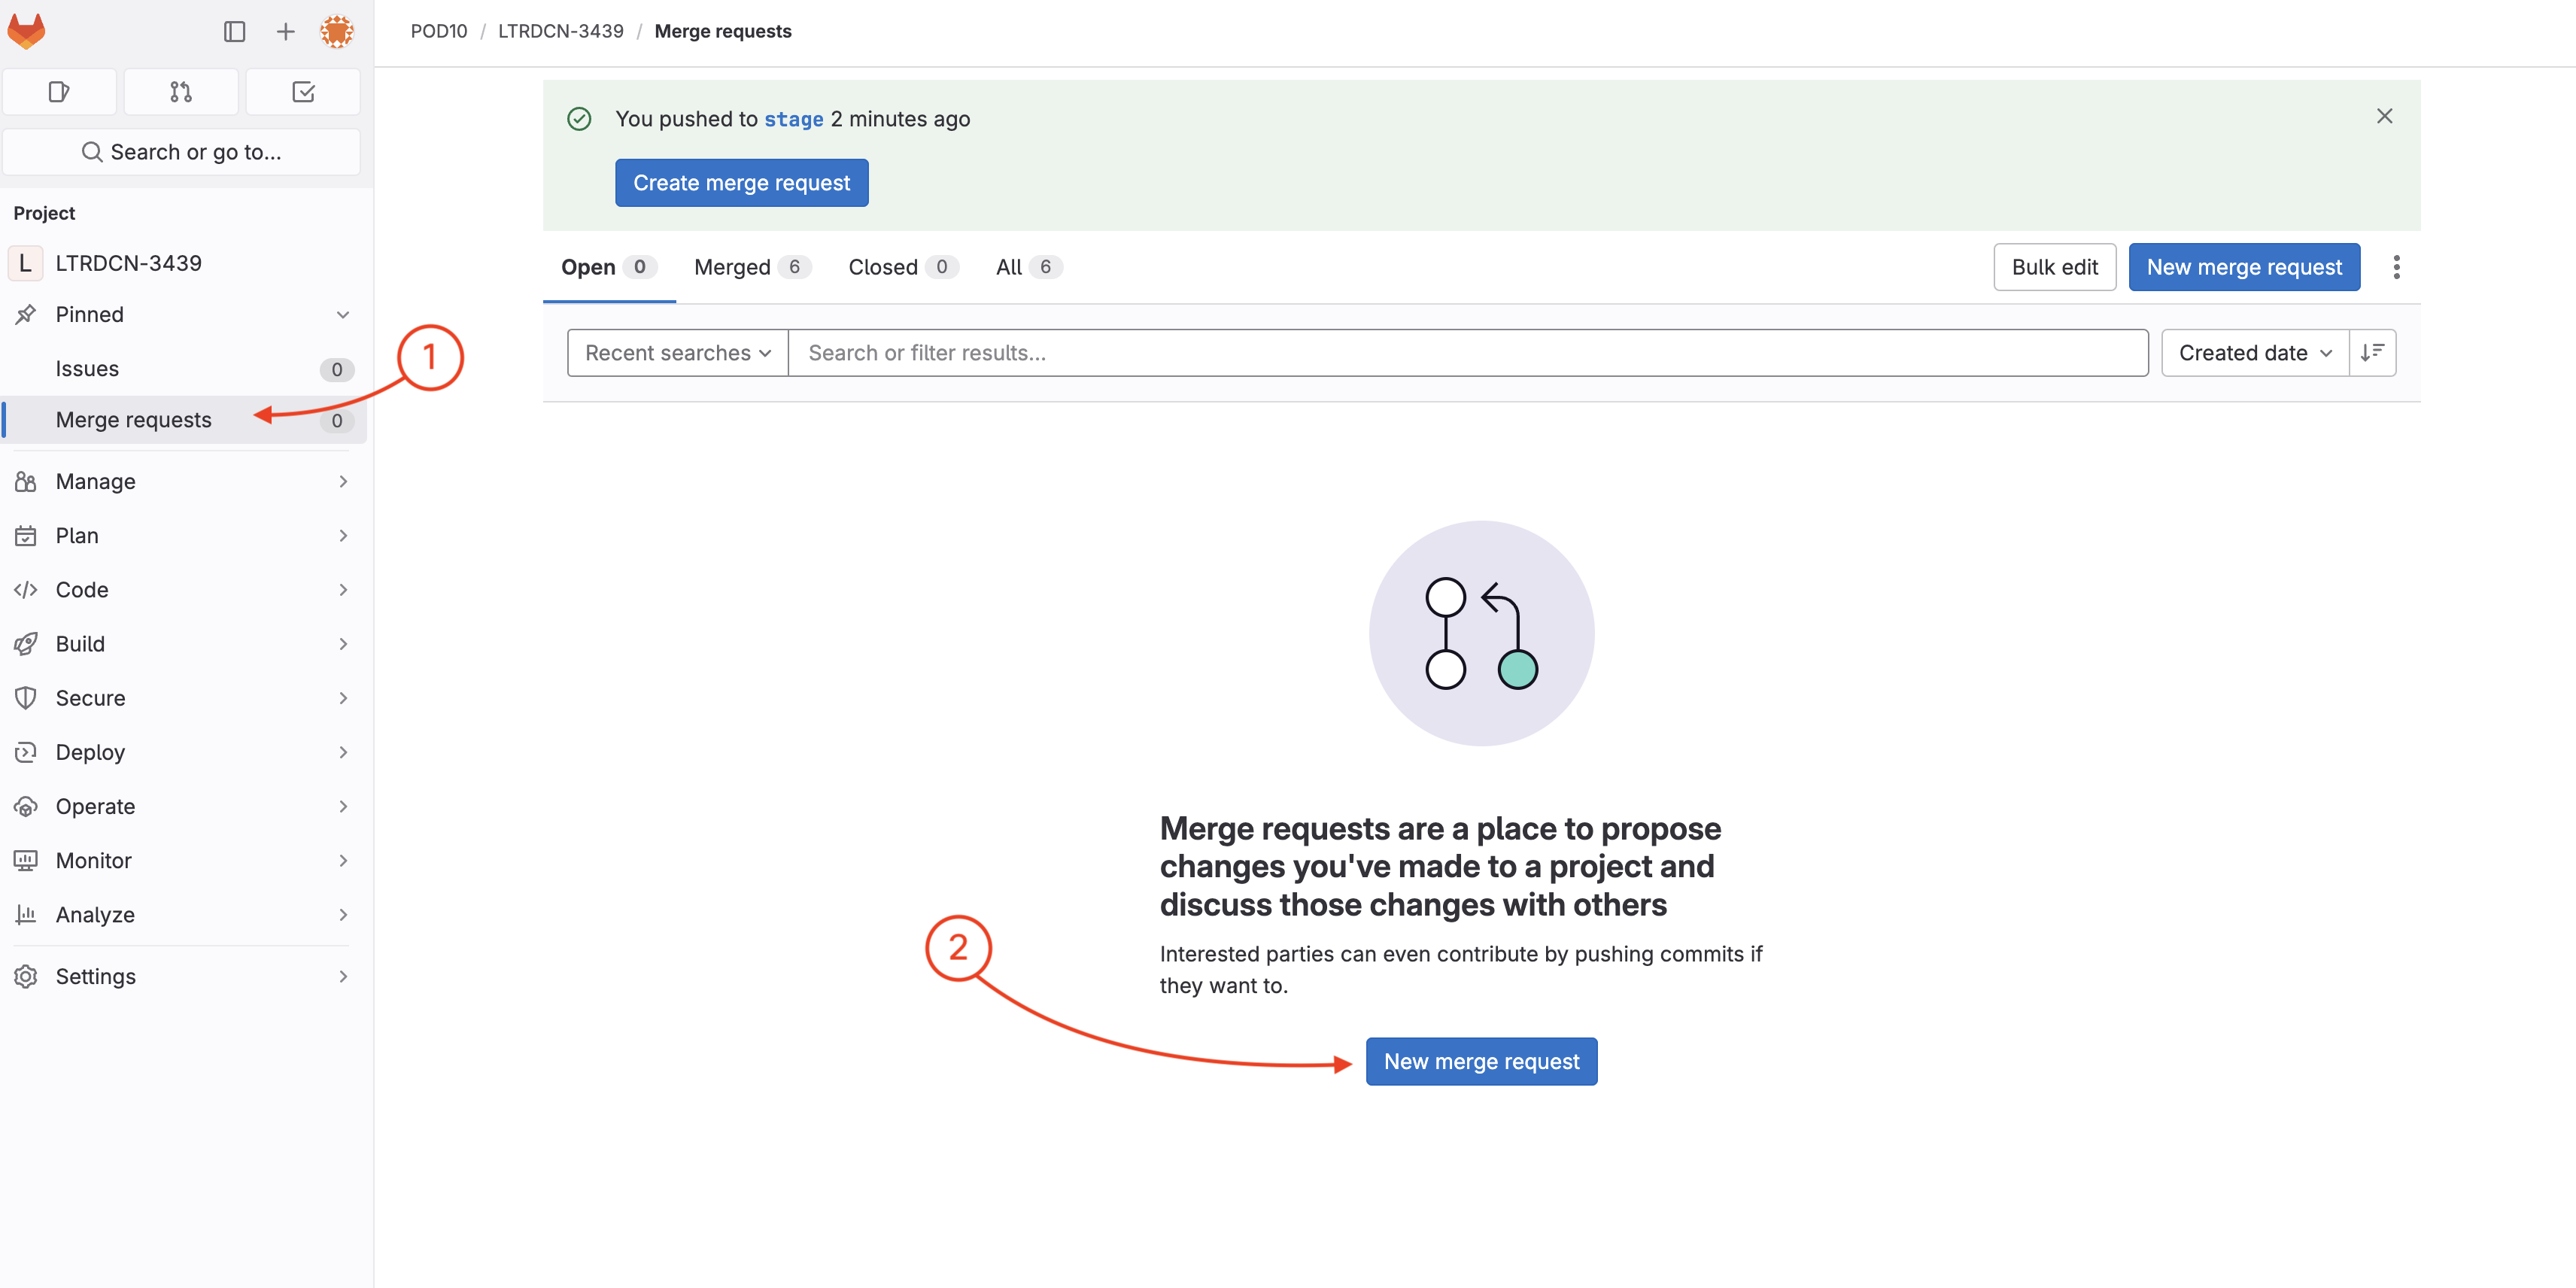
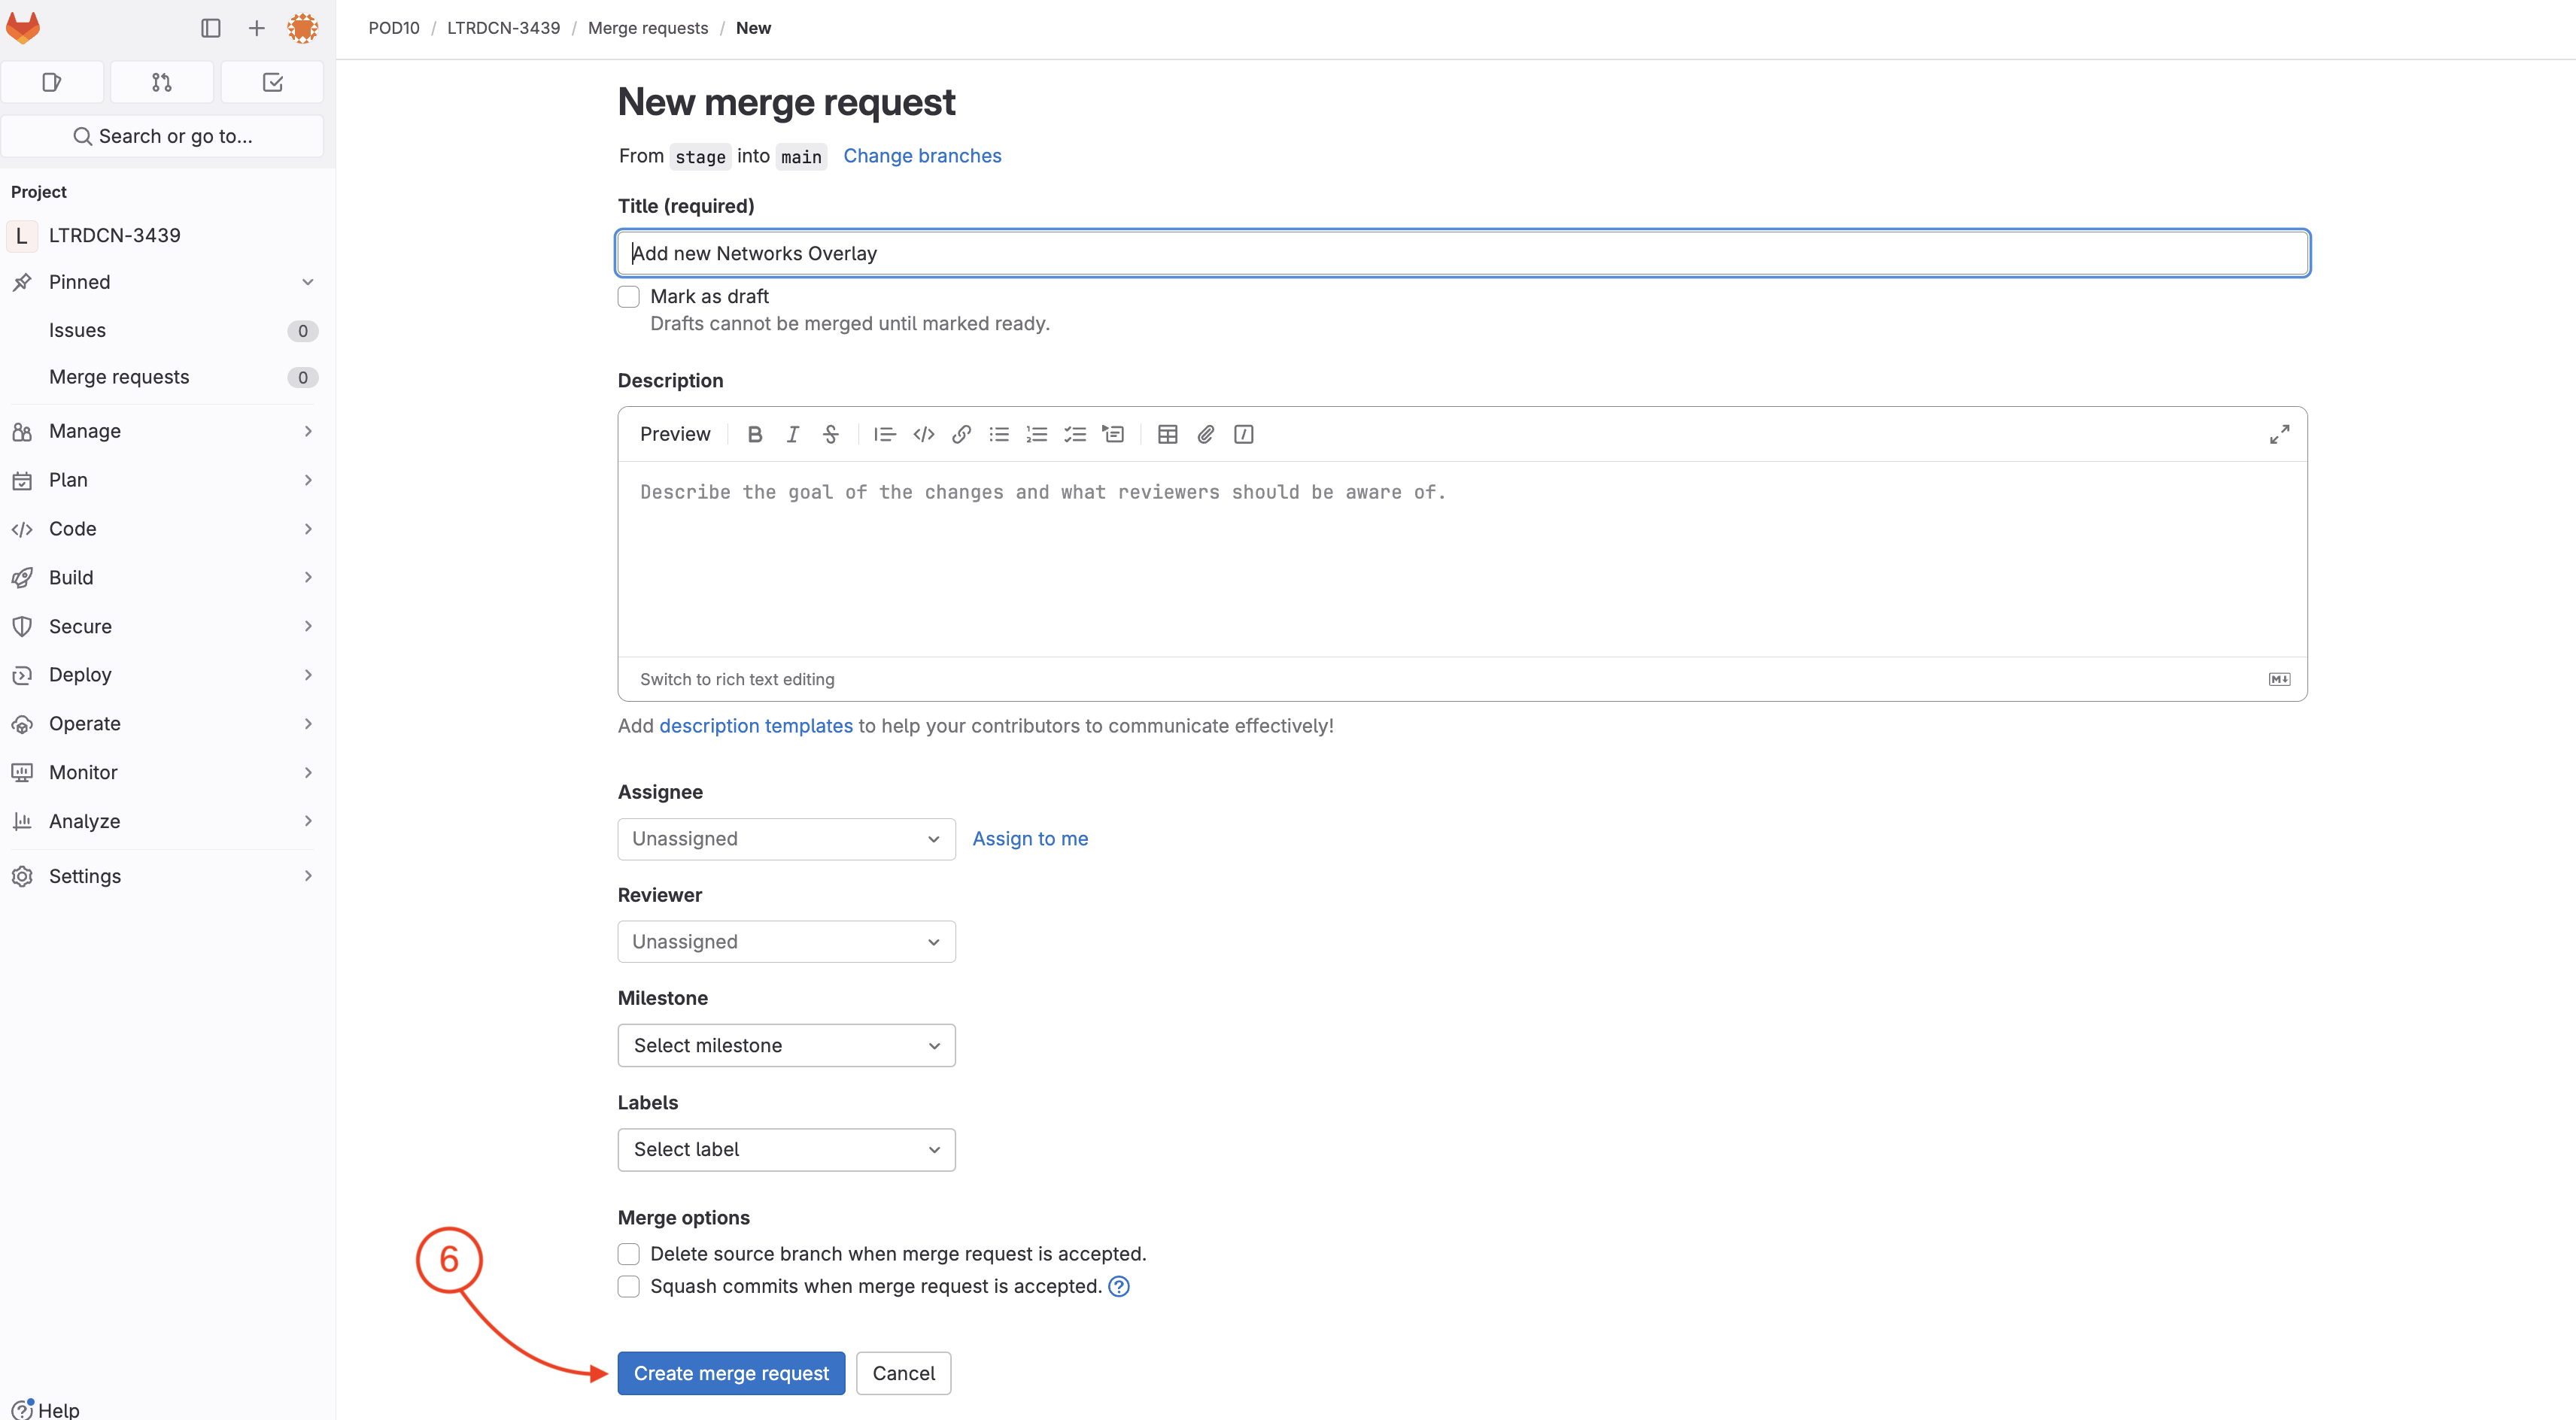
Now you need to create a merge request to verify/test the new Networks configuration against the NDFC staging environment fabric.


Wait until your pipeline completes against staging. In the mean time, feel free to checkout what is going on in your NDFC instance by following the next step.
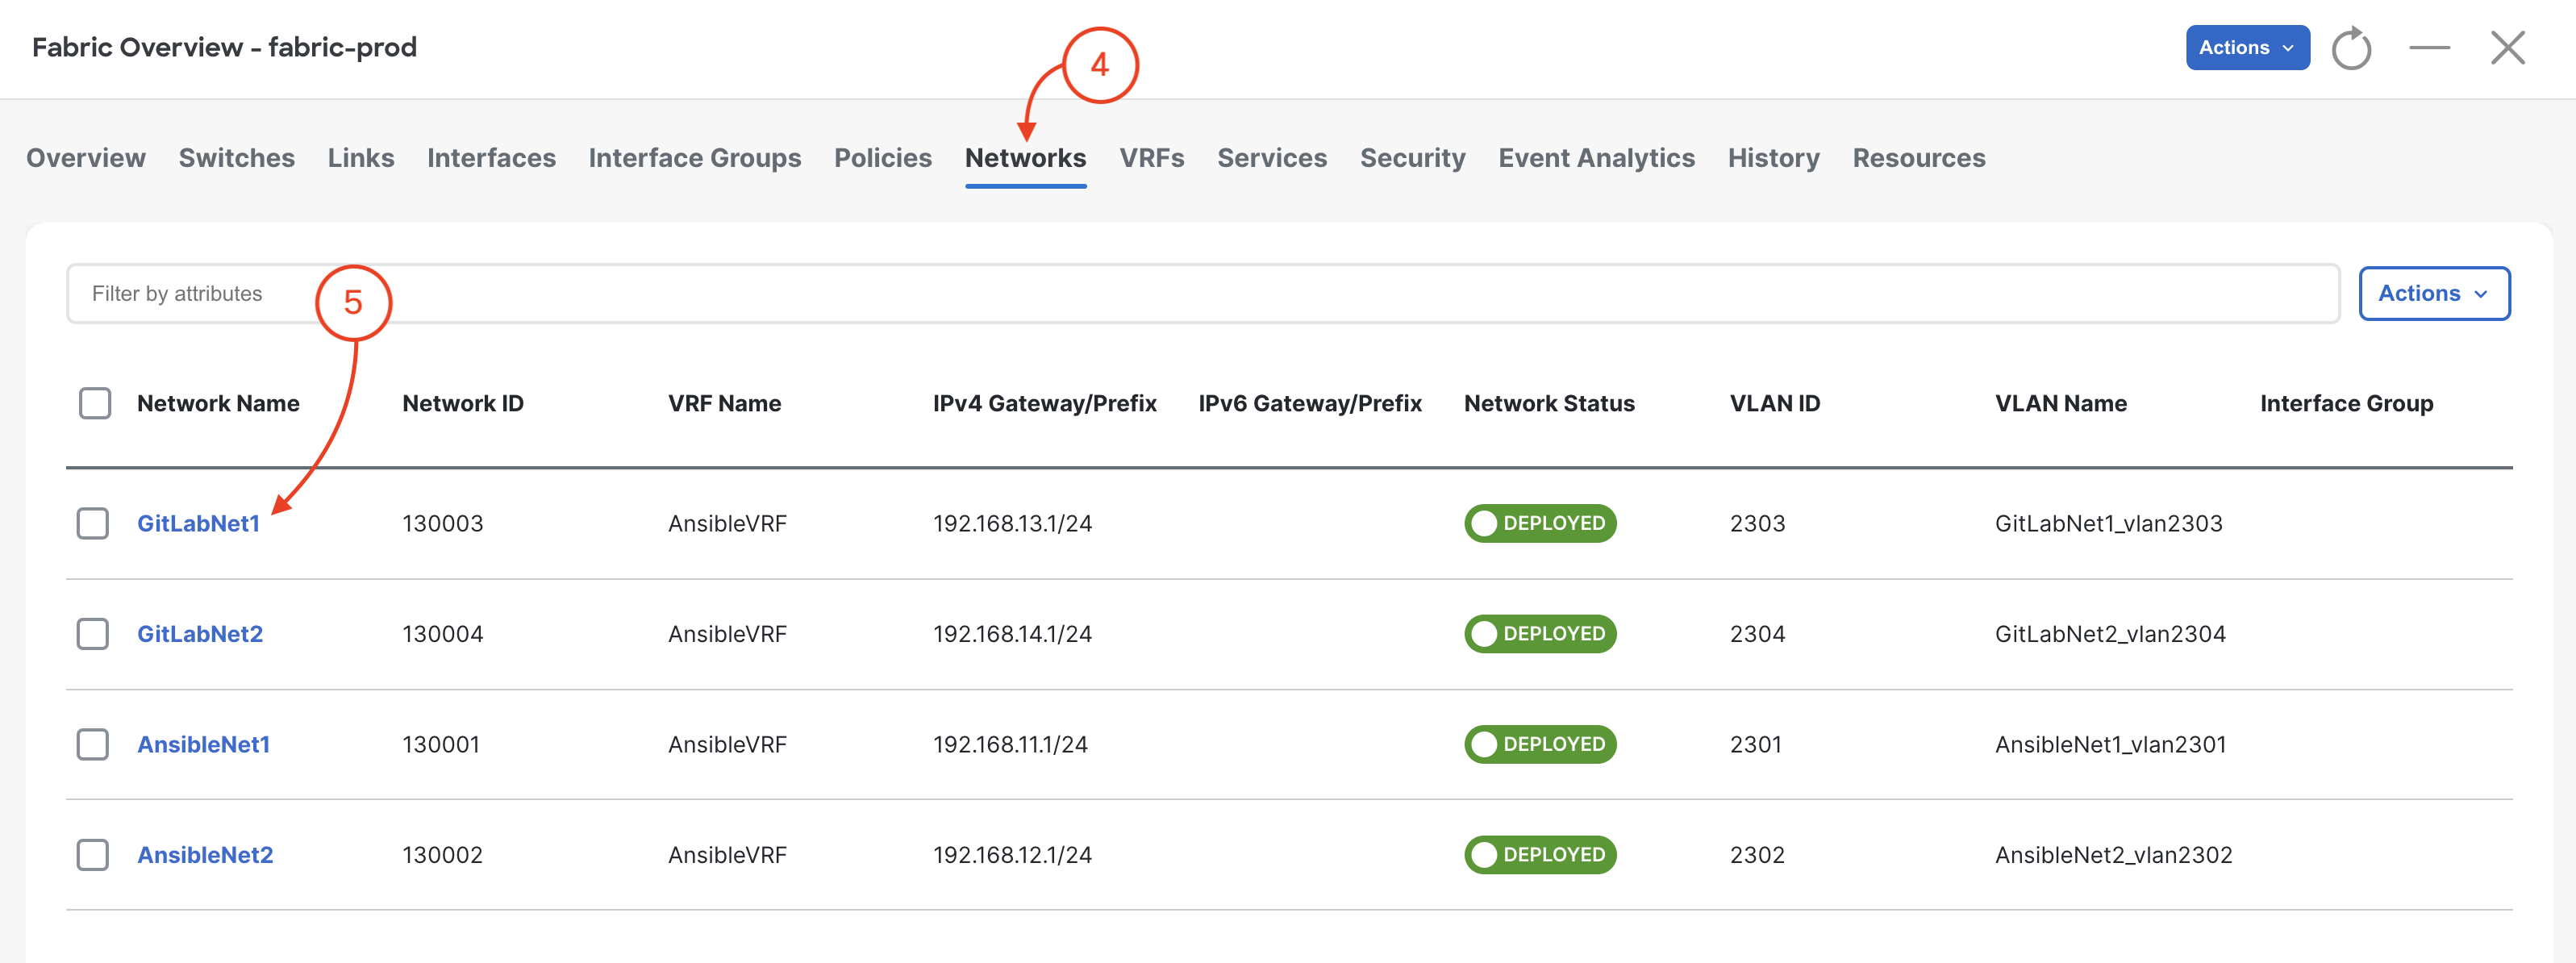
Staging FabricIn your browser, navigate back to your NDFC instance.

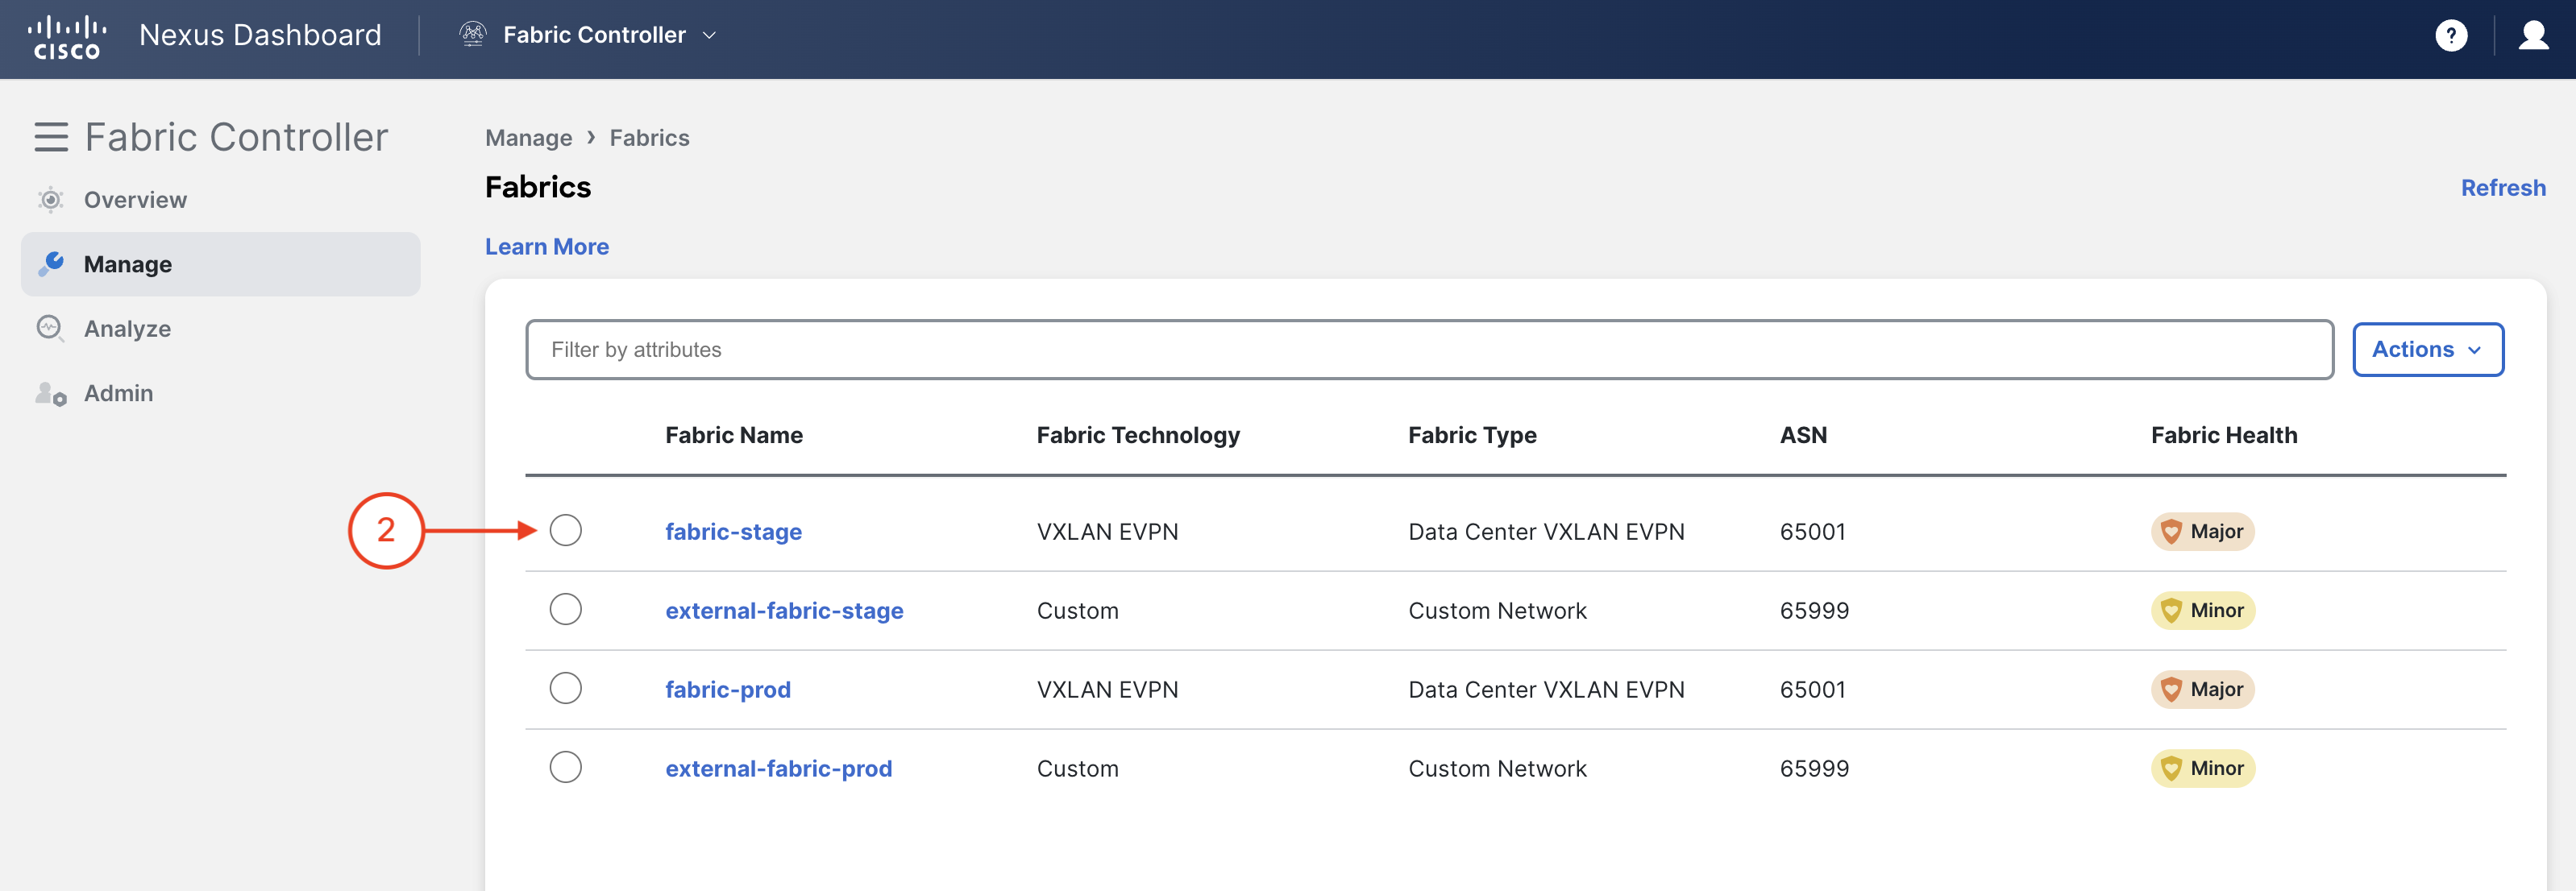
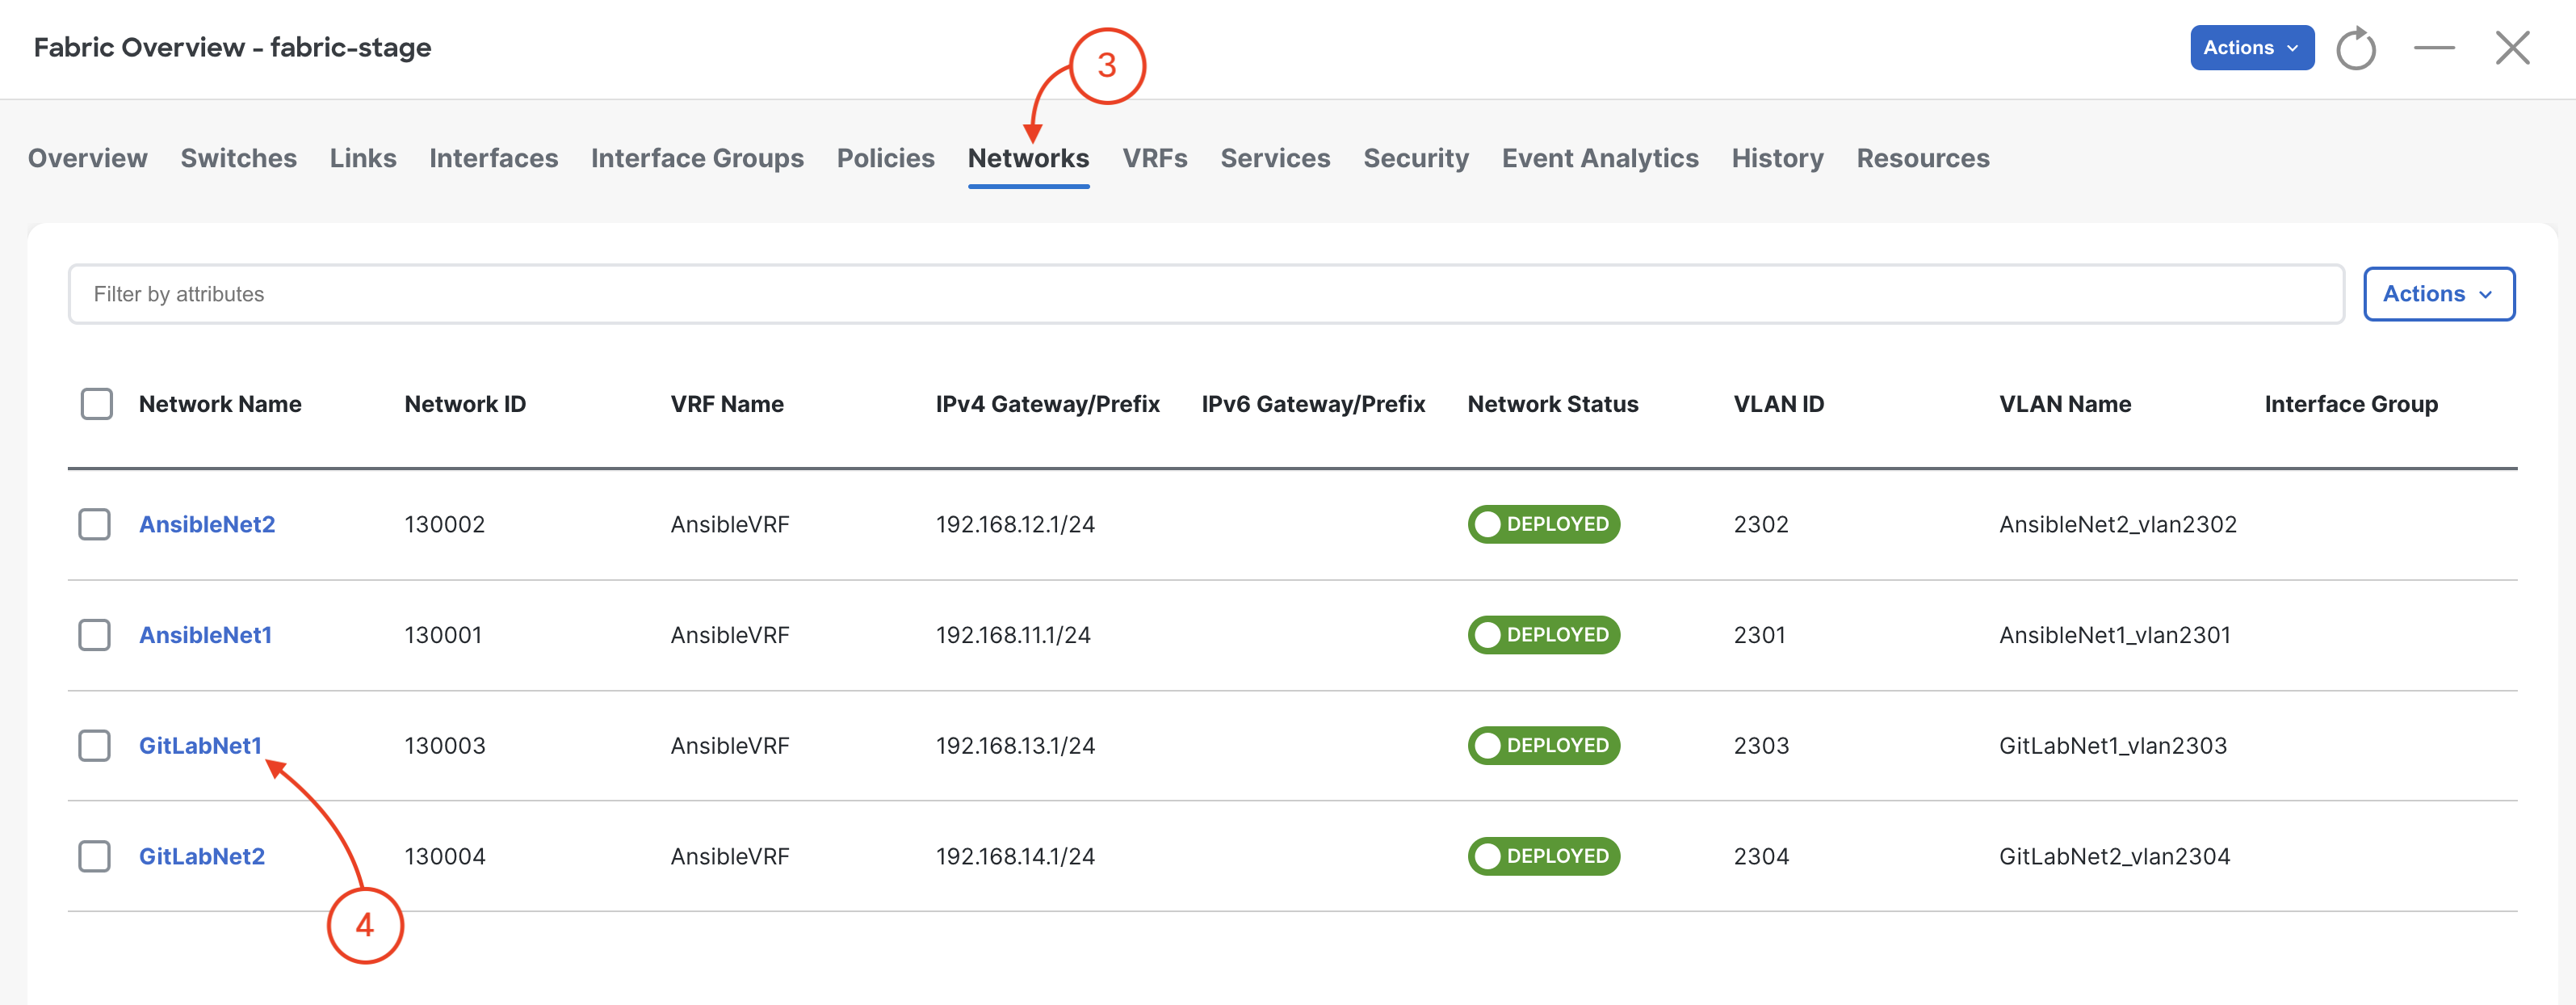
You may need to wait for the pipeline for some of the Networks to show up in the NDFC GUI.
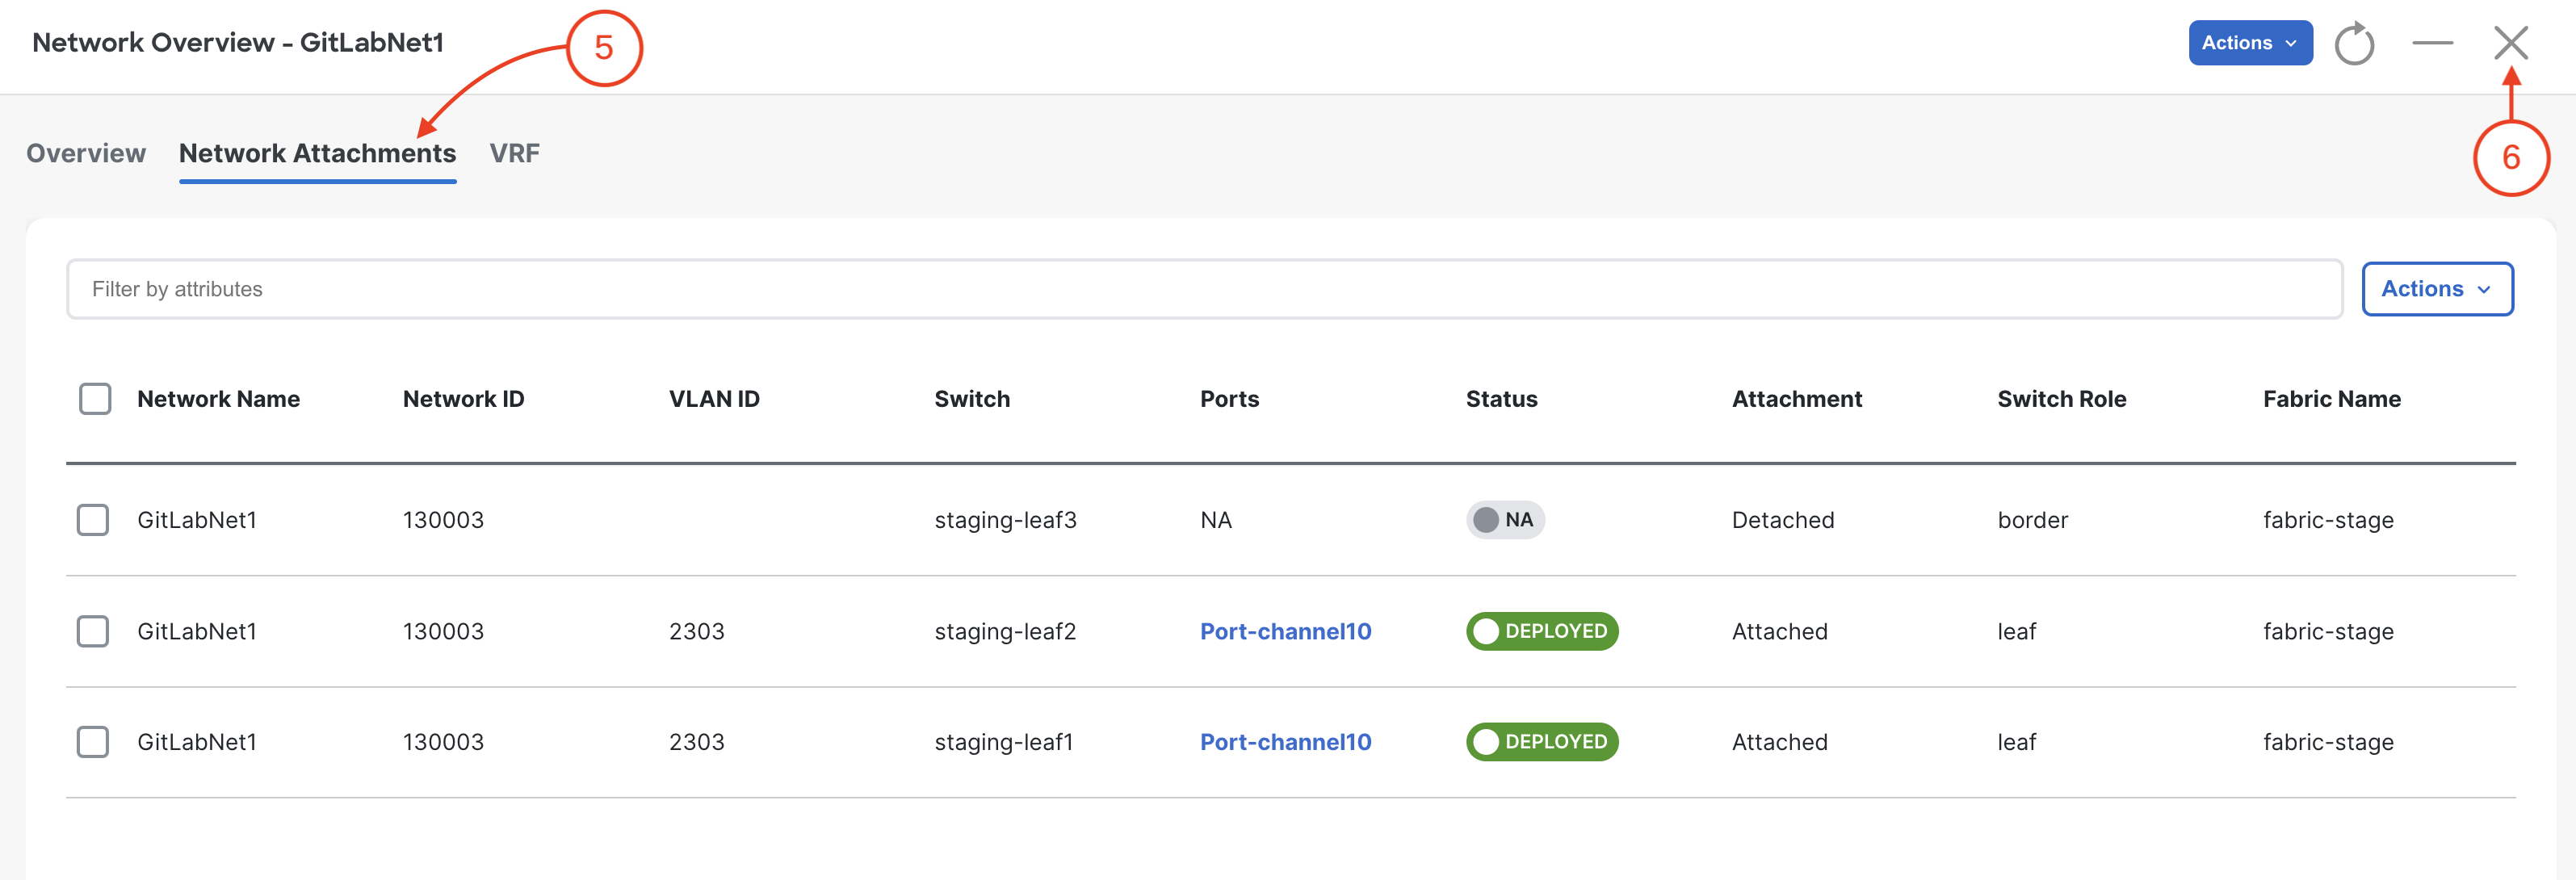
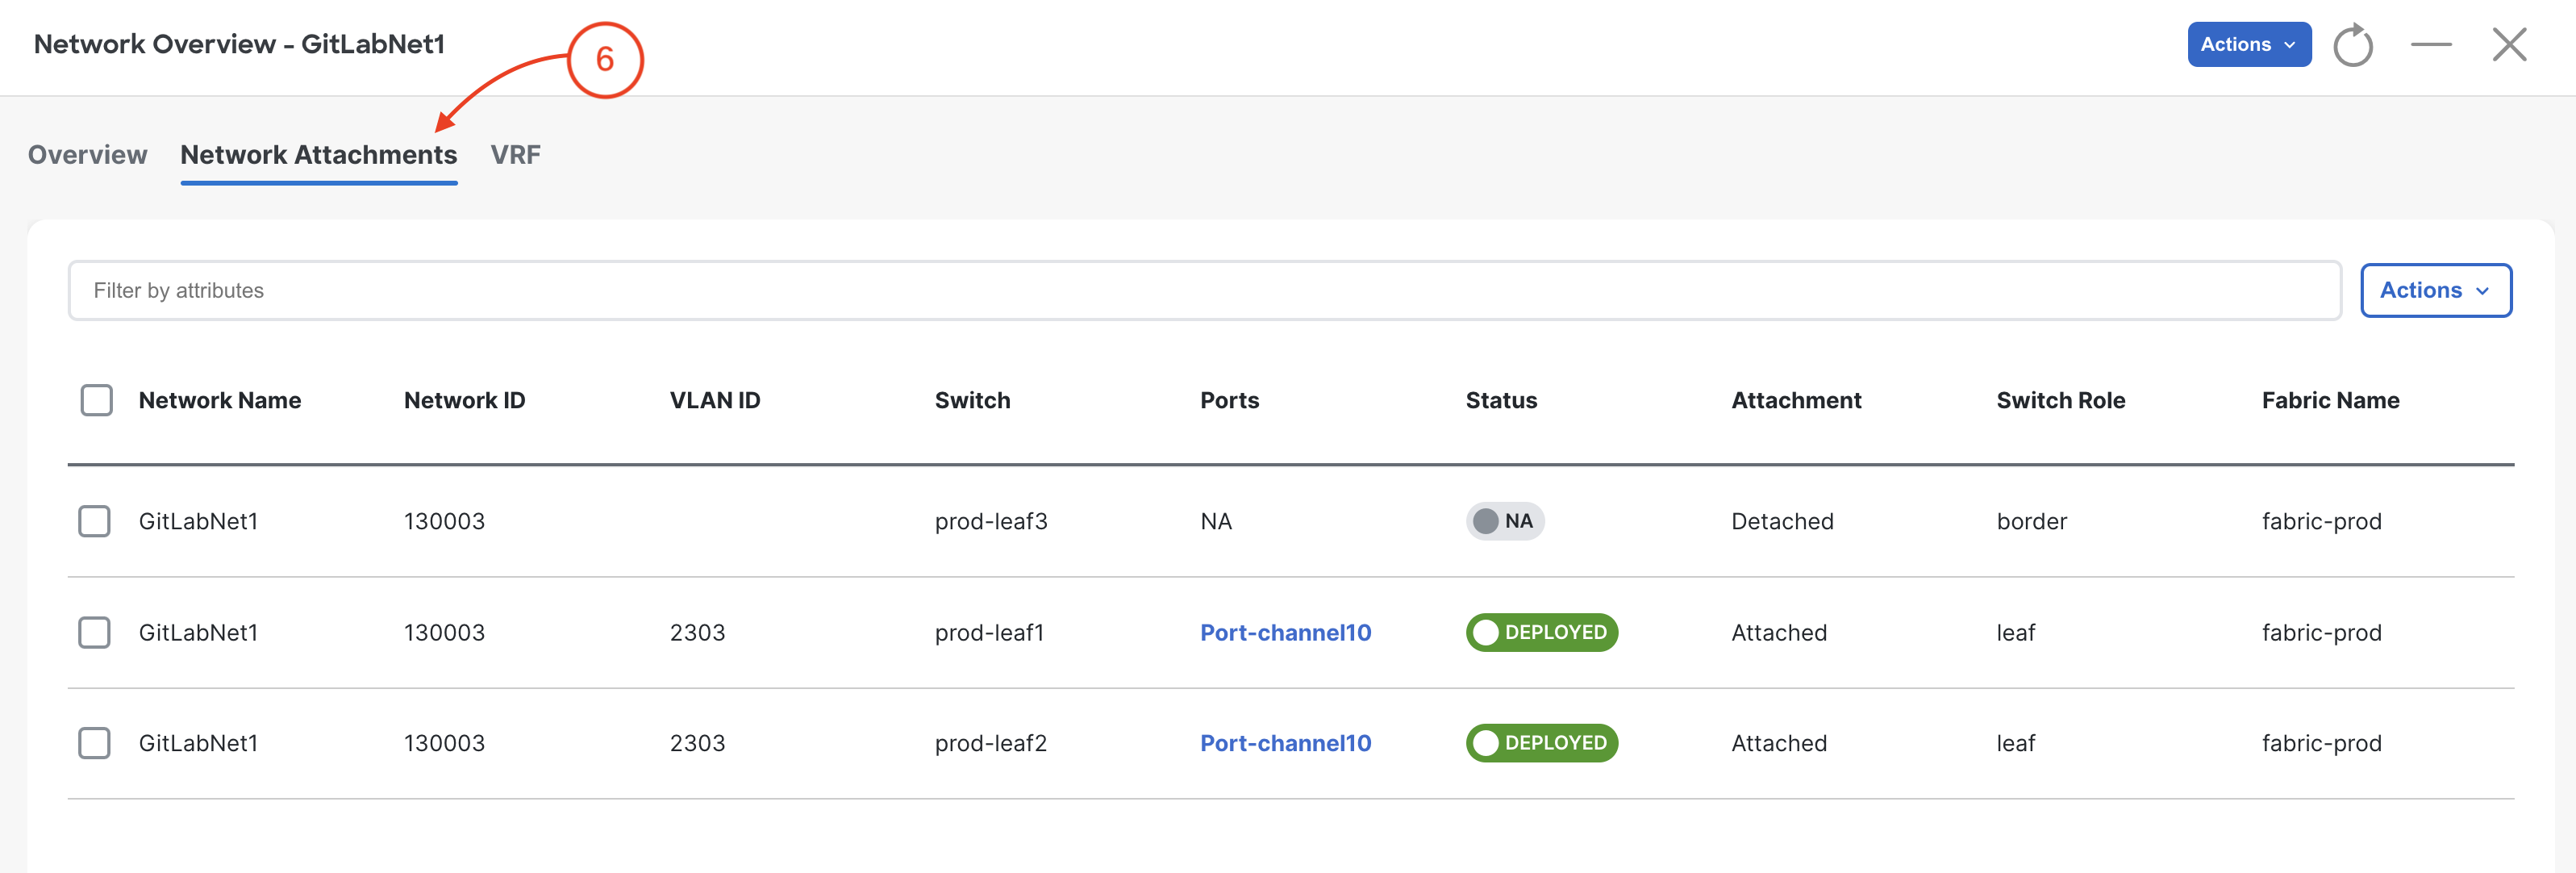
You may need to wait for the pipeline for some of the Network Attachments to show up in the NDFC GUI.
When your pipeline is done, open the merge request page:
Related merge request !# to merge stage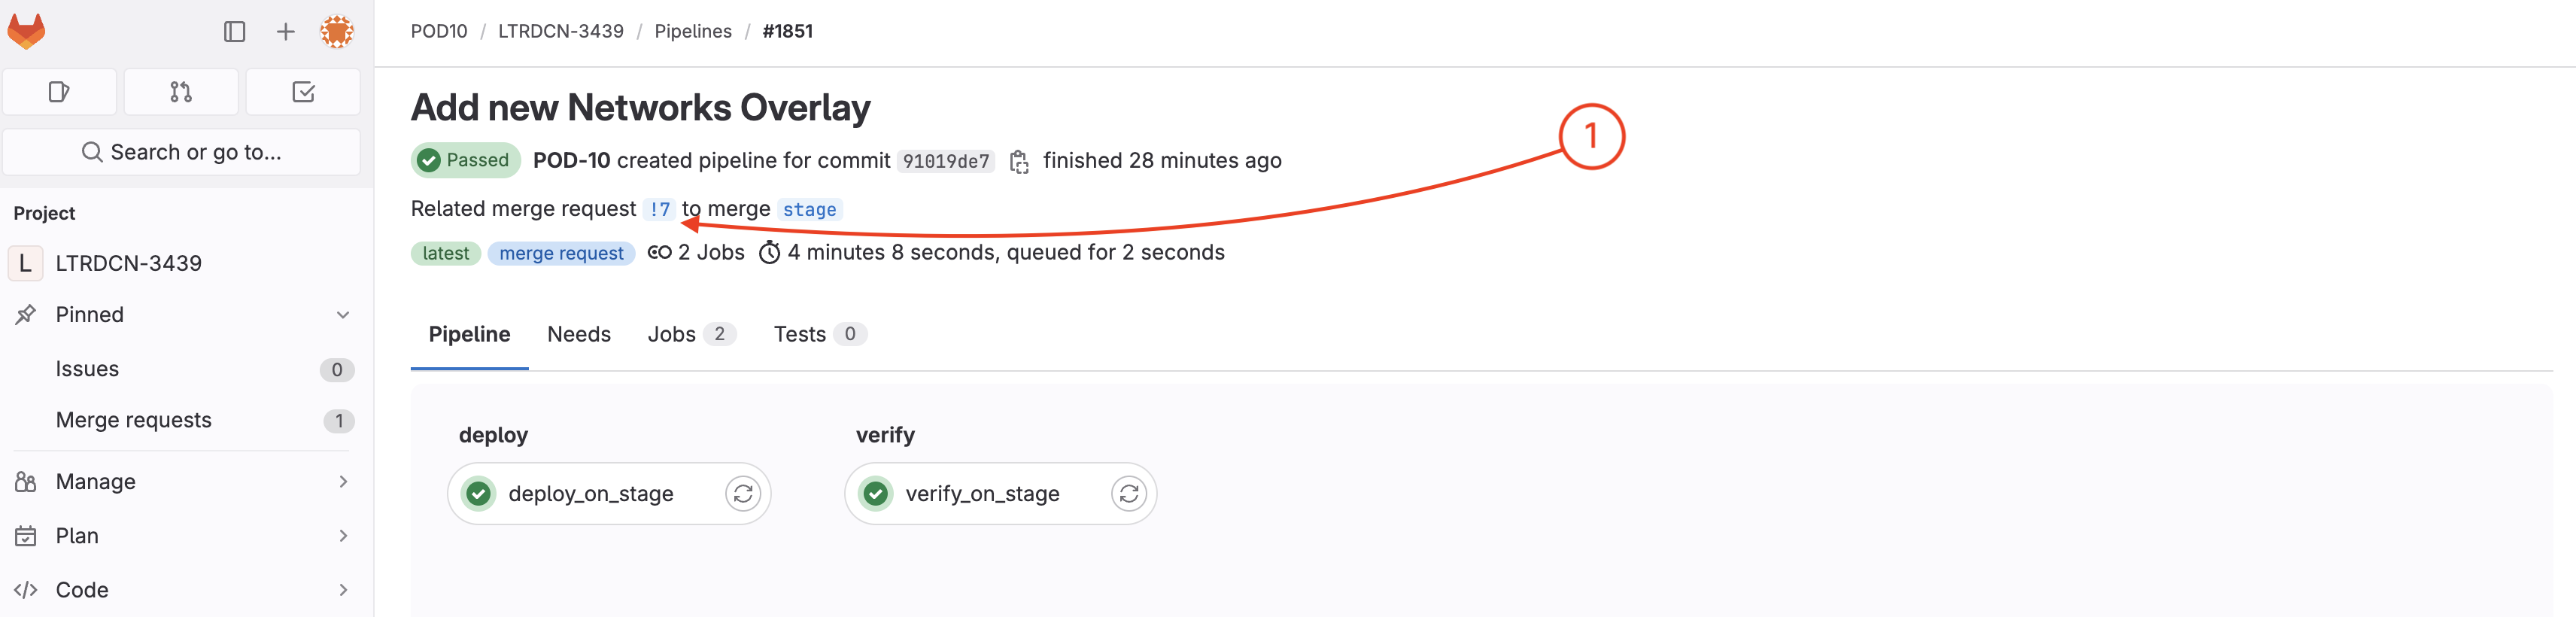
To open the merge request page:
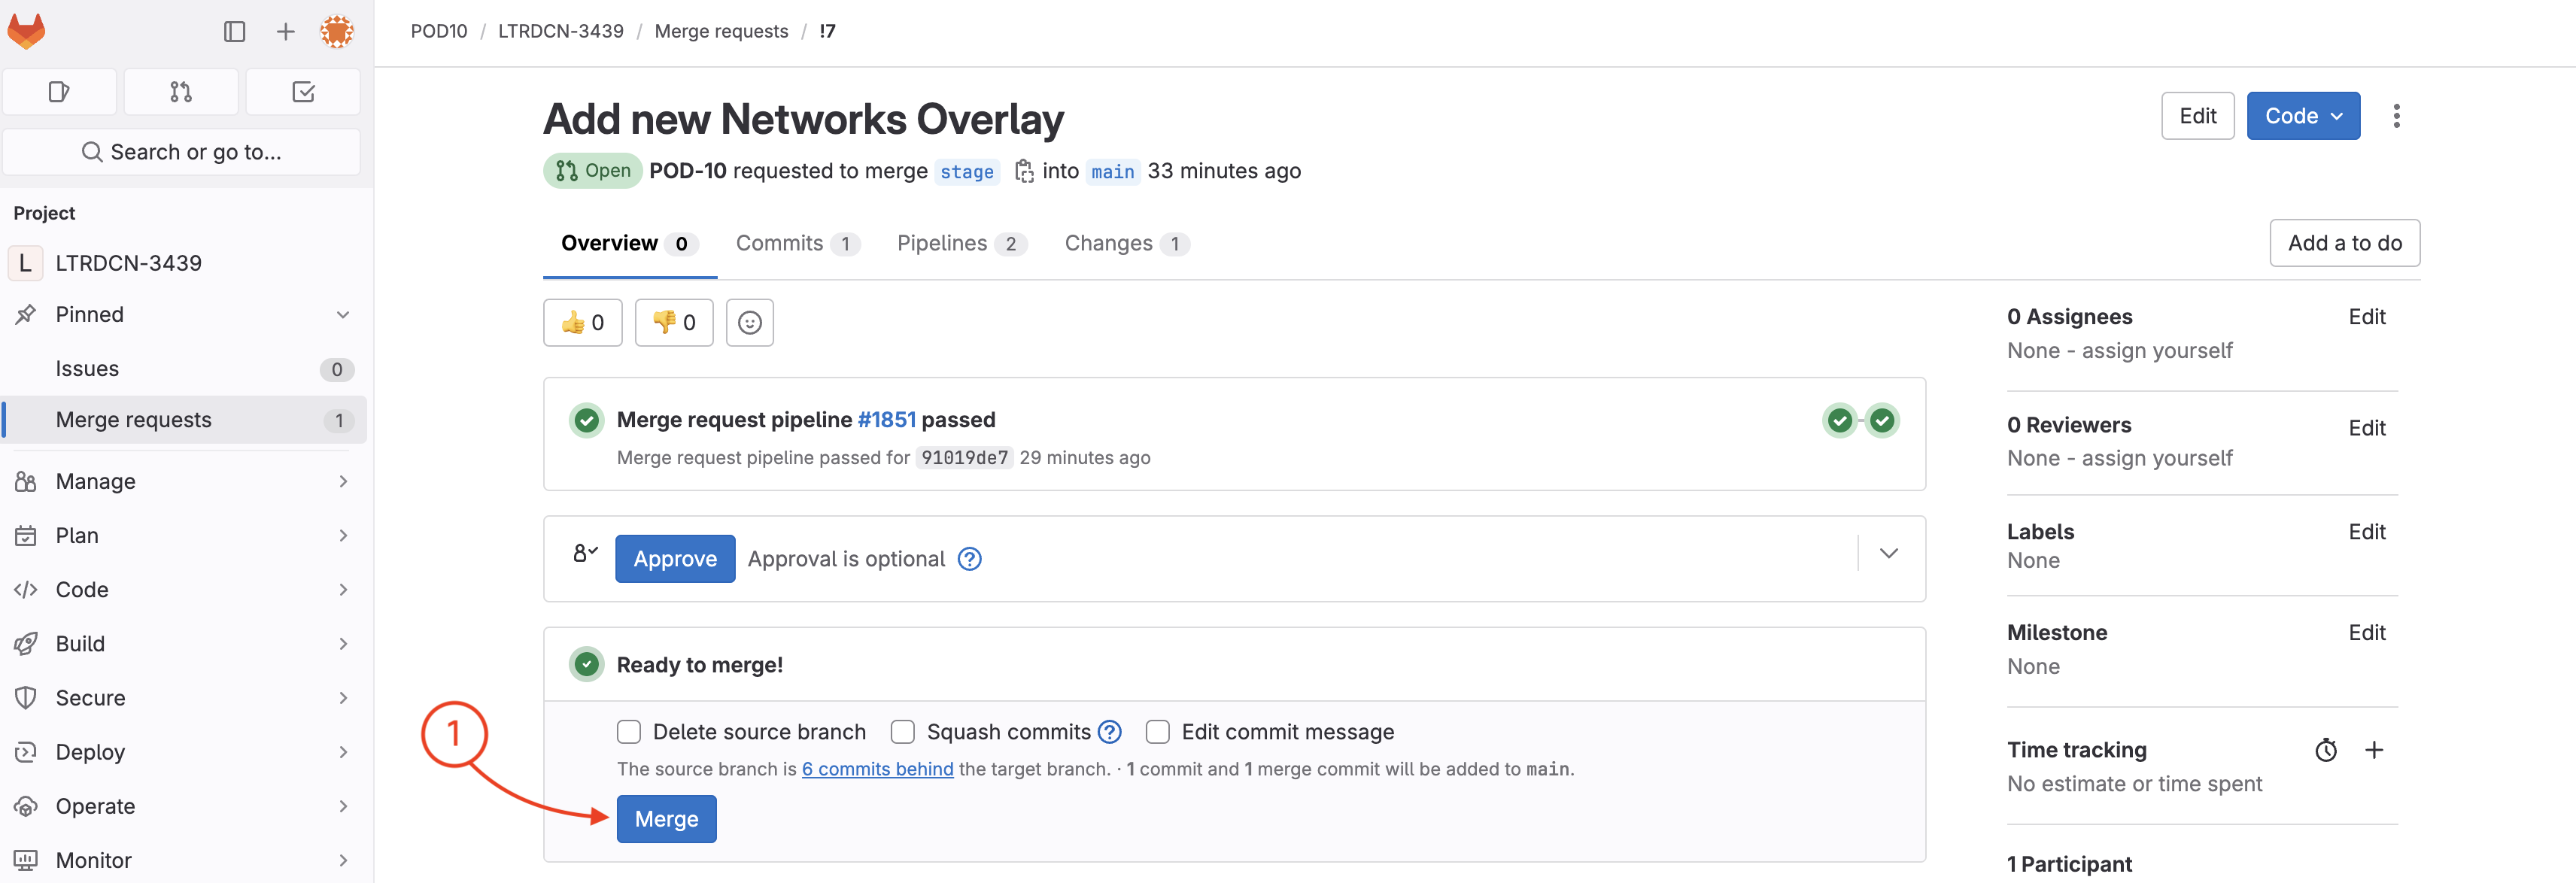

Wait until the pipeline is finished:
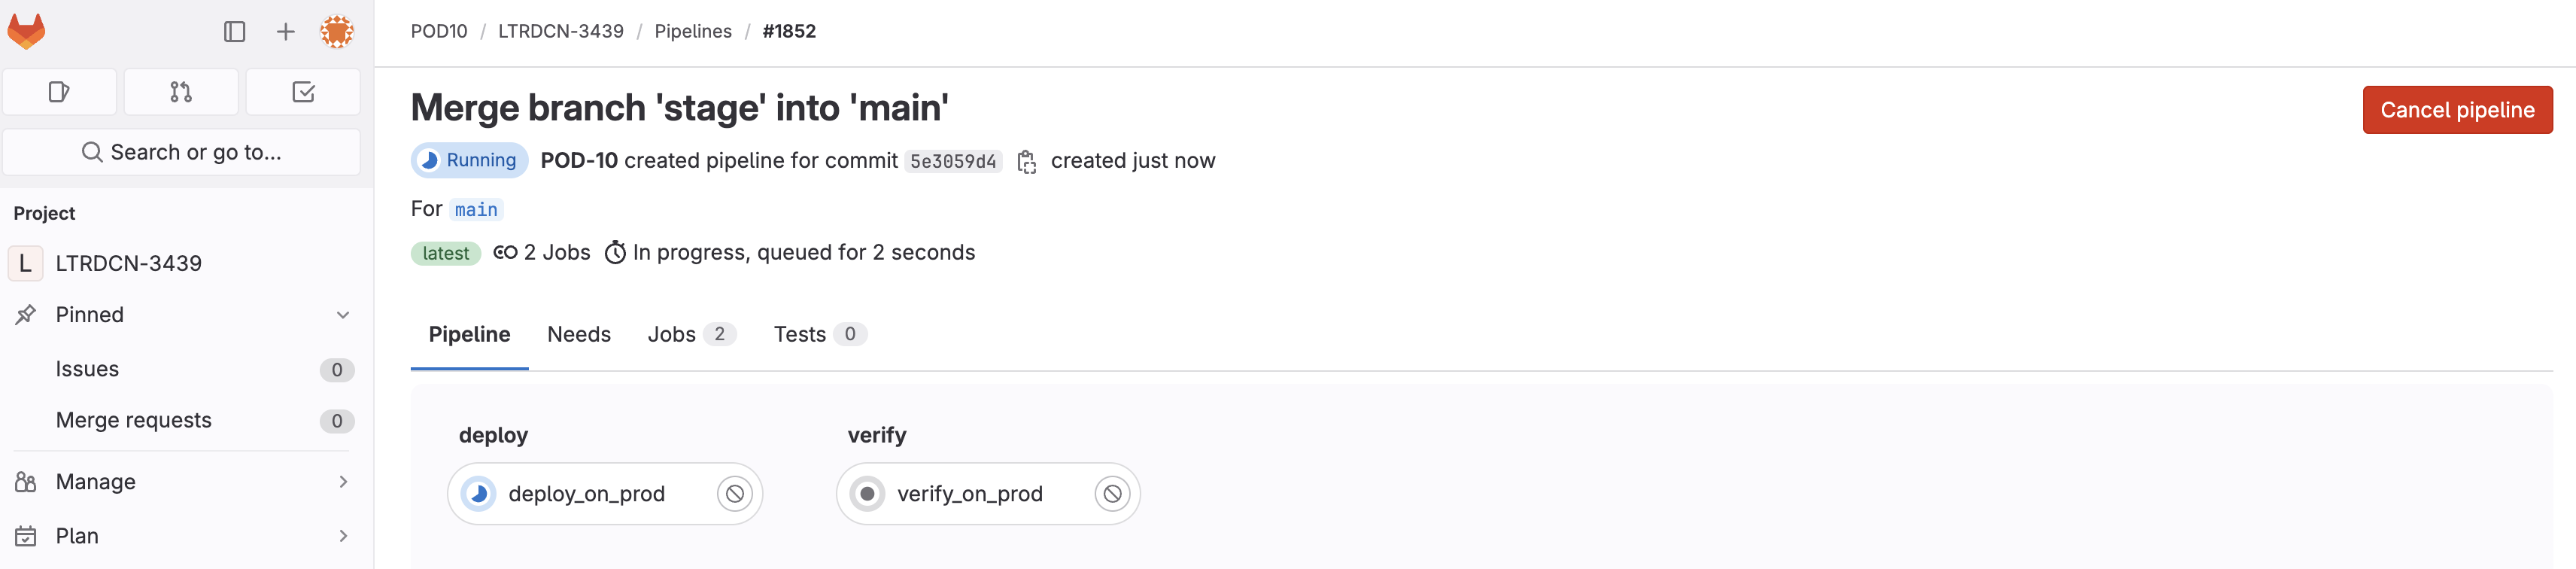
You have now modifed your Fabric by updating your source code and then using the CI and CD pipelines to deploy the changes!
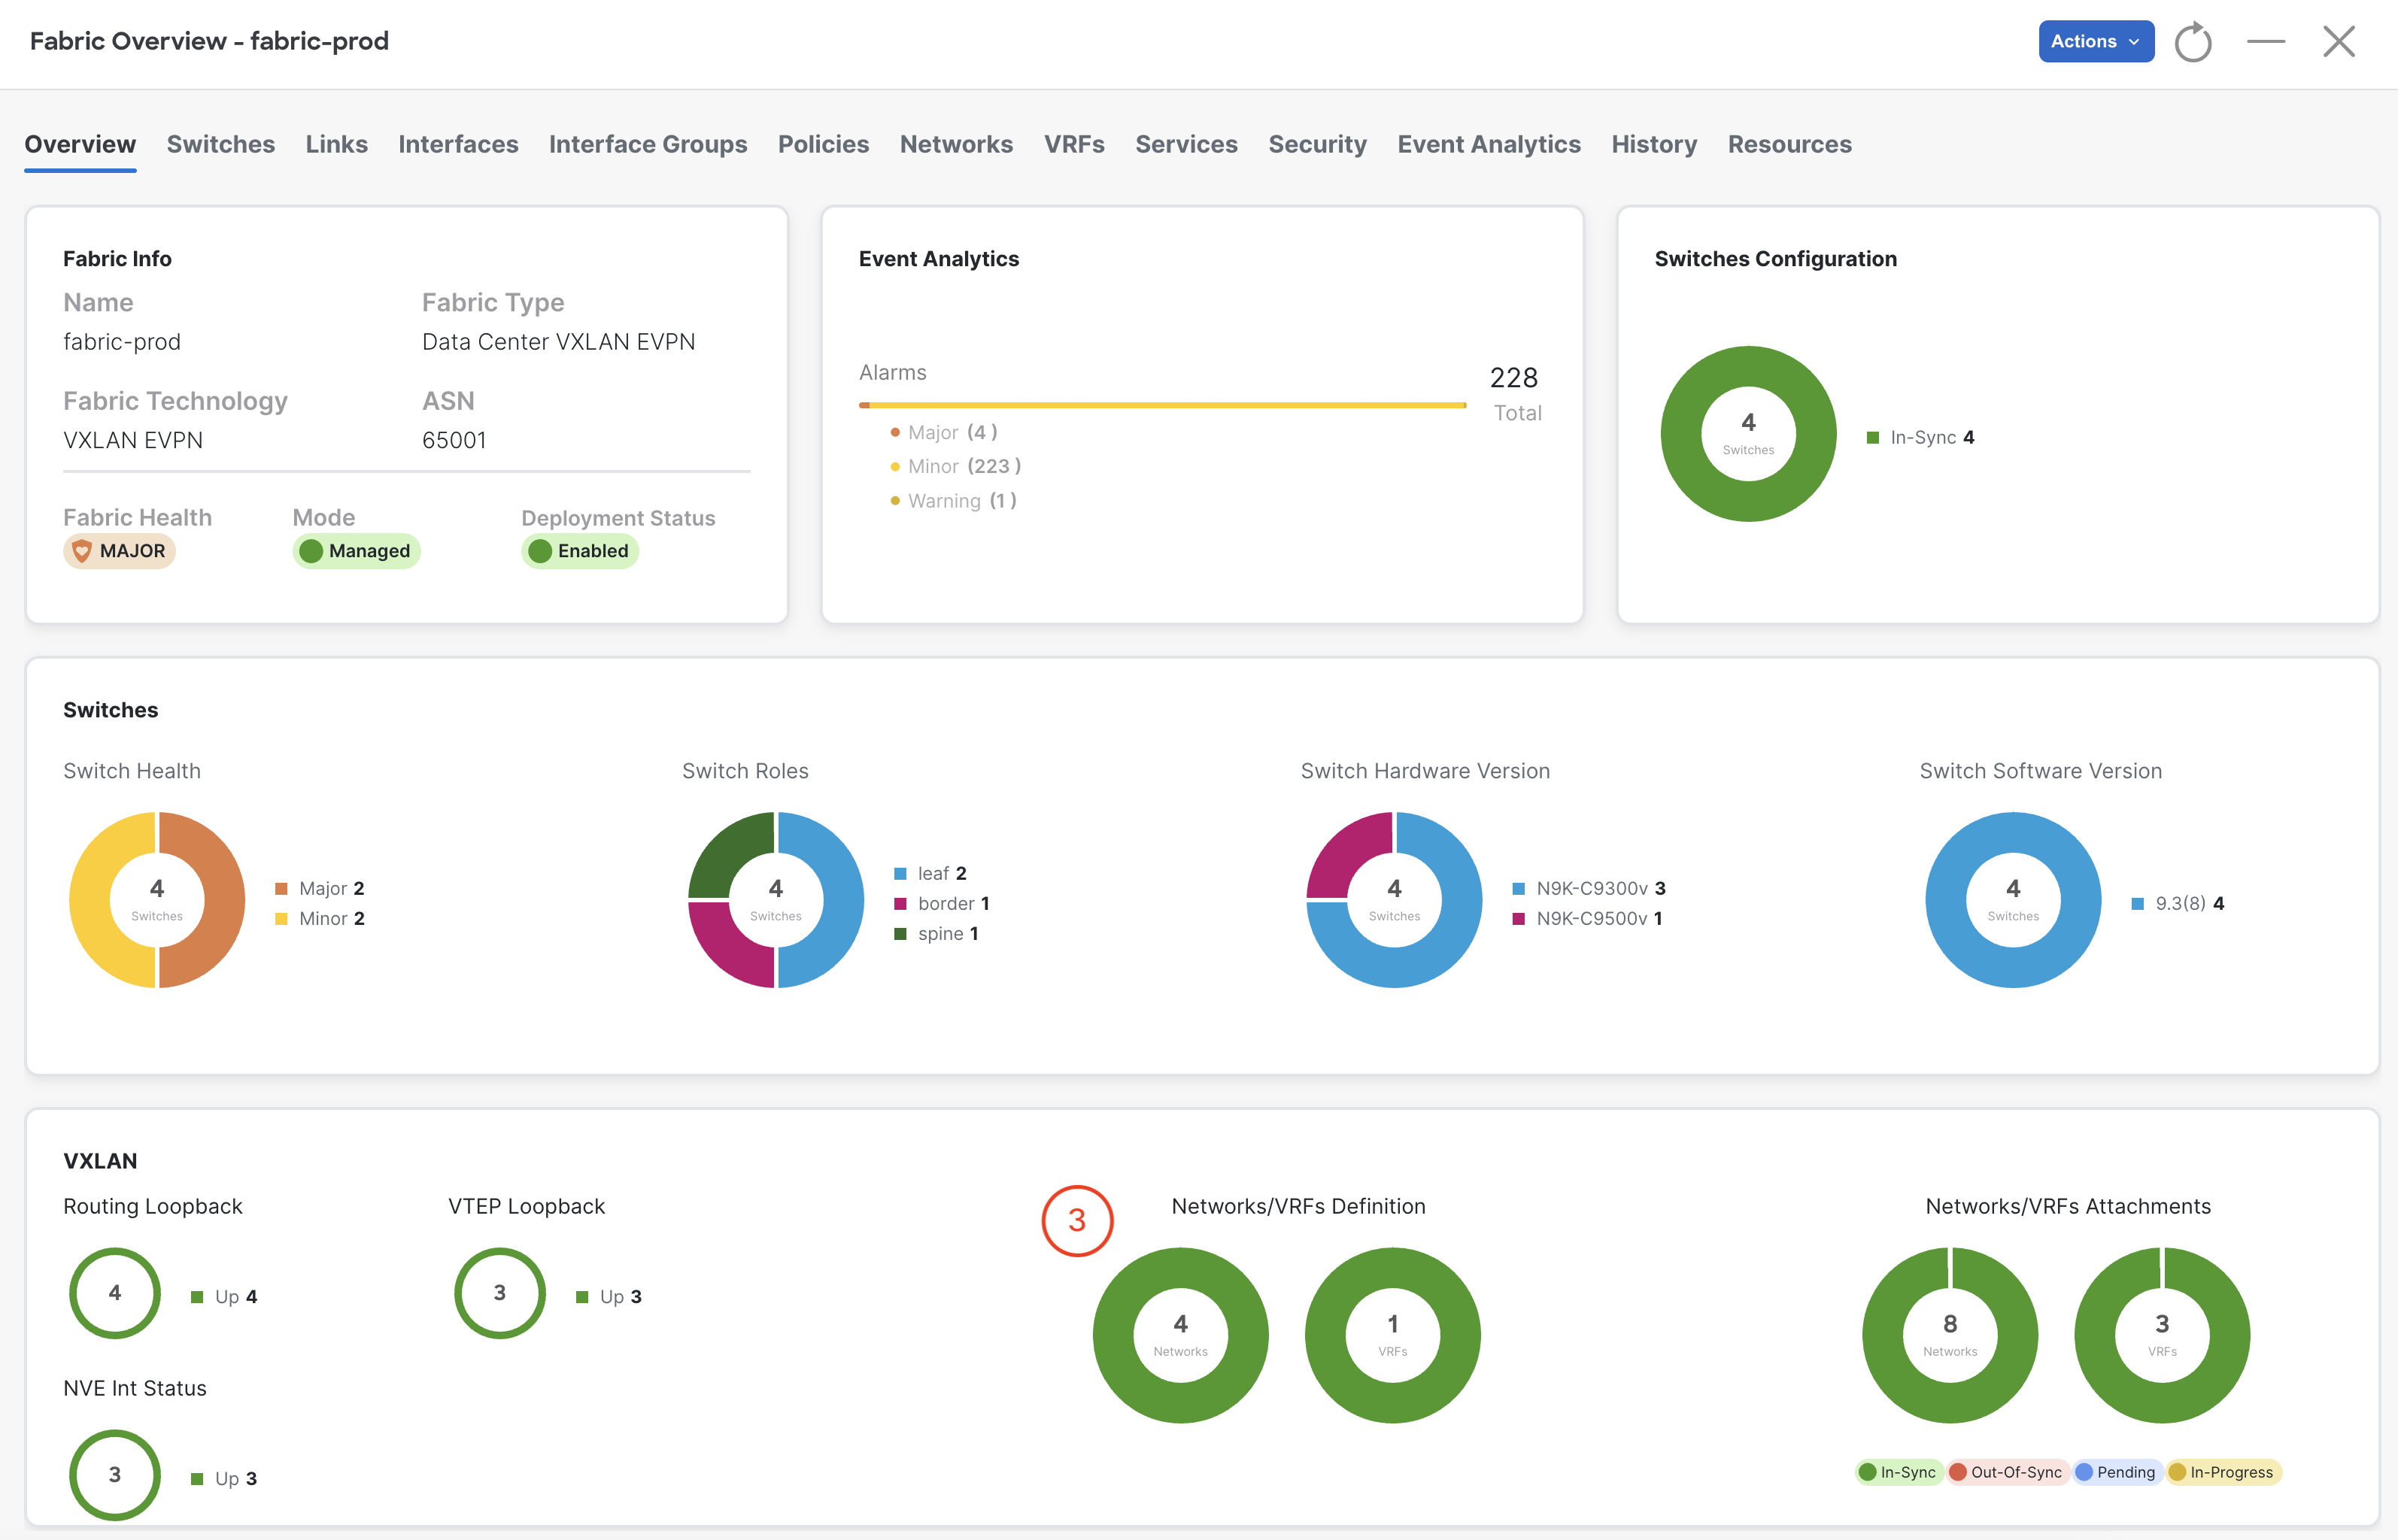
Production FabricIn your browser, return to NDFC and navigate to your prod-fabric:

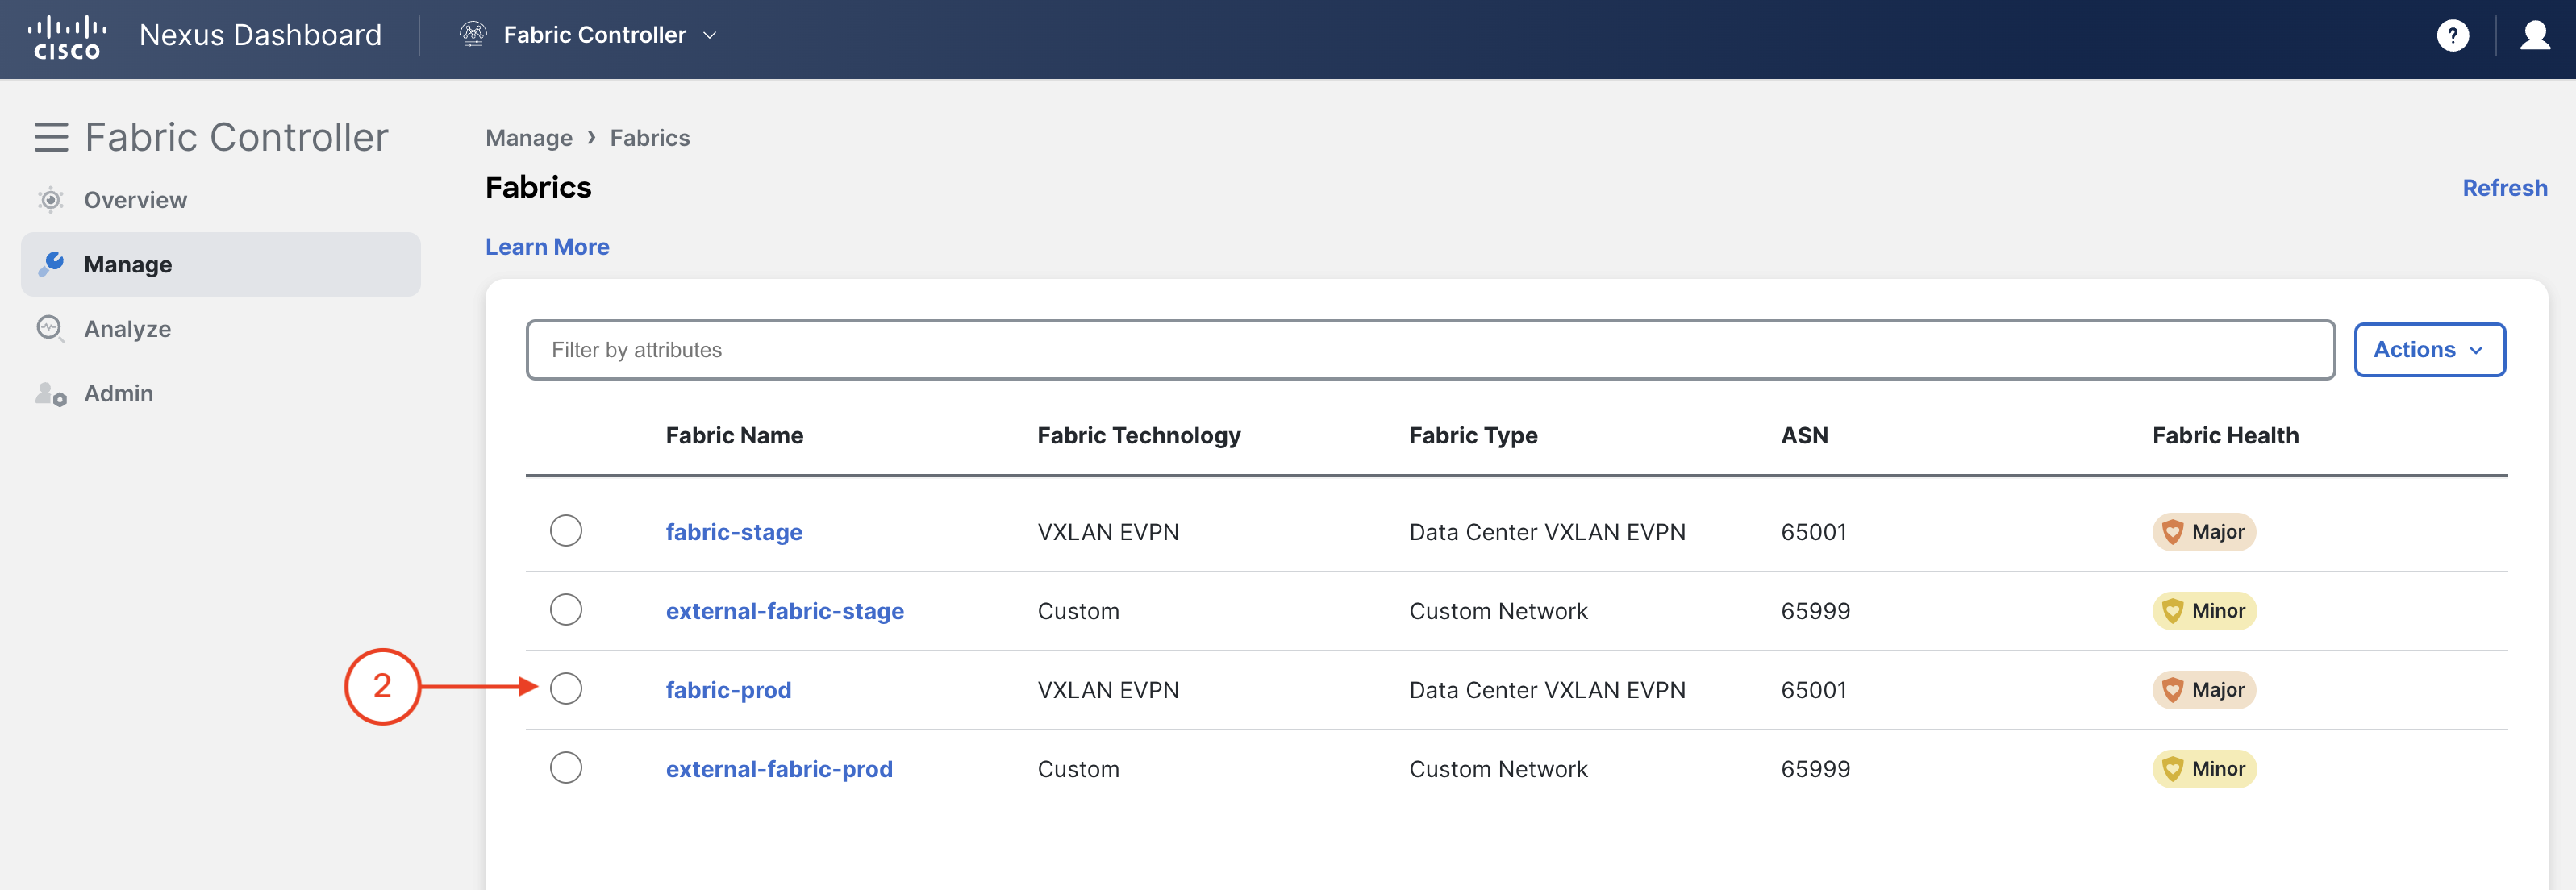
This time open the fabric page and check fabric-prod, NOT fabric-stage. Remember the CD pipeline pushes changes to the production fabric and you may need to wait to see the new Networks as the pipeline runs.
You successfully exported NDFC's REST API and experimented with them in Postman.
You took what you learned with NDFC's REST API and applied it to develop a Pythonic command line program to get and create network elements, VRFs and Networks in NDFC.
You have successfully developed a complete, end-to-end Ansible playbook using Infrastructure-as-Code (IaC) for deploying staging and production NDFC fabrics. This reusable playbook leverages YAML data files for configuration, enabling efficient and consistent deployments.
Thank you for attending Cisco Live 2025!!