There are several resources for understanding the APIs that power ND/NDFC. The first is the API documentation that comes embedded within ND for all services running on it. The second, you can view offline, without access to ND/NDFC and found on Cisco DevNet's website. As you will explore below, these resources can help you learn, navigate, and try out different API endpoints.
In your browser, close your staging fabric.

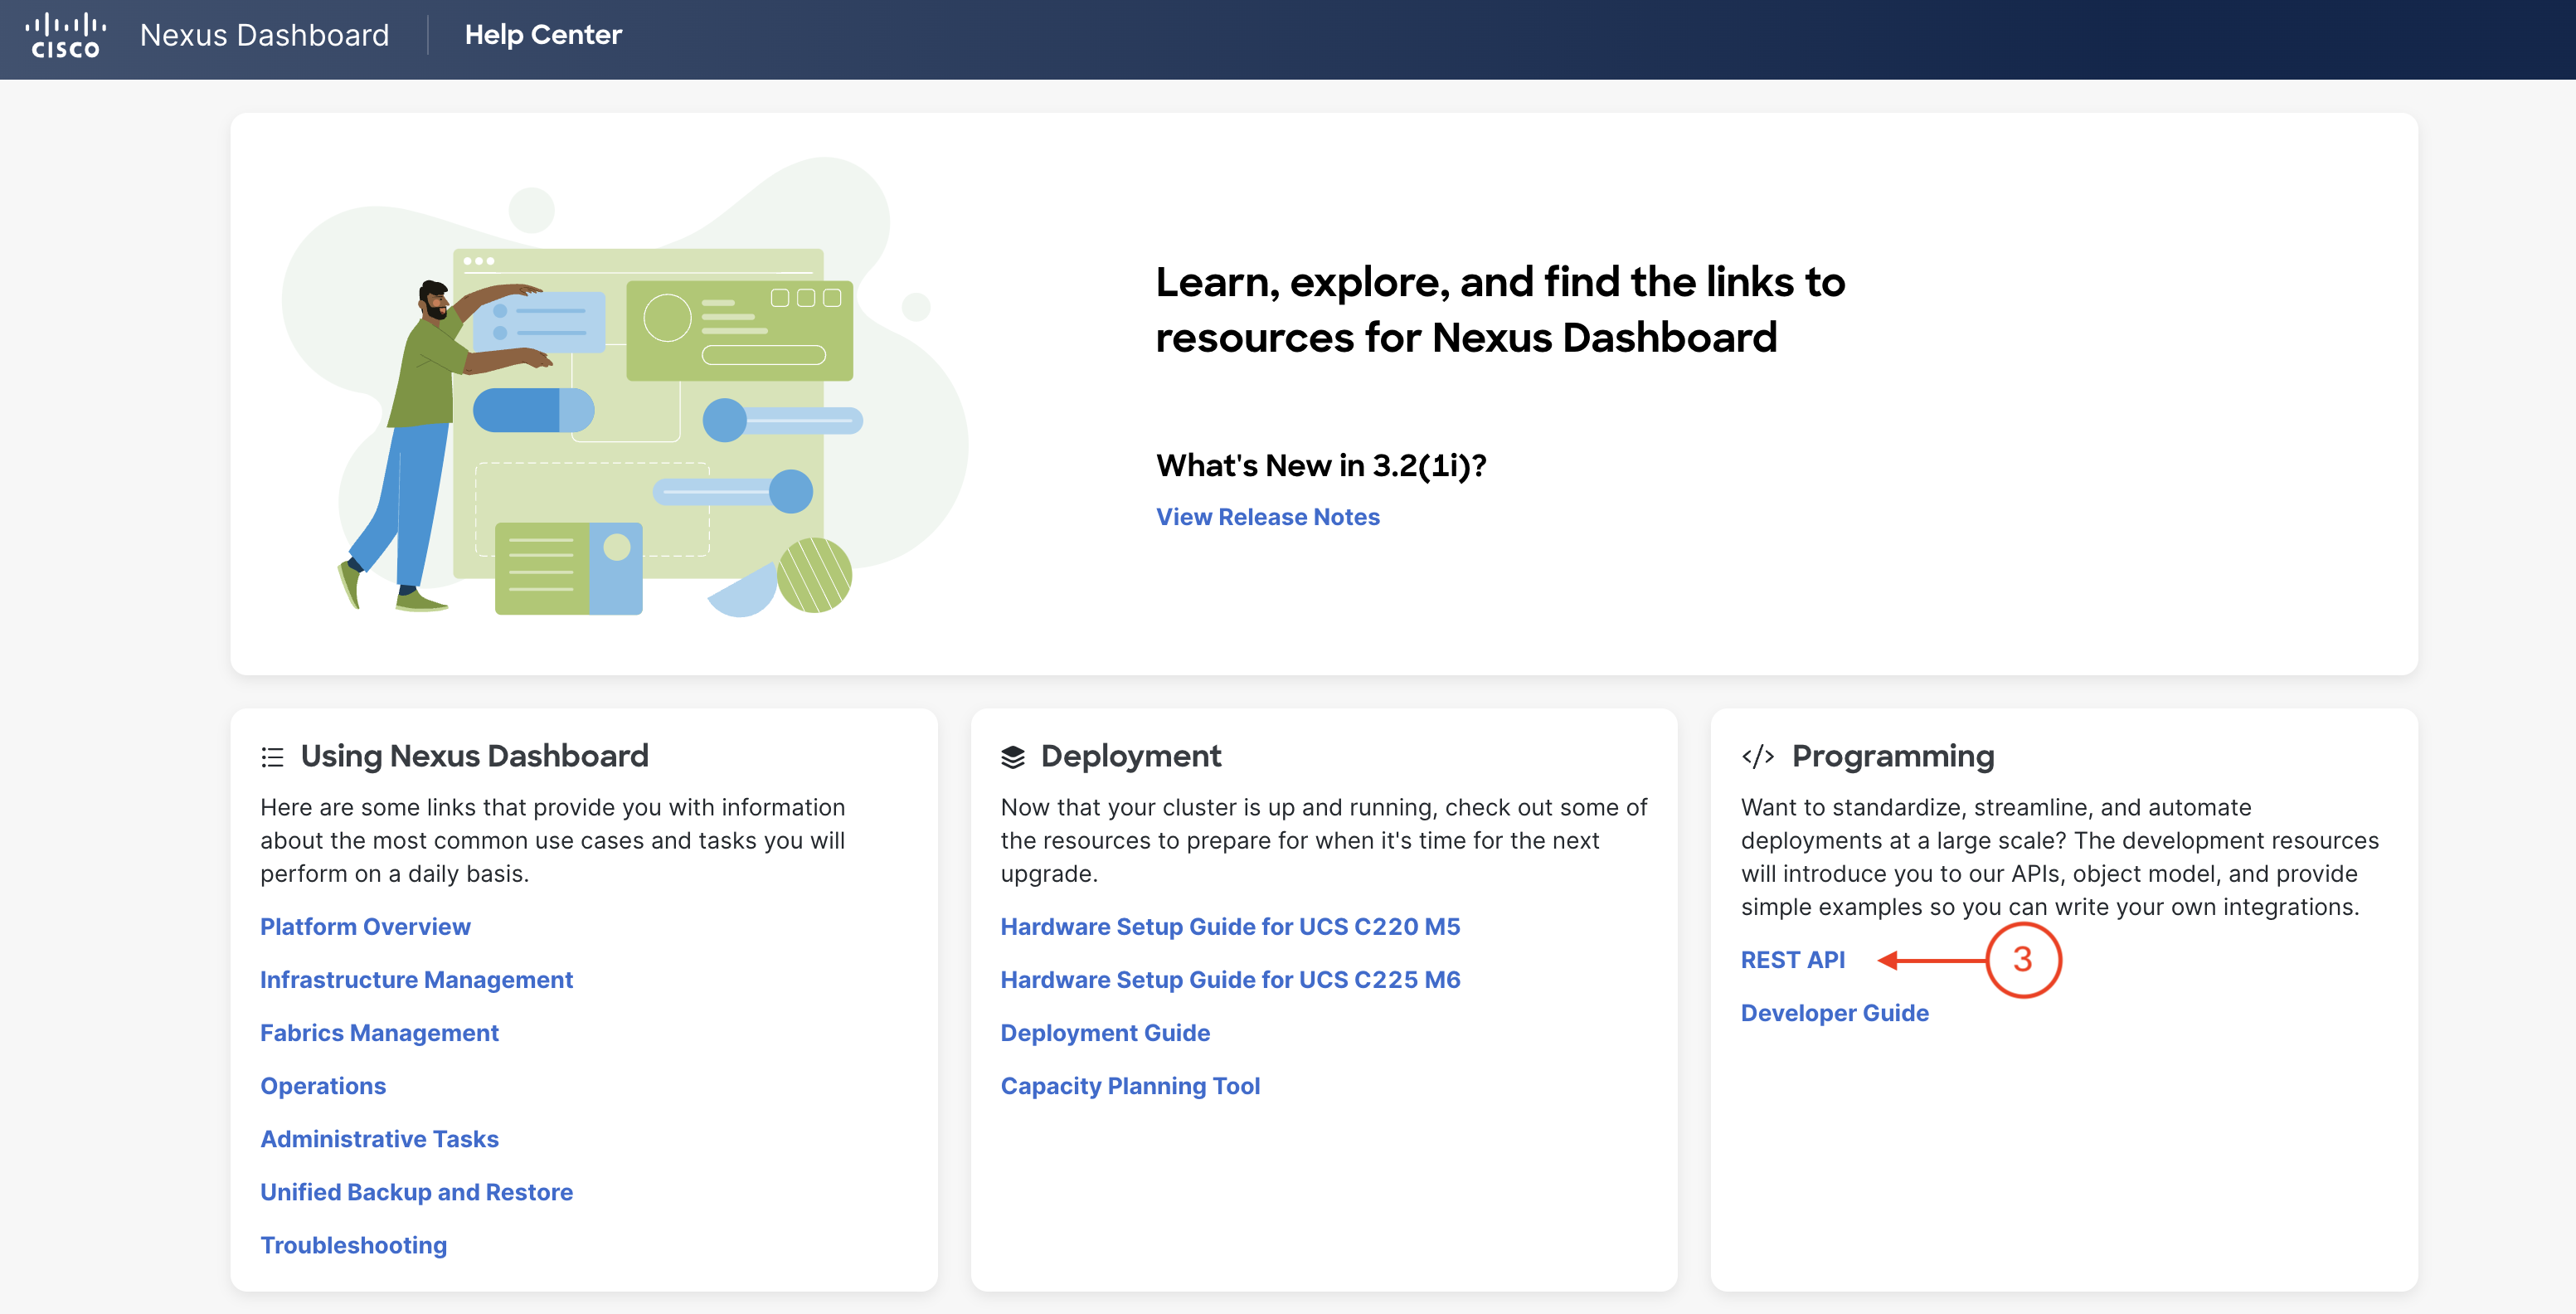
Back at your NDFC main dashboard, locate Help in the top-right corner:

Your browser should have opened a new tab to the ND/NDFC API Docs as shown below:
The API Docs provide the documentation for both Nexus Dashboard and Nexus Dashboard Fabric Controller via a drop-down menu as annotated in the picture below.
The lab will focus first on ND API Docs for authentication.
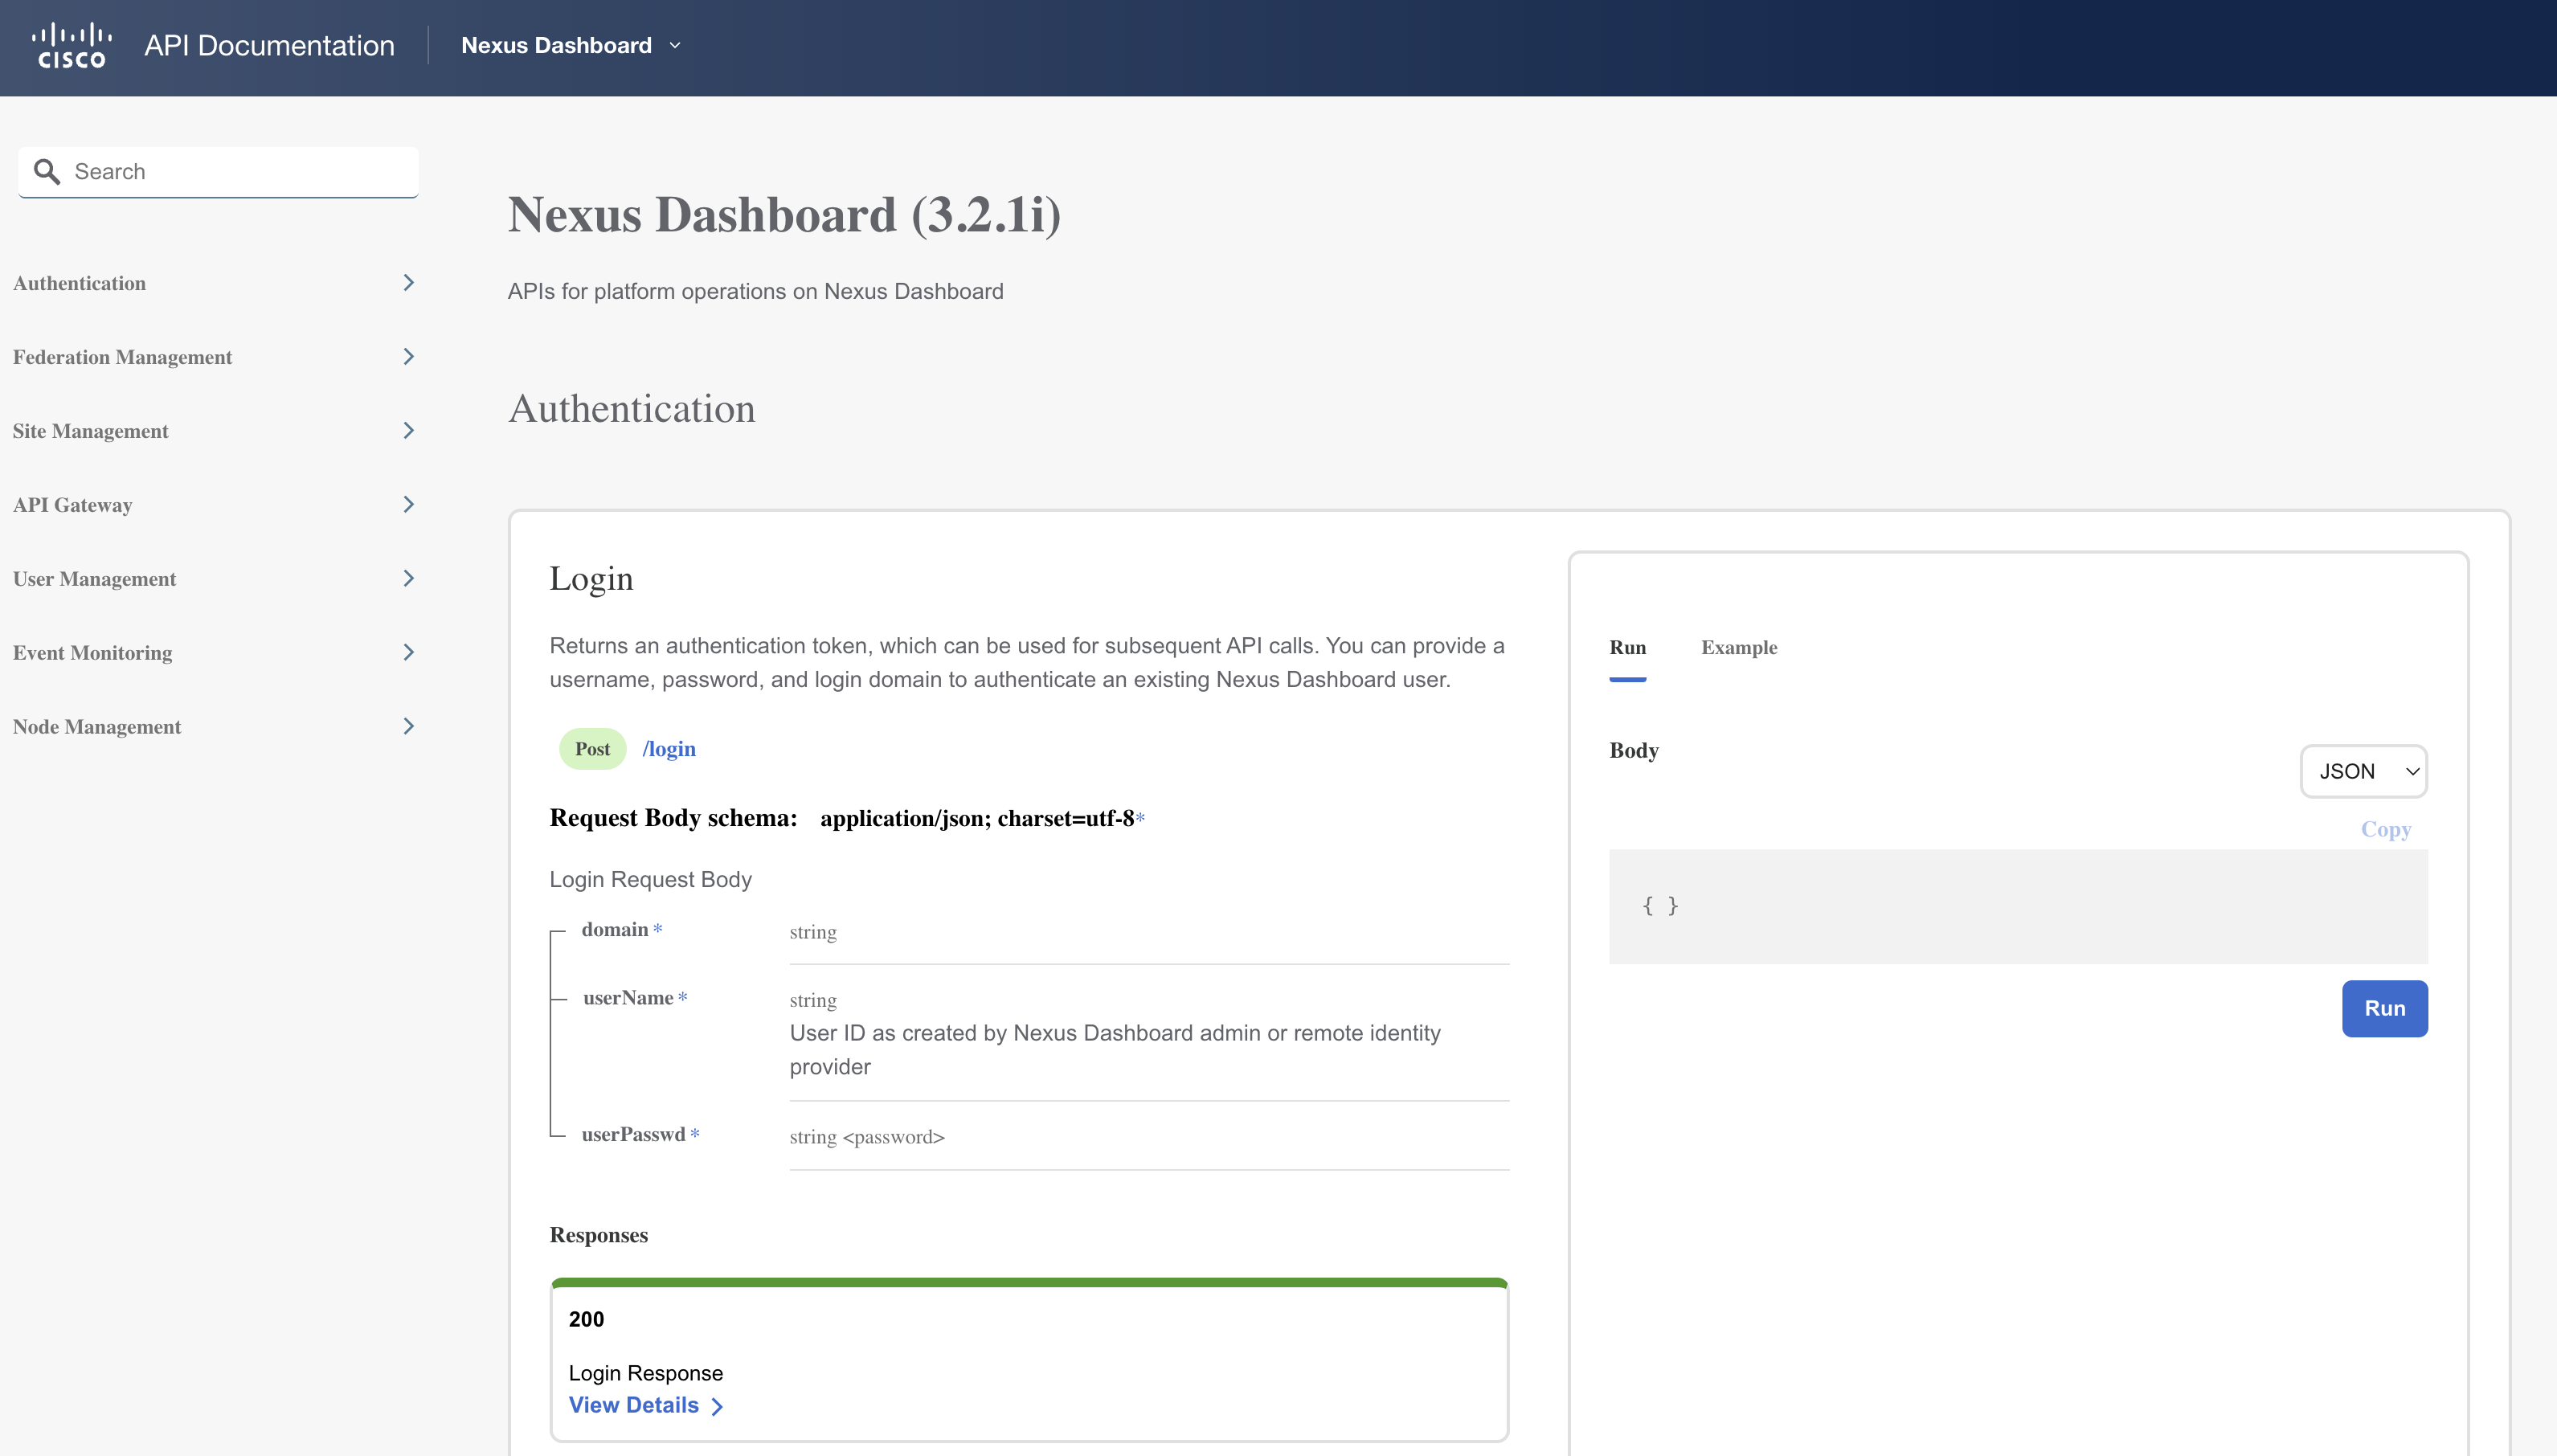
The APIs of ND/NDFC follow the OpenAPI 3.0 spec and the live documentation has swagger tools built-in, so users can try and test the API directly from Nexus Dashboard. Because NDFC is running as a service on Nexus Dashboard, all the authentication and authorization are provided by ND and ND provides a single API gateway for all the services running on top of it.
The Nexus Dashboard and services APIs require access via an authenticated and authorized account.
Only authorized accounts can submit requests to API operations.
All operations must communicate over a secure HTTPS connection.
When you authenticate using the /login endpoint, you receive an authorization token identified by the key name jwttoken in the response from ND.
This is a JSON Web Token (JWT) in response payload and cookies which you must then include in the request of each subsequent API operation in the format of a cookie.
AuthCookiejwttoken in response of /login API callTo test it, in the REST API page you just opened in the browser:

{
    "domain": "local",
    "userName": "admin",
    "userPasswd": "cisco.123"
}
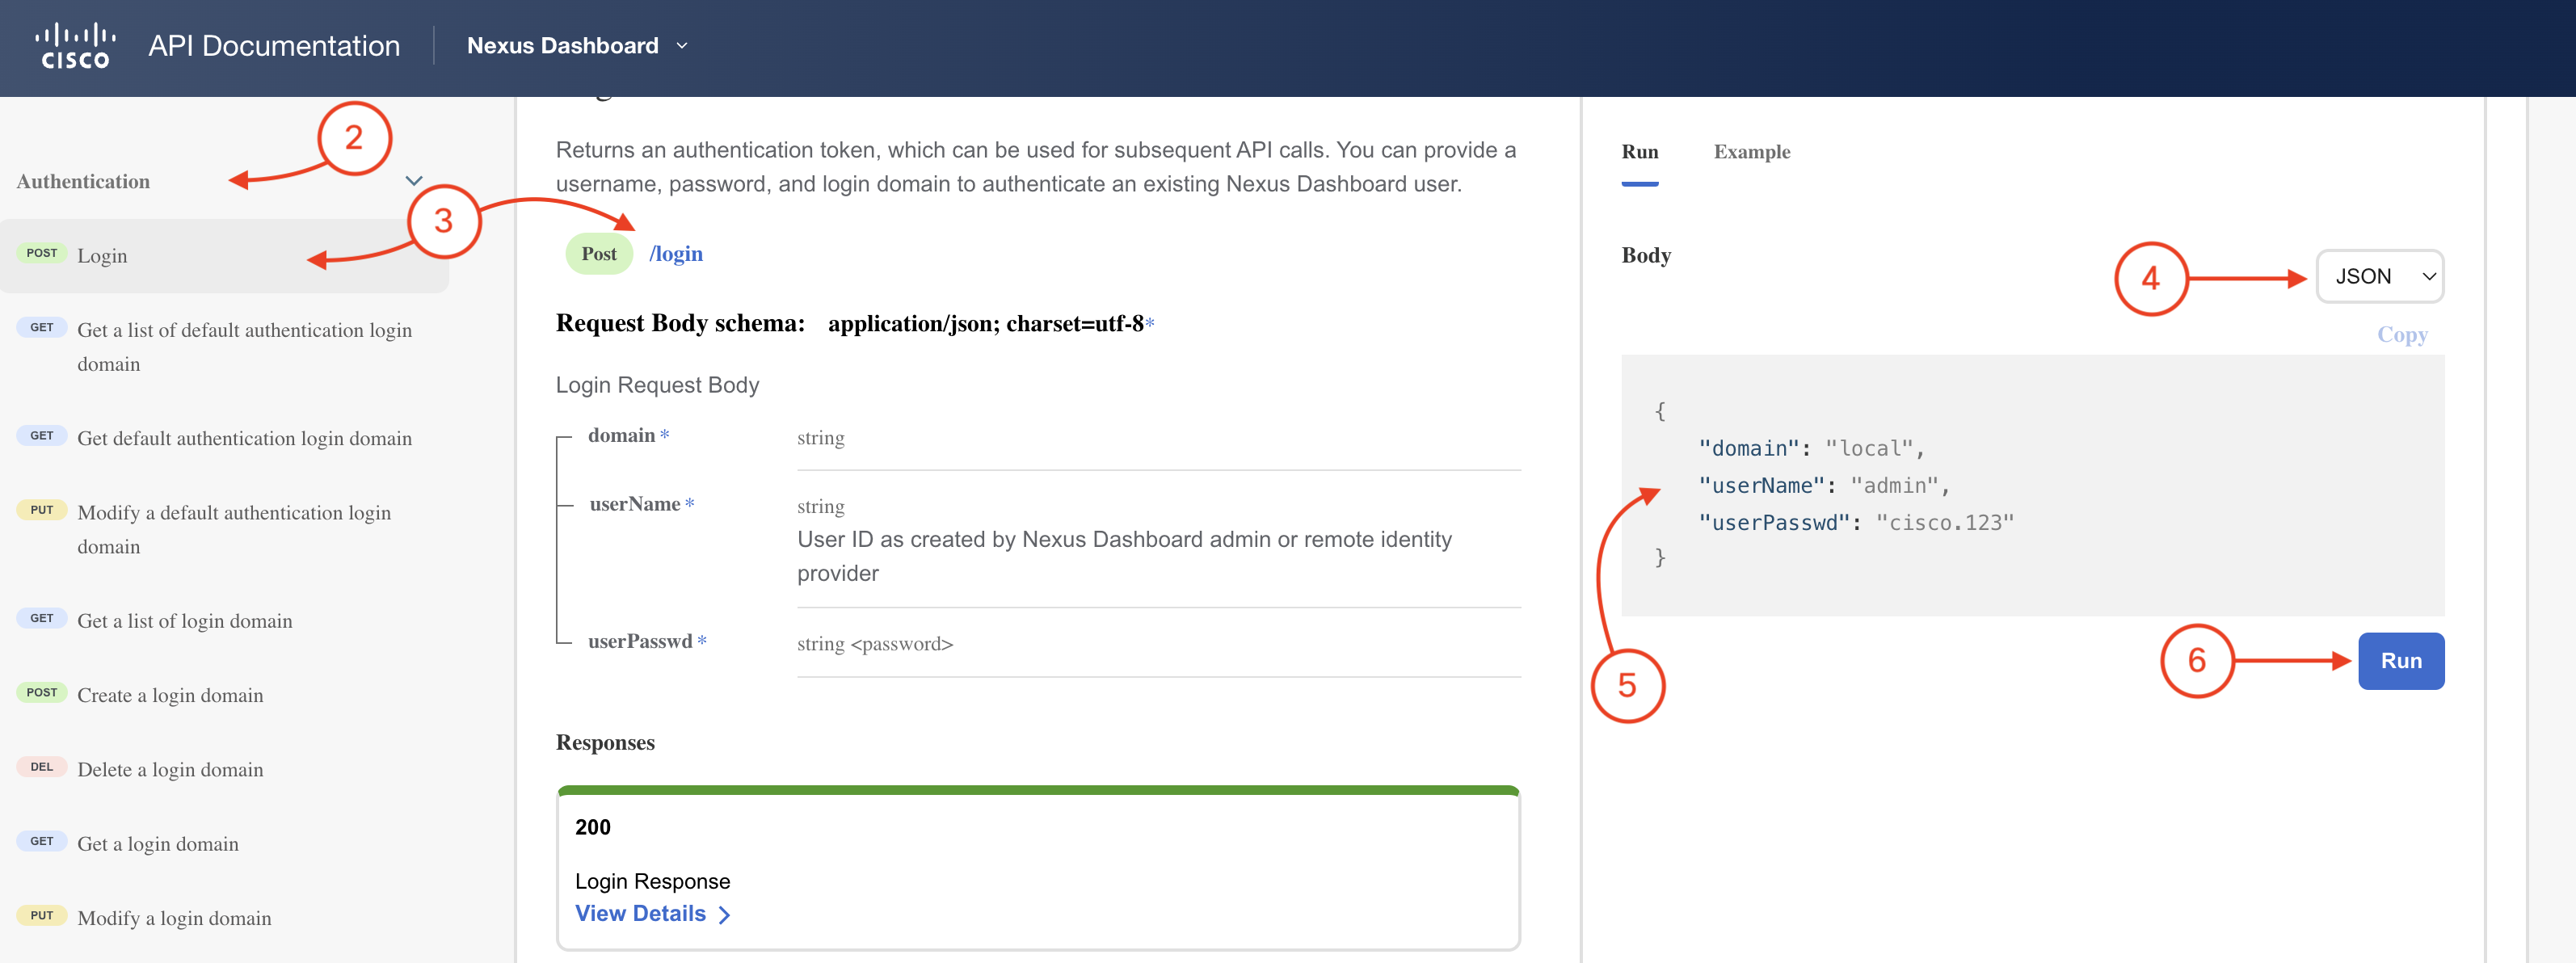
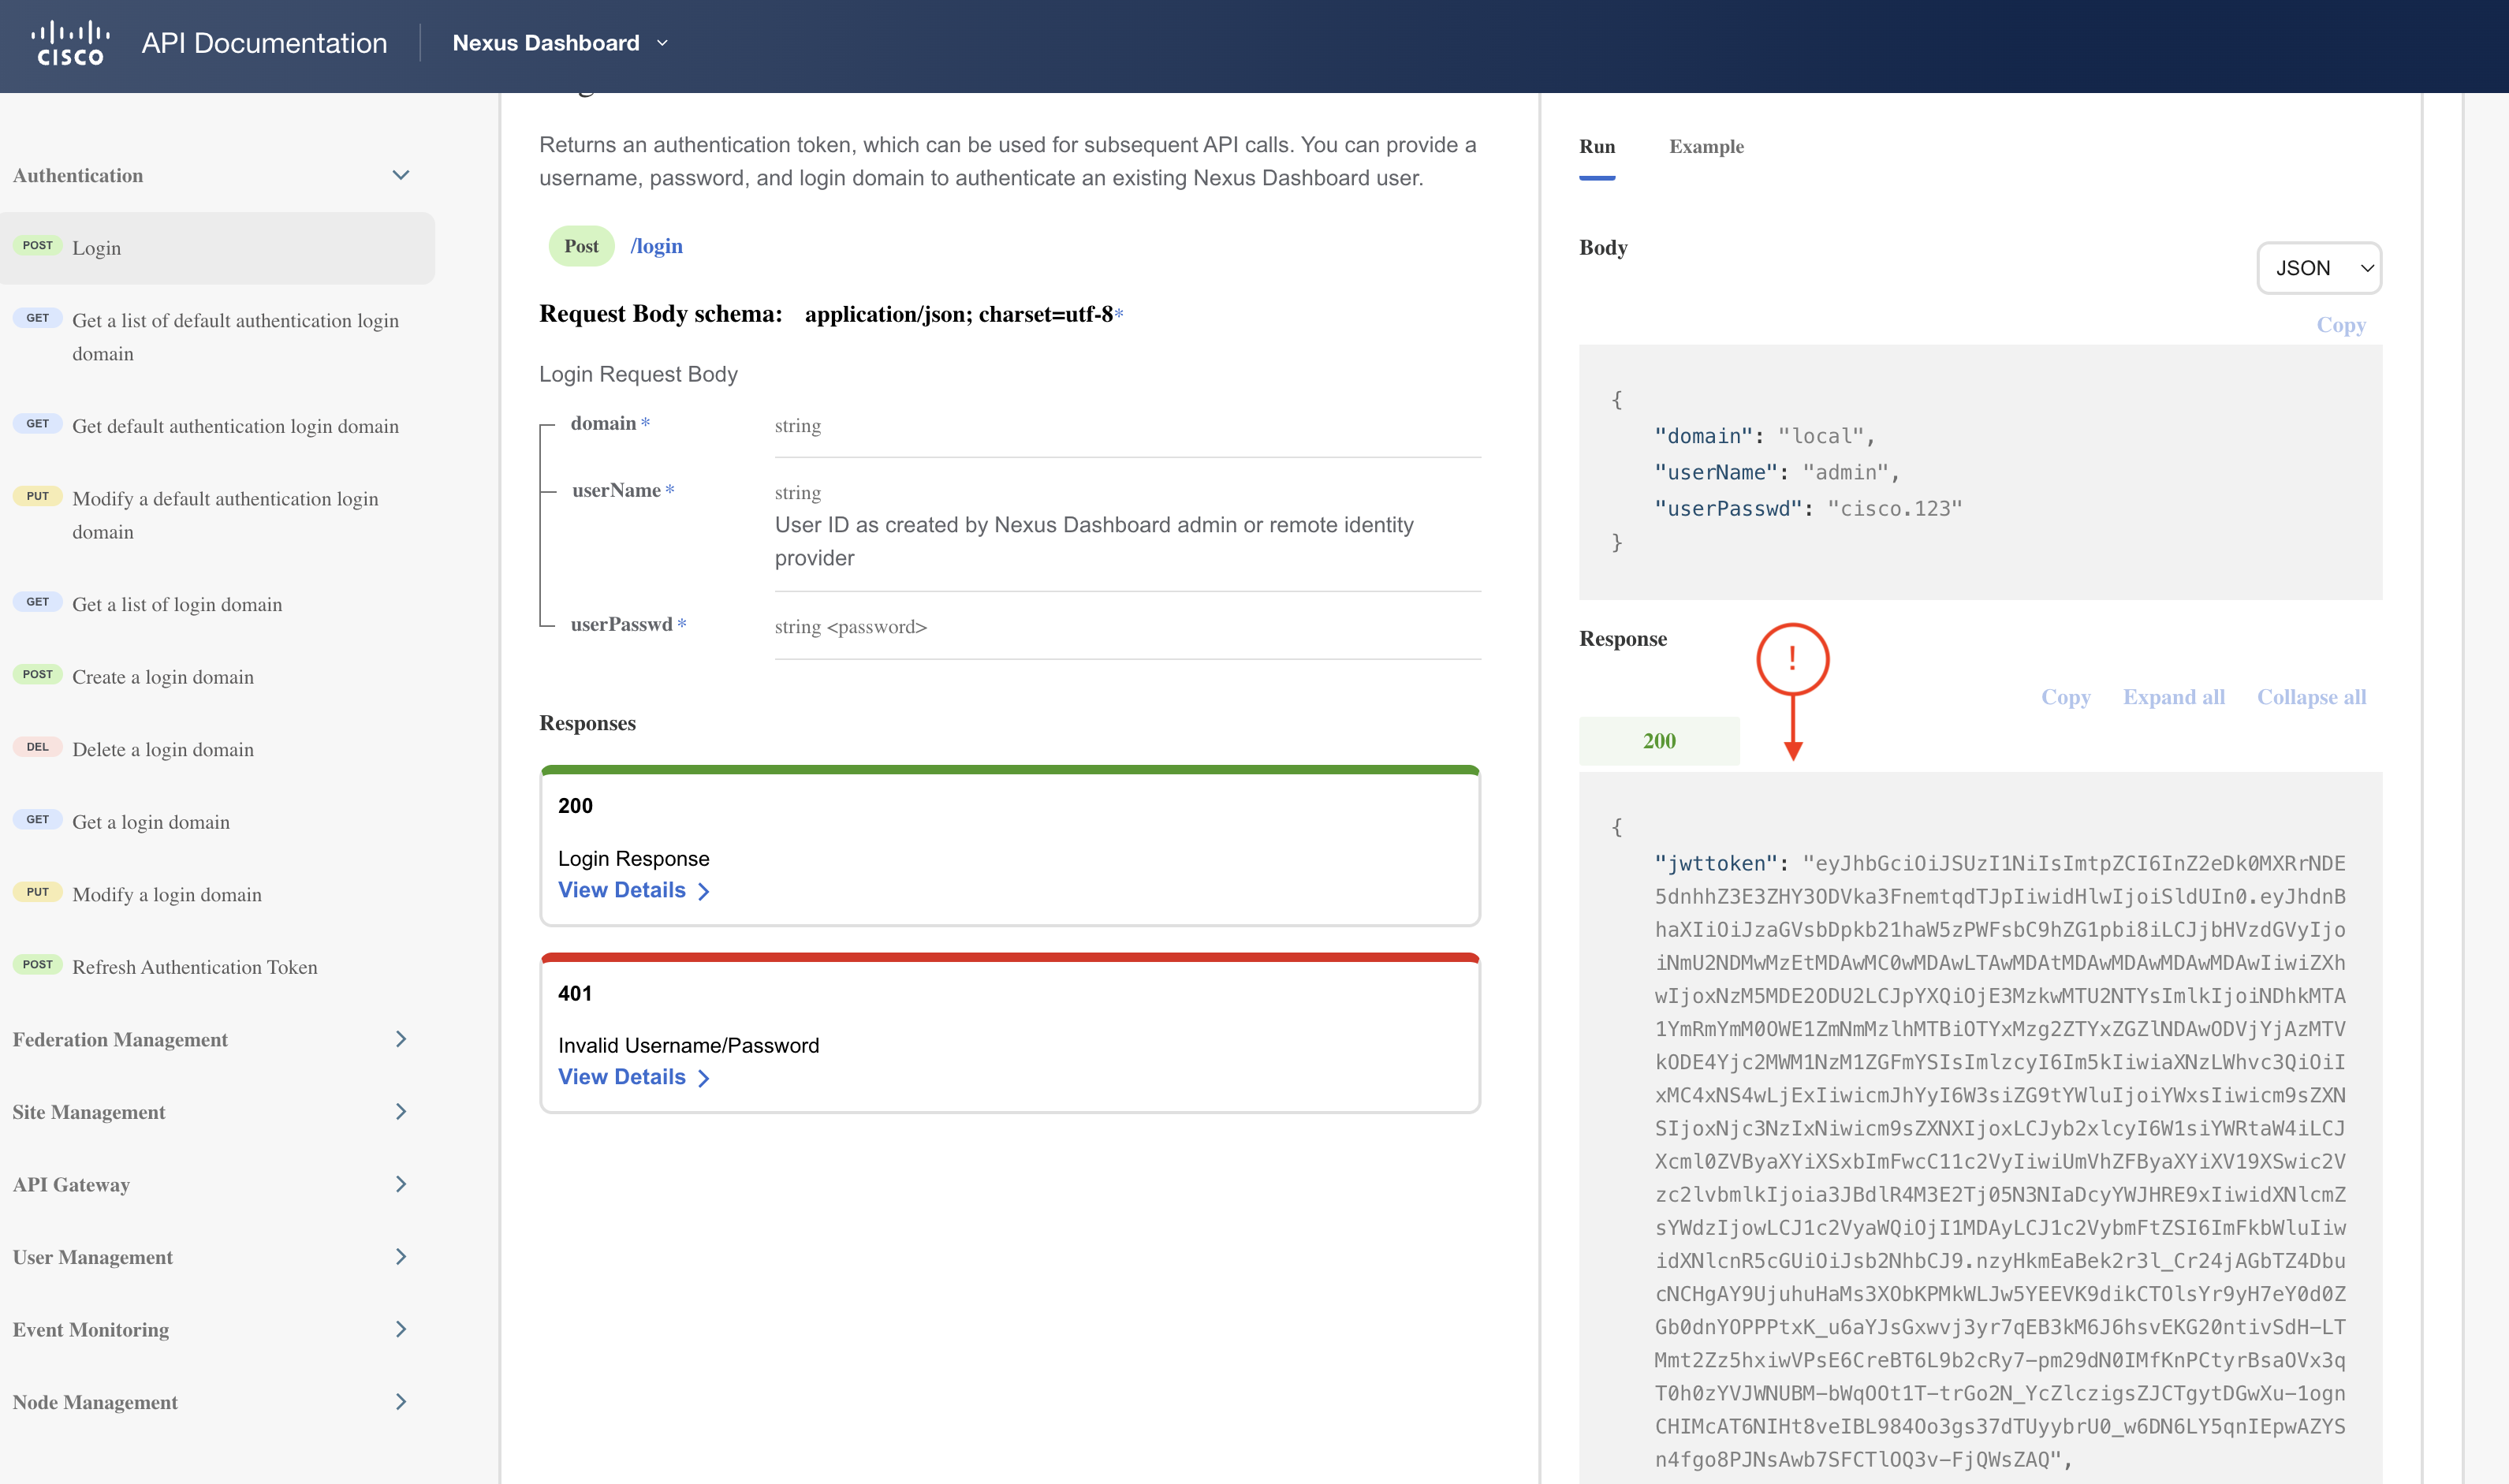
You should get a response that looks like the screenshot below:
You used the POST method and the login API endpoint URL:
POST https://10.15.0.98/login
You used the admin user account and local login domain in the POST payload to ND:
    {
        "username": "admin",
        "userpasswd": "cisco.123",
        "domain": "local"
    }
An example of the response you received is:
    {
        "jwttoken": "eyJhbGciOiJSUzI1NiIsImtpZCI6Ijdjc3ZqYjltZDBzcTl6ODI4c2o1Nm9rcHZ3eWpuOGp3IiwidHlwIjoiSldUIn0.eyJhdnBhaXIiOiJzaGVsbDpkb21haW5zPWFsbC9hZG1pbi8iLCJjbHVzdGVyIjoiNGU0NDJkMzEtMDAwMC0wMDAwLTAwMDAtMDAwMDAwMDAwMDAwIiwiZXhwIjoxNjg1MzY1NTE4LCJpYXQiOjE2ODUzNjQzMTgsImlkIjoiNDhkMTA1YmRmYmM0OWE1ZmNmMzlhMTBiOTYxMzg2ZTYxZGZlNDAwODVjYjAzMTVkODE4Yjc2MWM1NzM1ZGFmYSIsImlzcyI6Im5kIiwiaXNzLWhvc3QiOiIxMC4xNS4wLjExIiwicmJhYyI6W3siZG9tYWluIjoiYWxsIiwicm9sZXNSIjoxNjc3NzIxNiwicm9sZXNXIjoxLCJyb2xlcyI6W1siYWRtaW4iLCJXcml0ZVByaXYiXSxbImFwcC11c2VyIiwiUmVhZFByaXYiXV19XSwic2Vzc2lvbmlkIjoiWGNkYnBMcWE9TDRpRlhQbndZZHExT0UwIiwidXNlcmZsYWdzIjowLCJ1c2VyaWQiOjI1MDAyLCJ1c2VybmFtZSI6ImFkbWluIiwidXNlcnR5cGUiOiJsb2NhbCJ9.YJO9pU3tKIU64rHIx6L41fCuQaHhxIOJj7RzieE479n8zpgyVNT_FgWdKmQX6H7sKJpMqVHf9bgIQWCq-RKpUgmWey0mAiMBv7o3zUf3bZcM6nCPZk4ouf28Pw8yFgj2j_EUUlhaUPpxXAtP89d8vL4s9ZLpzDCZDWWXeAzNCKtZj6ZLEt_EGRxKXoHsObGB9x_W0iwB4OCa6NjQYMfA0cN7iV3Iwk29cF4uGhVZqbyOCjQkDpUZjaV-IFtu6VReGckviDQBiFs3PXM9-j8FOxAs4IW5Z-2NZG1U-Tdbm3bneMtKlitkXngZjXAXm9WizpIusOa32Z-pChlGQhPBDg",
        "username": "admin",
        "usertype": "local",
        "rbac": "[{\"domain\":\"all\",\"rolesR\":16777216,\"rolesW\":1,\"roles\":[[\"admin\",\"WritePriv\"],[\"app-user\",\"ReadPriv\"]]}]",
        "statusCode": 200,
        "token": "eyJhbGciOiJSUzI1NiIsImtpZCI6Ijdjc3ZqYjltZDBzcTl6ODI4c2o1Nm9rcHZ3eWpuOGp3IiwidHlwIjoiSldUIn0.eyJhdnBhaXIiOiJzaGVsbDpkb21haW5zPWFsbC9hZG1pbi8iLCJjbHVzdGVyIjoiNGU0NDJkMzEtMDAwMC0wMDAwLTAwMDAtMDAwMDAwMDAwMDAwIiwiZXhwIjoxNjg1MzY1NTE4LCJpYXQiOjE2ODUzNjQzMTgsImlkIjoiNDhkMTA1YmRmYmM0OWE1ZmNmMzlhMTBiOTYxMzg2ZTYxZGZlNDAwODVjYjAzMTVkODE4Yjc2MWM1NzM1ZGFmYSIsImlzcyI6Im5kIiwiaXNzLWhvc3QiOiIxMC4xNS4wLjExIiwicmJhYyI6W3siZG9tYWluIjoiYWxsIiwicm9sZXNSIjoxNjc3NzIxNiwicm9sZXNXIjoxLCJyb2xlcyI6W1siYWRtaW4iLCJXcml0ZVByaXYiXSxbImFwcC11c2VyIiwiUmVhZFByaXYiXV19XSwic2Vzc2lvbmlkIjoiWGNkYnBMcWE9TDRpRlhQbndZZHExT0UwIiwidXNlcmZsYWdzIjowLCJ1c2VyaWQiOjI1MDAyLCJ1c2VybmFtZSI6ImFkbWluIiwidXNlcnR5cGUiOiJsb2NhbCJ9.YJO9pU3tKIU64rHIx6L41fCuQaHhxIOJj7RzieE479n8zpgyVNT_FgWdKmQX6H7sKJpMqVHf9bgIQWCq-RKpUgmWey0mAiMBv7o3zUf3bZcM6nCPZk4ouf28Pw8yFgj2j_EUUlhaUPpxXAtP89d8vL4s9ZLpzDCZDWWXeAzNCKtZj6ZLEt_EGRxKXoHsObGB9x_W0iwB4OCa6NjQYMfA0cN7iV3Iwk29cF4uGhVZqbyOCjQkDpUZjaV-IFtu6VReGckviDQBiFs3PXM9-j8FOxAs4IW5Z-2NZG1U-Tdbm3bneMtKlitkXngZjXAXm9WizpIusOa32Z-pChlGQhPBDg"
    }
For subsequent API requests, the value associated with the jwttoken key will be used as the value of the AuthCookie cookie.
All JWT tokens expire after a certain period of time. Since all subsequent API calls rely on the authentication token you receive when you first login, you may want to refresh the existing token instead of obtaining a new one by logging in again.
The steps below are provided for informational purposes only and there is no need to perform these steps for this lab.
If you wanted to refresh the token, you would send an empty payload using the POST method with the jwttoken as AuthCookie cookie to the API endpoint /refresh:
POST https://10.15.0.98/refresh
where the jwttoken is in the request cookie as AuthCookie:
AuthCookie: value of jwttoken
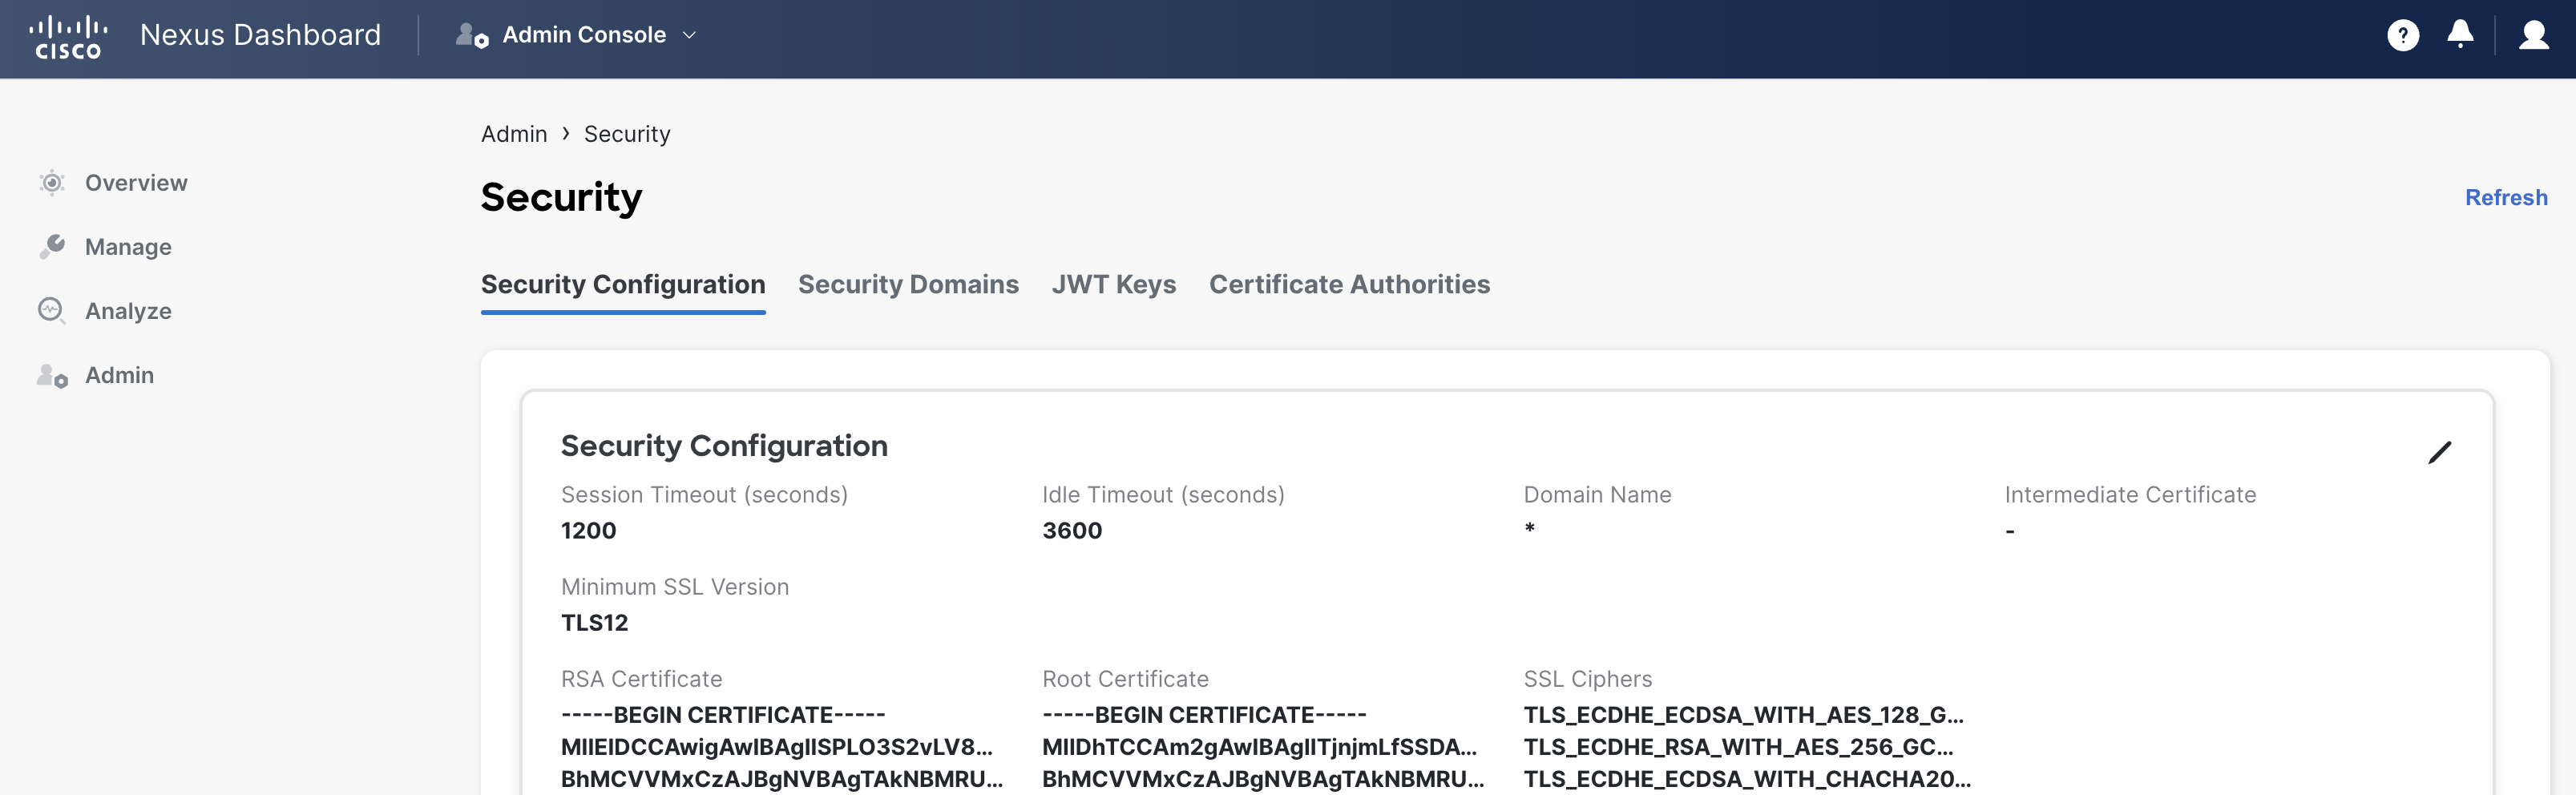
The default token duration is 20 minutes, but can be changed under the ND Admin Console. We are NOT going to update the token duration in this lab, but if you wanted to do so, you would:
Continue to the next section to explore the NDFC API Docs.