For the deploy role tasks, ensure you are in your VSCode Terminal and open the main.yml file found in roles/deploy/tasks/ using the VSCode code keyword as before.
code-server -r ~/workspace/ndfclab/ansible/roles/deploy/tasks/main.yml
It is finally time to add tasks to your deploy role. The tasks will be used to save the configuration and deploy the pending fabric configuration to your switches.
For these tasks, we leverage the generic fallback module cisco.dcnm.dcnm_rest to interact with the NDFC REST API.
The first task is the API to save the configuration of the fabric, while the second is to trigger the deployment of the fabric configuration.
For these tasks, you again use the block keyword. These tasks are grouped and have a common tag of deploy associated with them.
- name: Role Entry Point - [deploy]
  ansible.builtin.debug:
    msg:
      - "----------------------------------------------------------------"
      - "+             Calling Role - [deploy]                          +"
      - "----------------------------------------------------------------"

- name: Config-Save & Deploy for NDFC Fabric {{ fabric_settings.FABRIC_NAME }}
  tags:
    - deploy
  block:
    - name: Config-Save for Fabric {{ fabric_settings.FABRIC_NAME }}
      cisco.dcnm.dcnm_rest:
        method: POST
        path: "/appcenter/cisco/ndfc/api/v1/lan-fabric/rest/control/fabrics/{{ fabric_settings.FABRIC_NAME }}/config-save"

    - name: Deploy for Fabric {{ fabric_settings.FABRIC_NAME }}
      cisco.dcnm.dcnm_rest:
        path: "/appcenter/cisco/ndfc/api/v1/lan-fabric/rest/control/fabrics/{{ fabric_settings.FABRIC_NAME }}/config-deploy?forceShowRun=false"
        method: POST
fabric.yml Ansible PlaybookNavigate back to your fabric.yml file by using the VSCode code command:
code-server -r ~/workspace/ndfclab/ansible/fabric.yml
deploy role under the roles: section of the playbook
Your fabric.yml file should already be populated from the previous section. With the file open, you only need to add the highlighted line, which should be line number 13
in your file. You can do this by highlighting the text in the lab guide and copying then pasting in your file or typing the line in your file. After one of those actions, press the
return key such that there is a new line after where you entered - manage_overlay. Note: Make sure your indentation is correct and aligns with the previous item which should
be - manage_overlay.
---
# This is the top level build playbook that runs the various
# Ansible roles that will be used to build out the fabric

- name: Build VXLAN EVPN Fabric on NDFC
  hosts: ndfc
  gather_facts: false

  roles:
    - create_fabric
    - add_inventory
    - manage_overlay
    - deploy # Add this line under the manage_overlay role from the previous section
Make sure you are in the root Ansible directory
cd ~/workspace/ndfclab/ansible
From the root ansible project directory execute the following command.
ansible-playbook -i hosts.stage.yml fabric.yml --tags deploy
Upon a successful run of the playbook your output should look as follows:
  PLAY [Build VXLAN EVPN Fabric on NDFC] **********************************************************************************************************************************

  TASK [deploy : Config-Save for Fabric fabric-stage] *********************************************************************************************************************
  ok: [10.15.0.98]

  TASK [deploy : Deploy for Fabric fabric-stage] **************************************************************************************************************************
  ok: [10.15.0.98]

  PLAY RECAP **************************************************************************************************************************************************************
  10.15.0.98                 : ok=2    changed=0    unreachable=0    failed=0    skipped=0    rescued=0    ignored=0
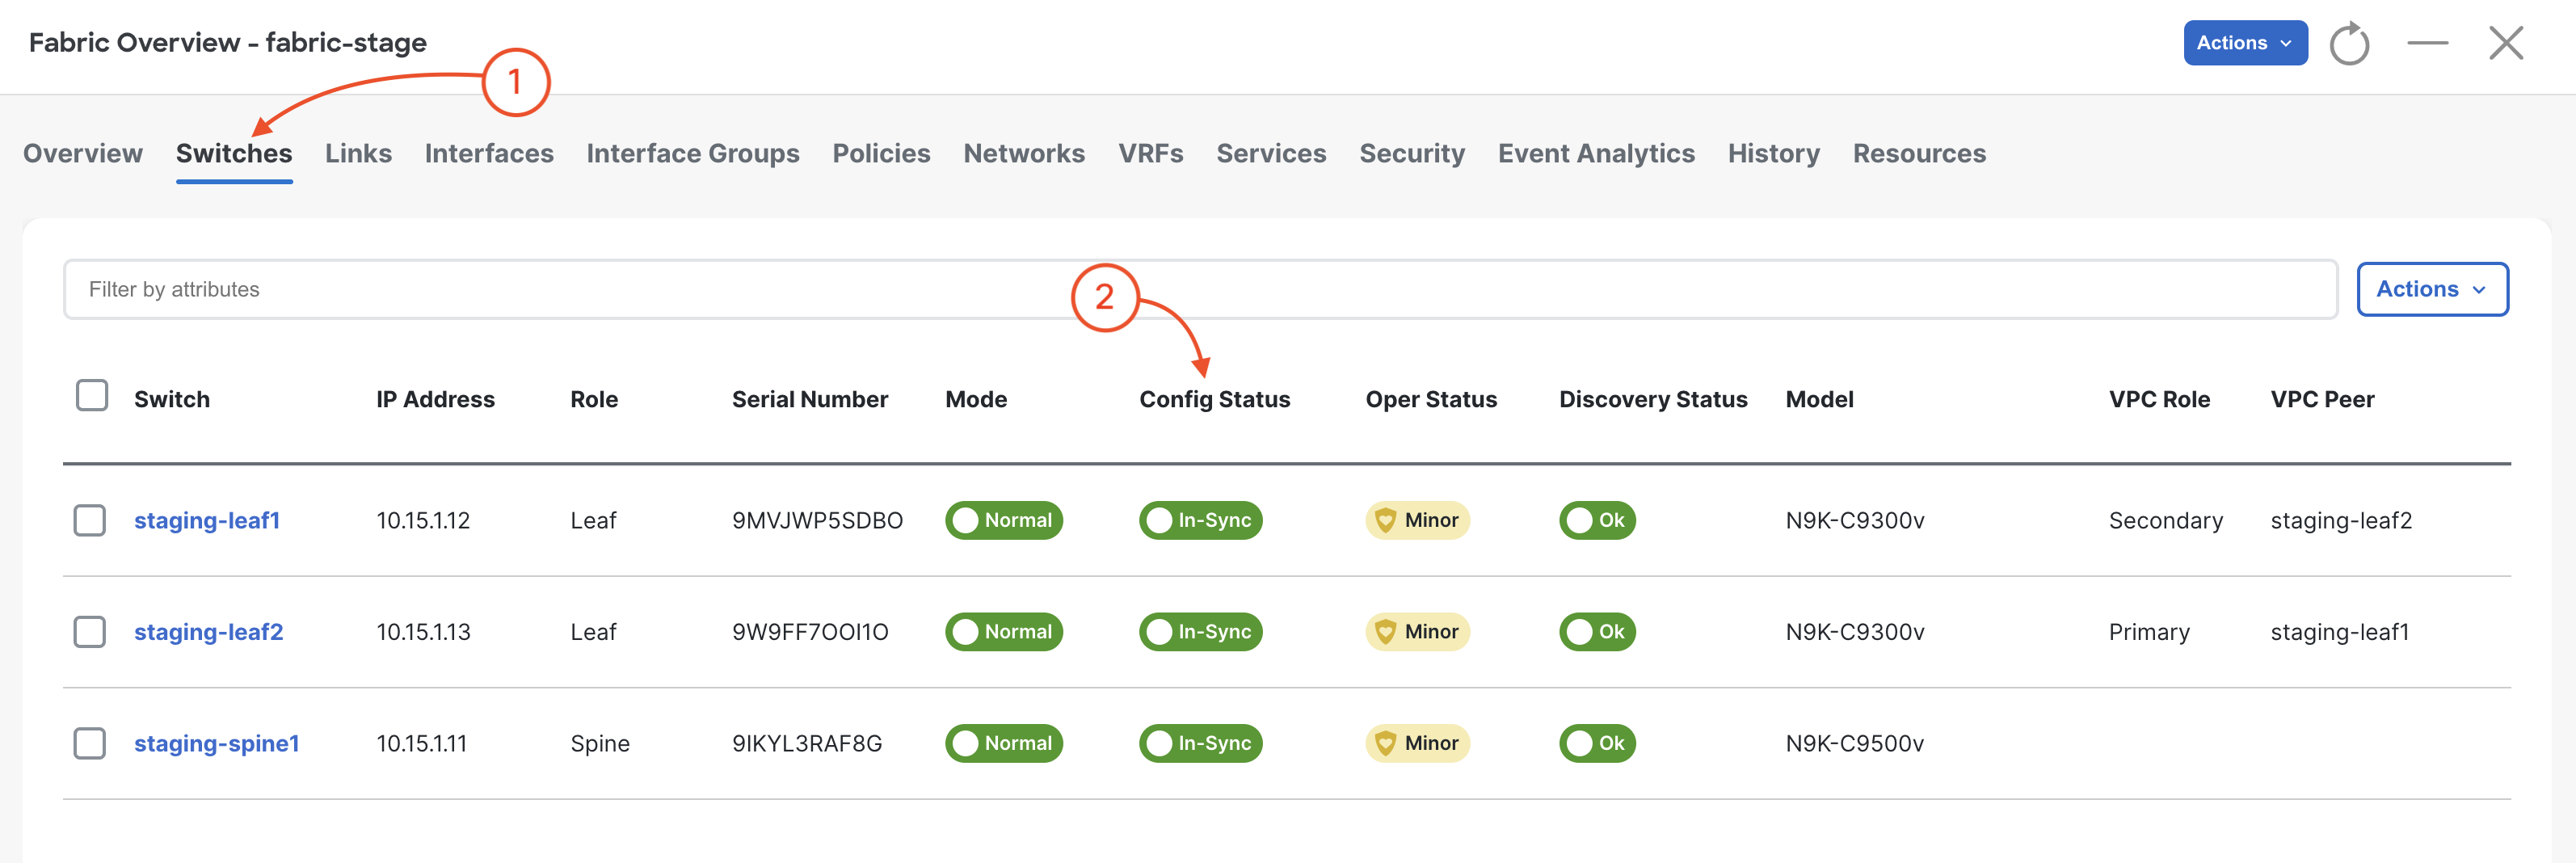
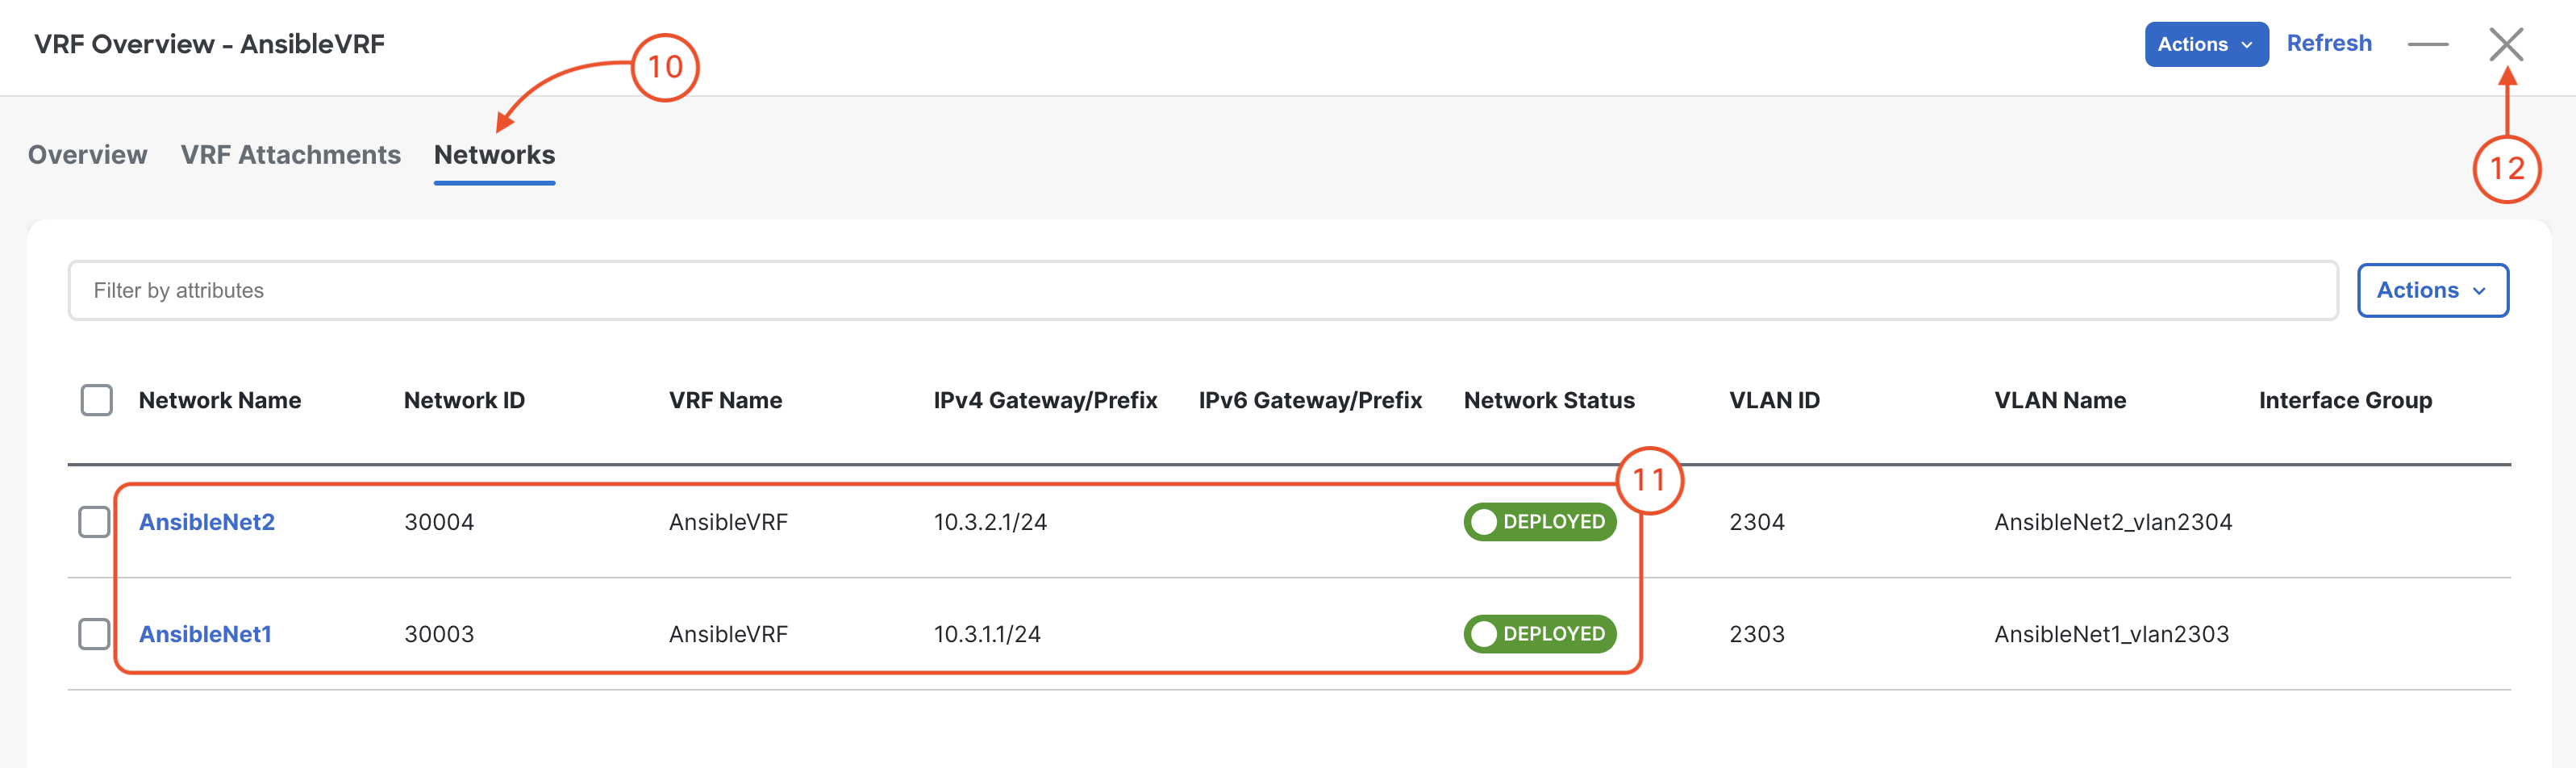
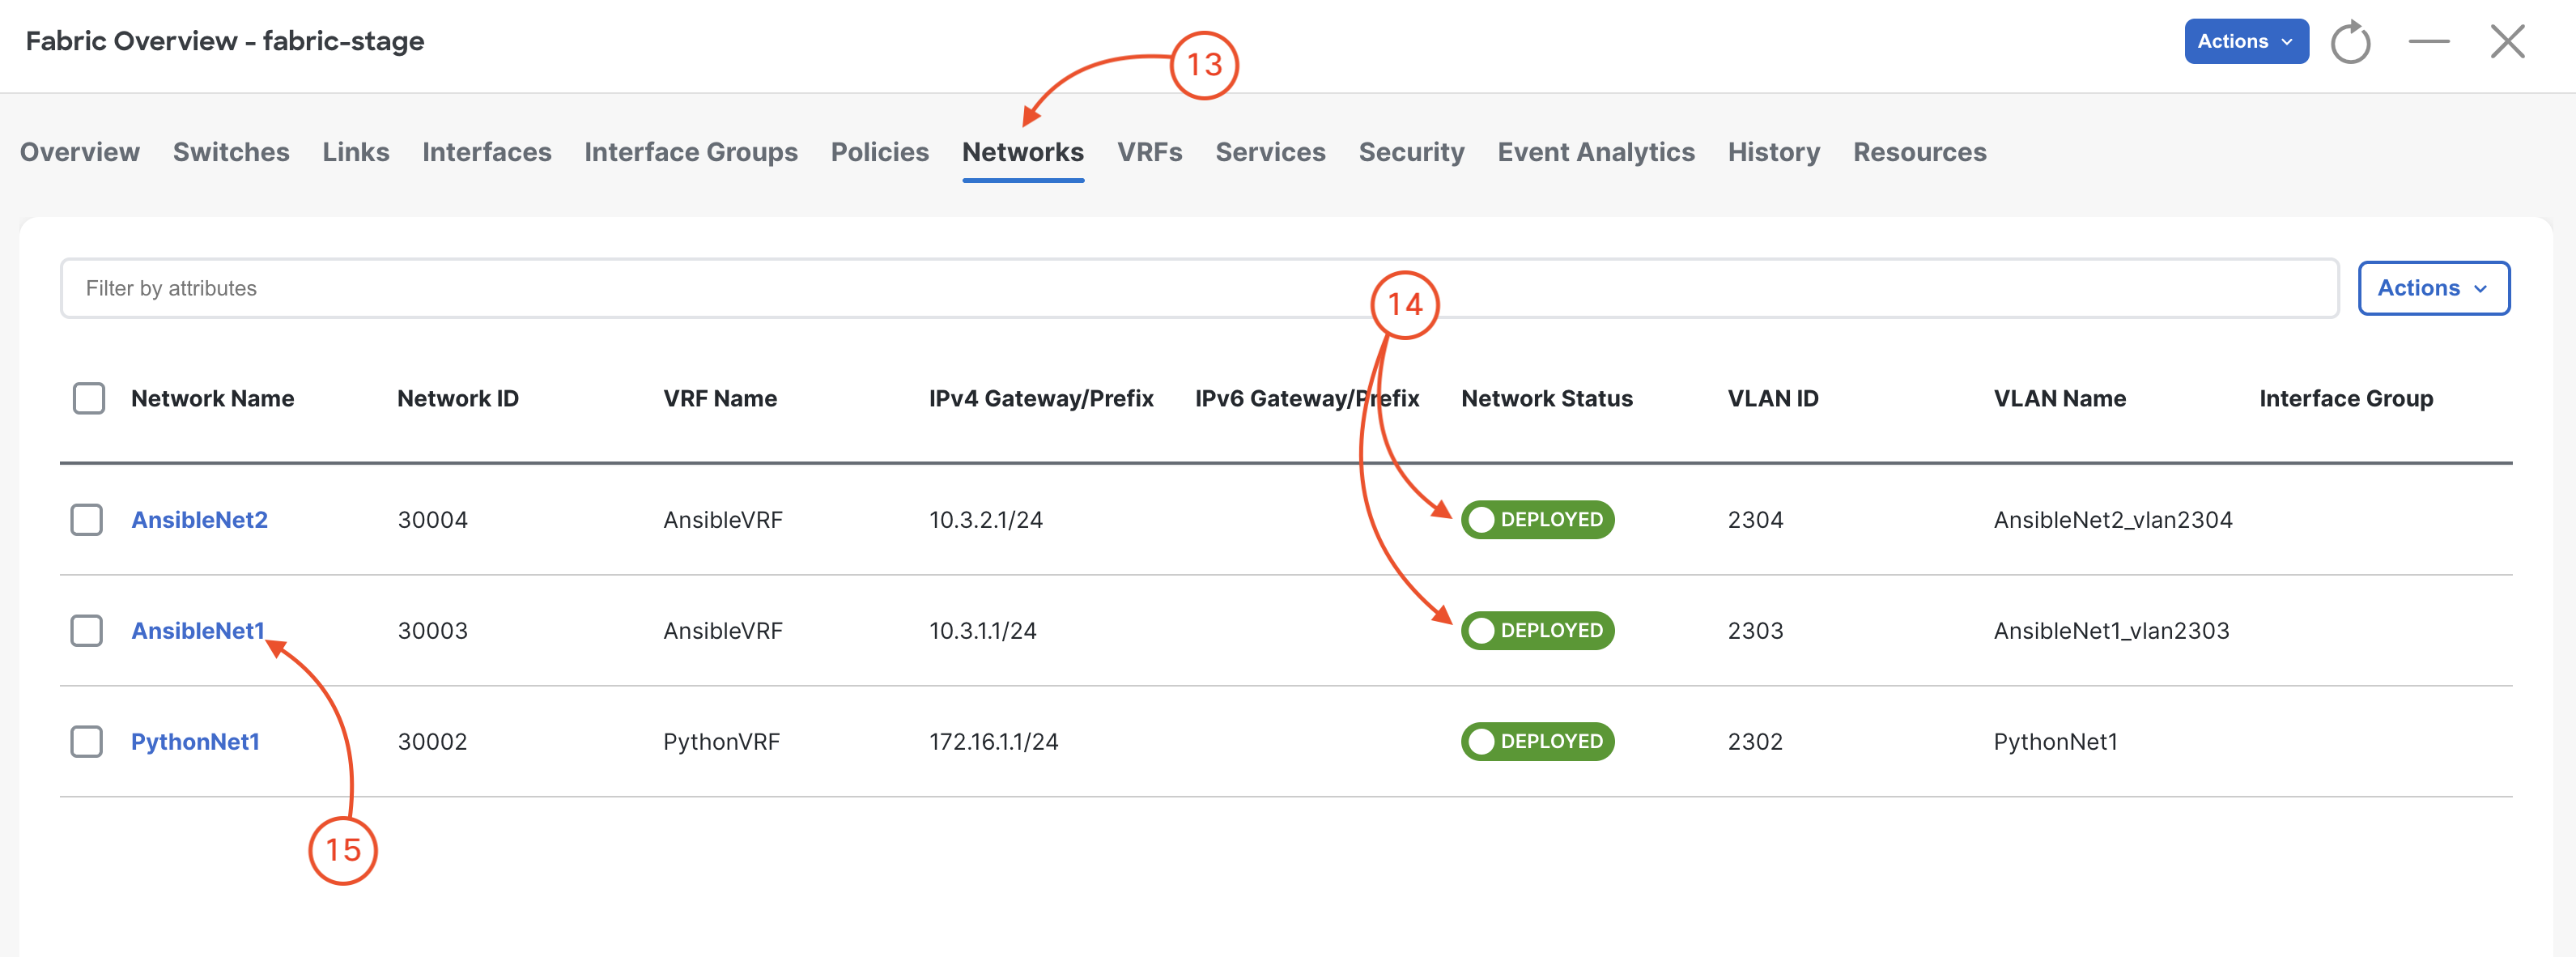
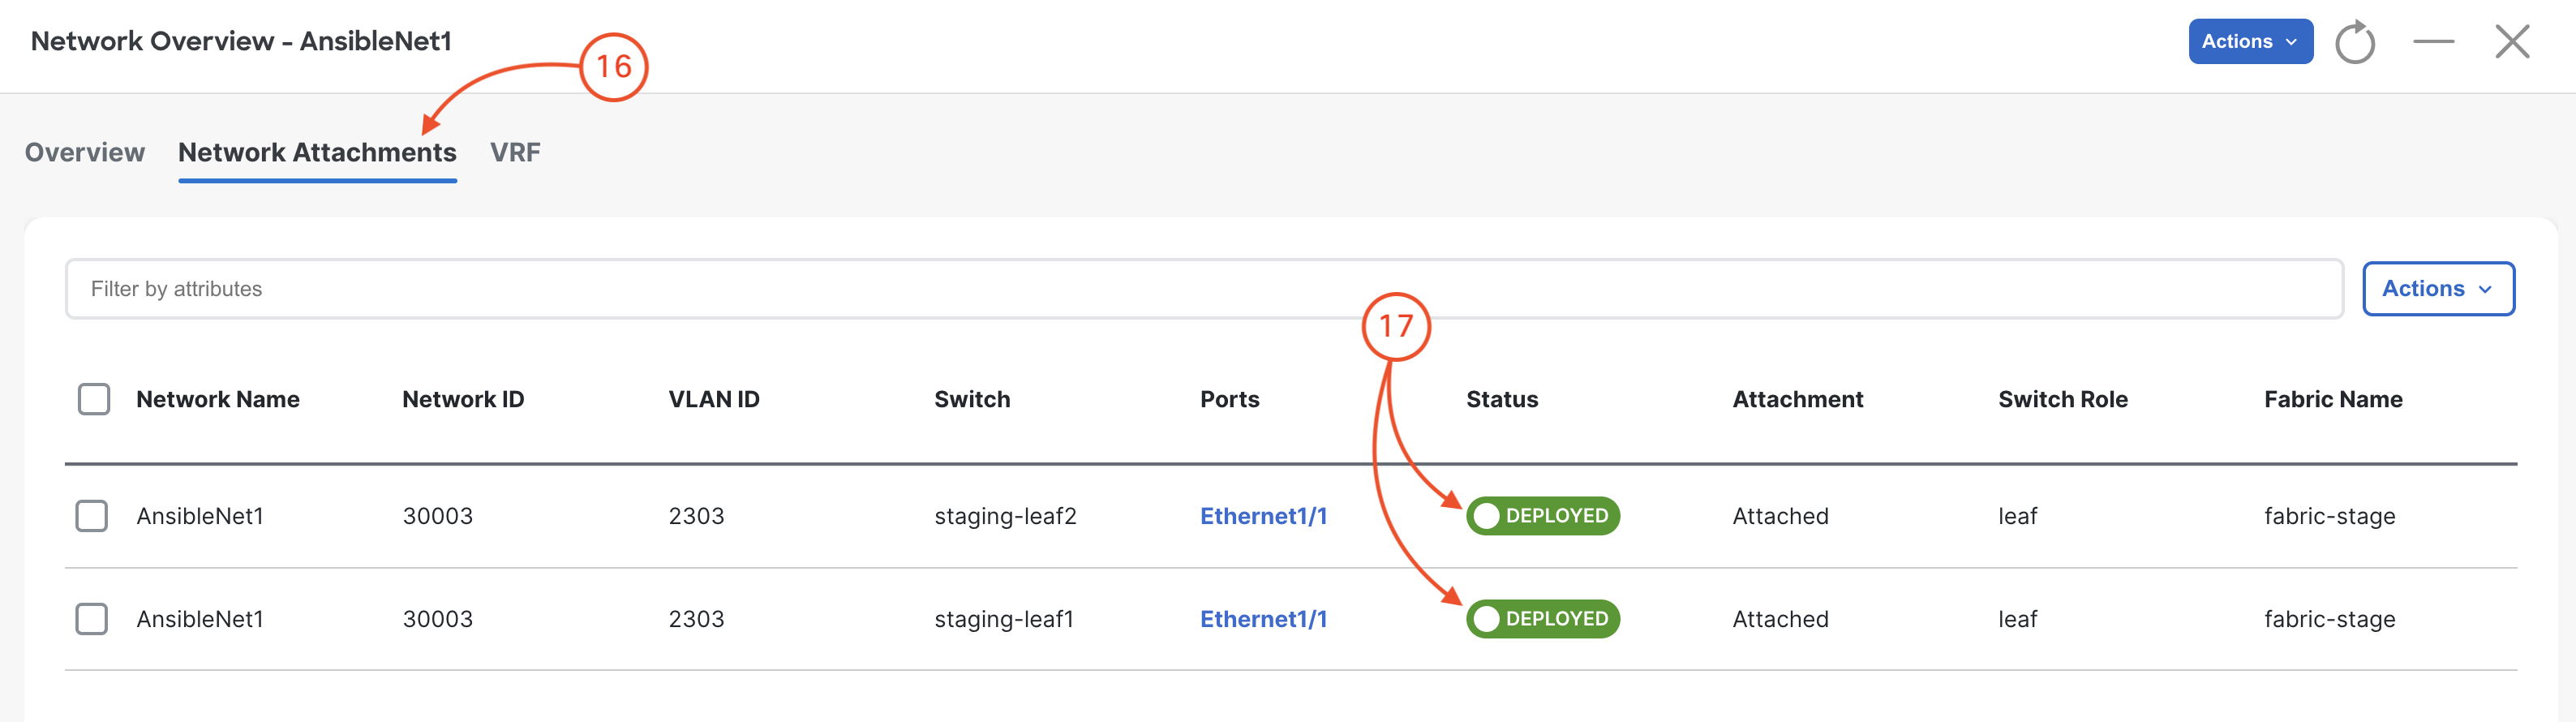
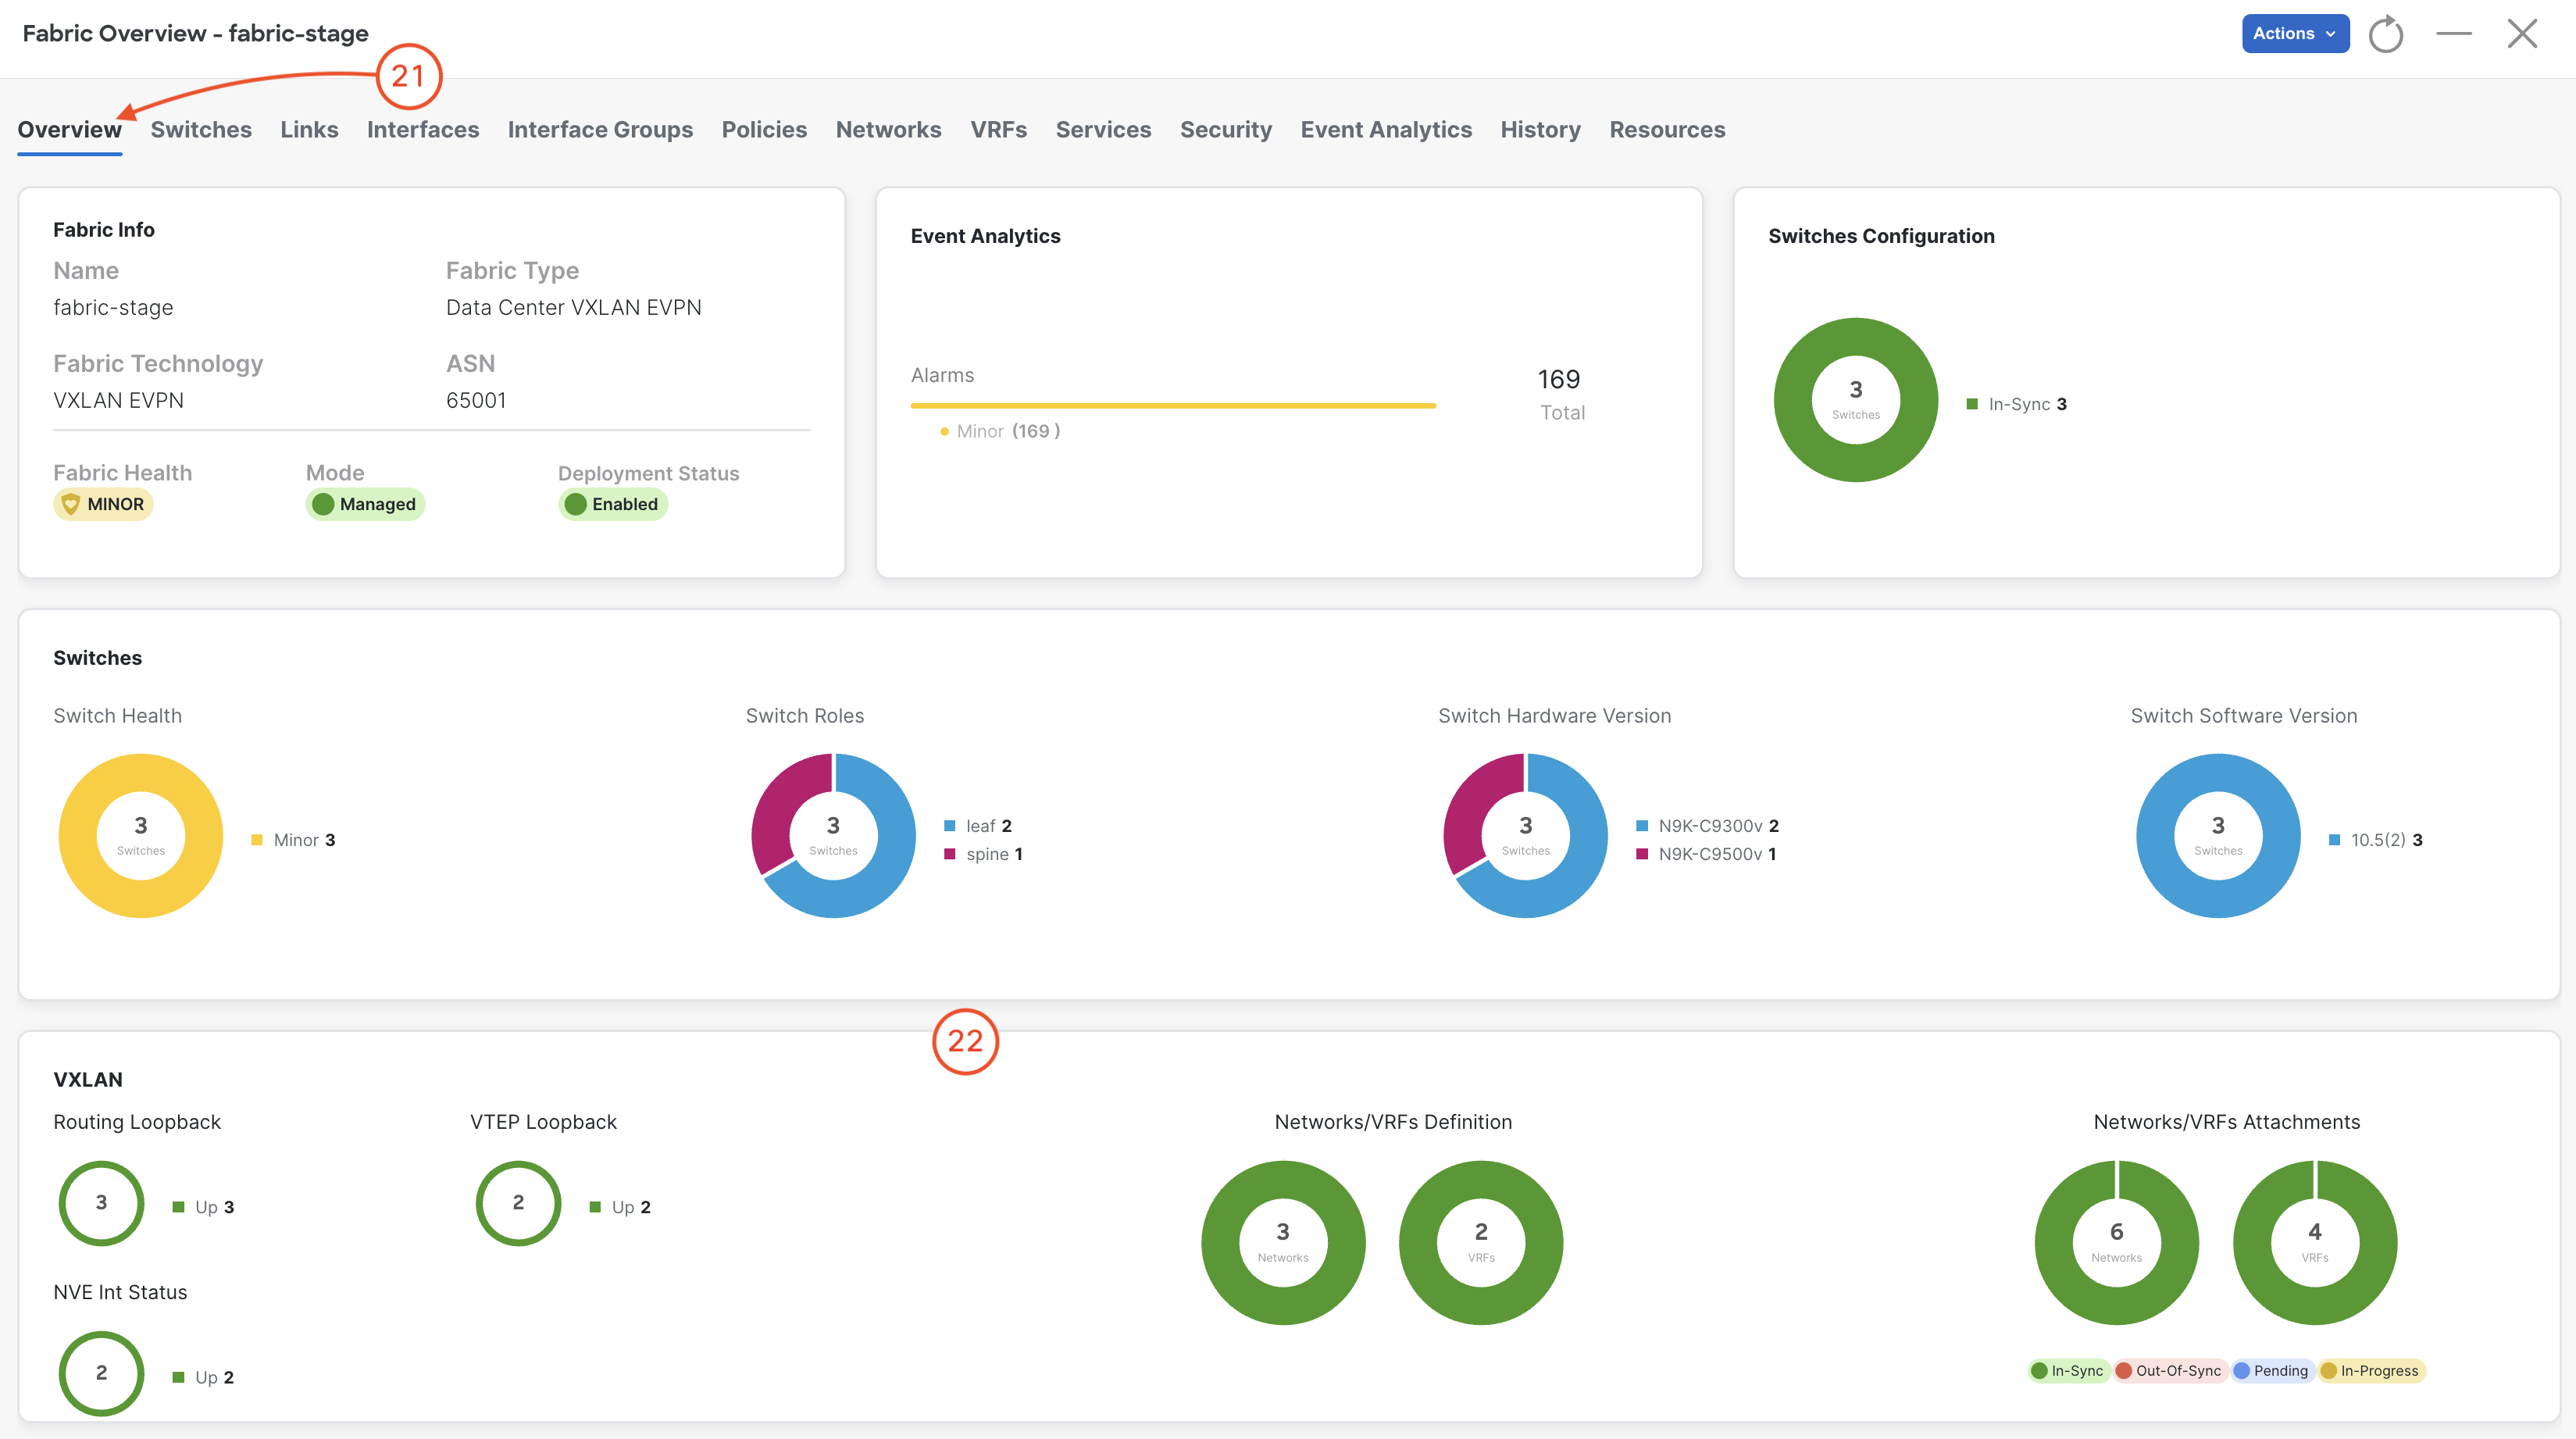
Return to your NDFC browser window and verify the deployment of the fabric configuration.
In-Sync. If not, please click the refresh button to the right of the Actions button

Next, you will build upon what you learned here with an abstraction layer on top of Ansible NDFC collection with an easy-to-use data model-driven VXLAN as Code solution collection.