You are going to create a new branch in your repo called new_overlay. This is a common practice to make changes to your code and validate those changes against your fabric in its own branch before merging them into your main branch.
git checkout -b new_overlay
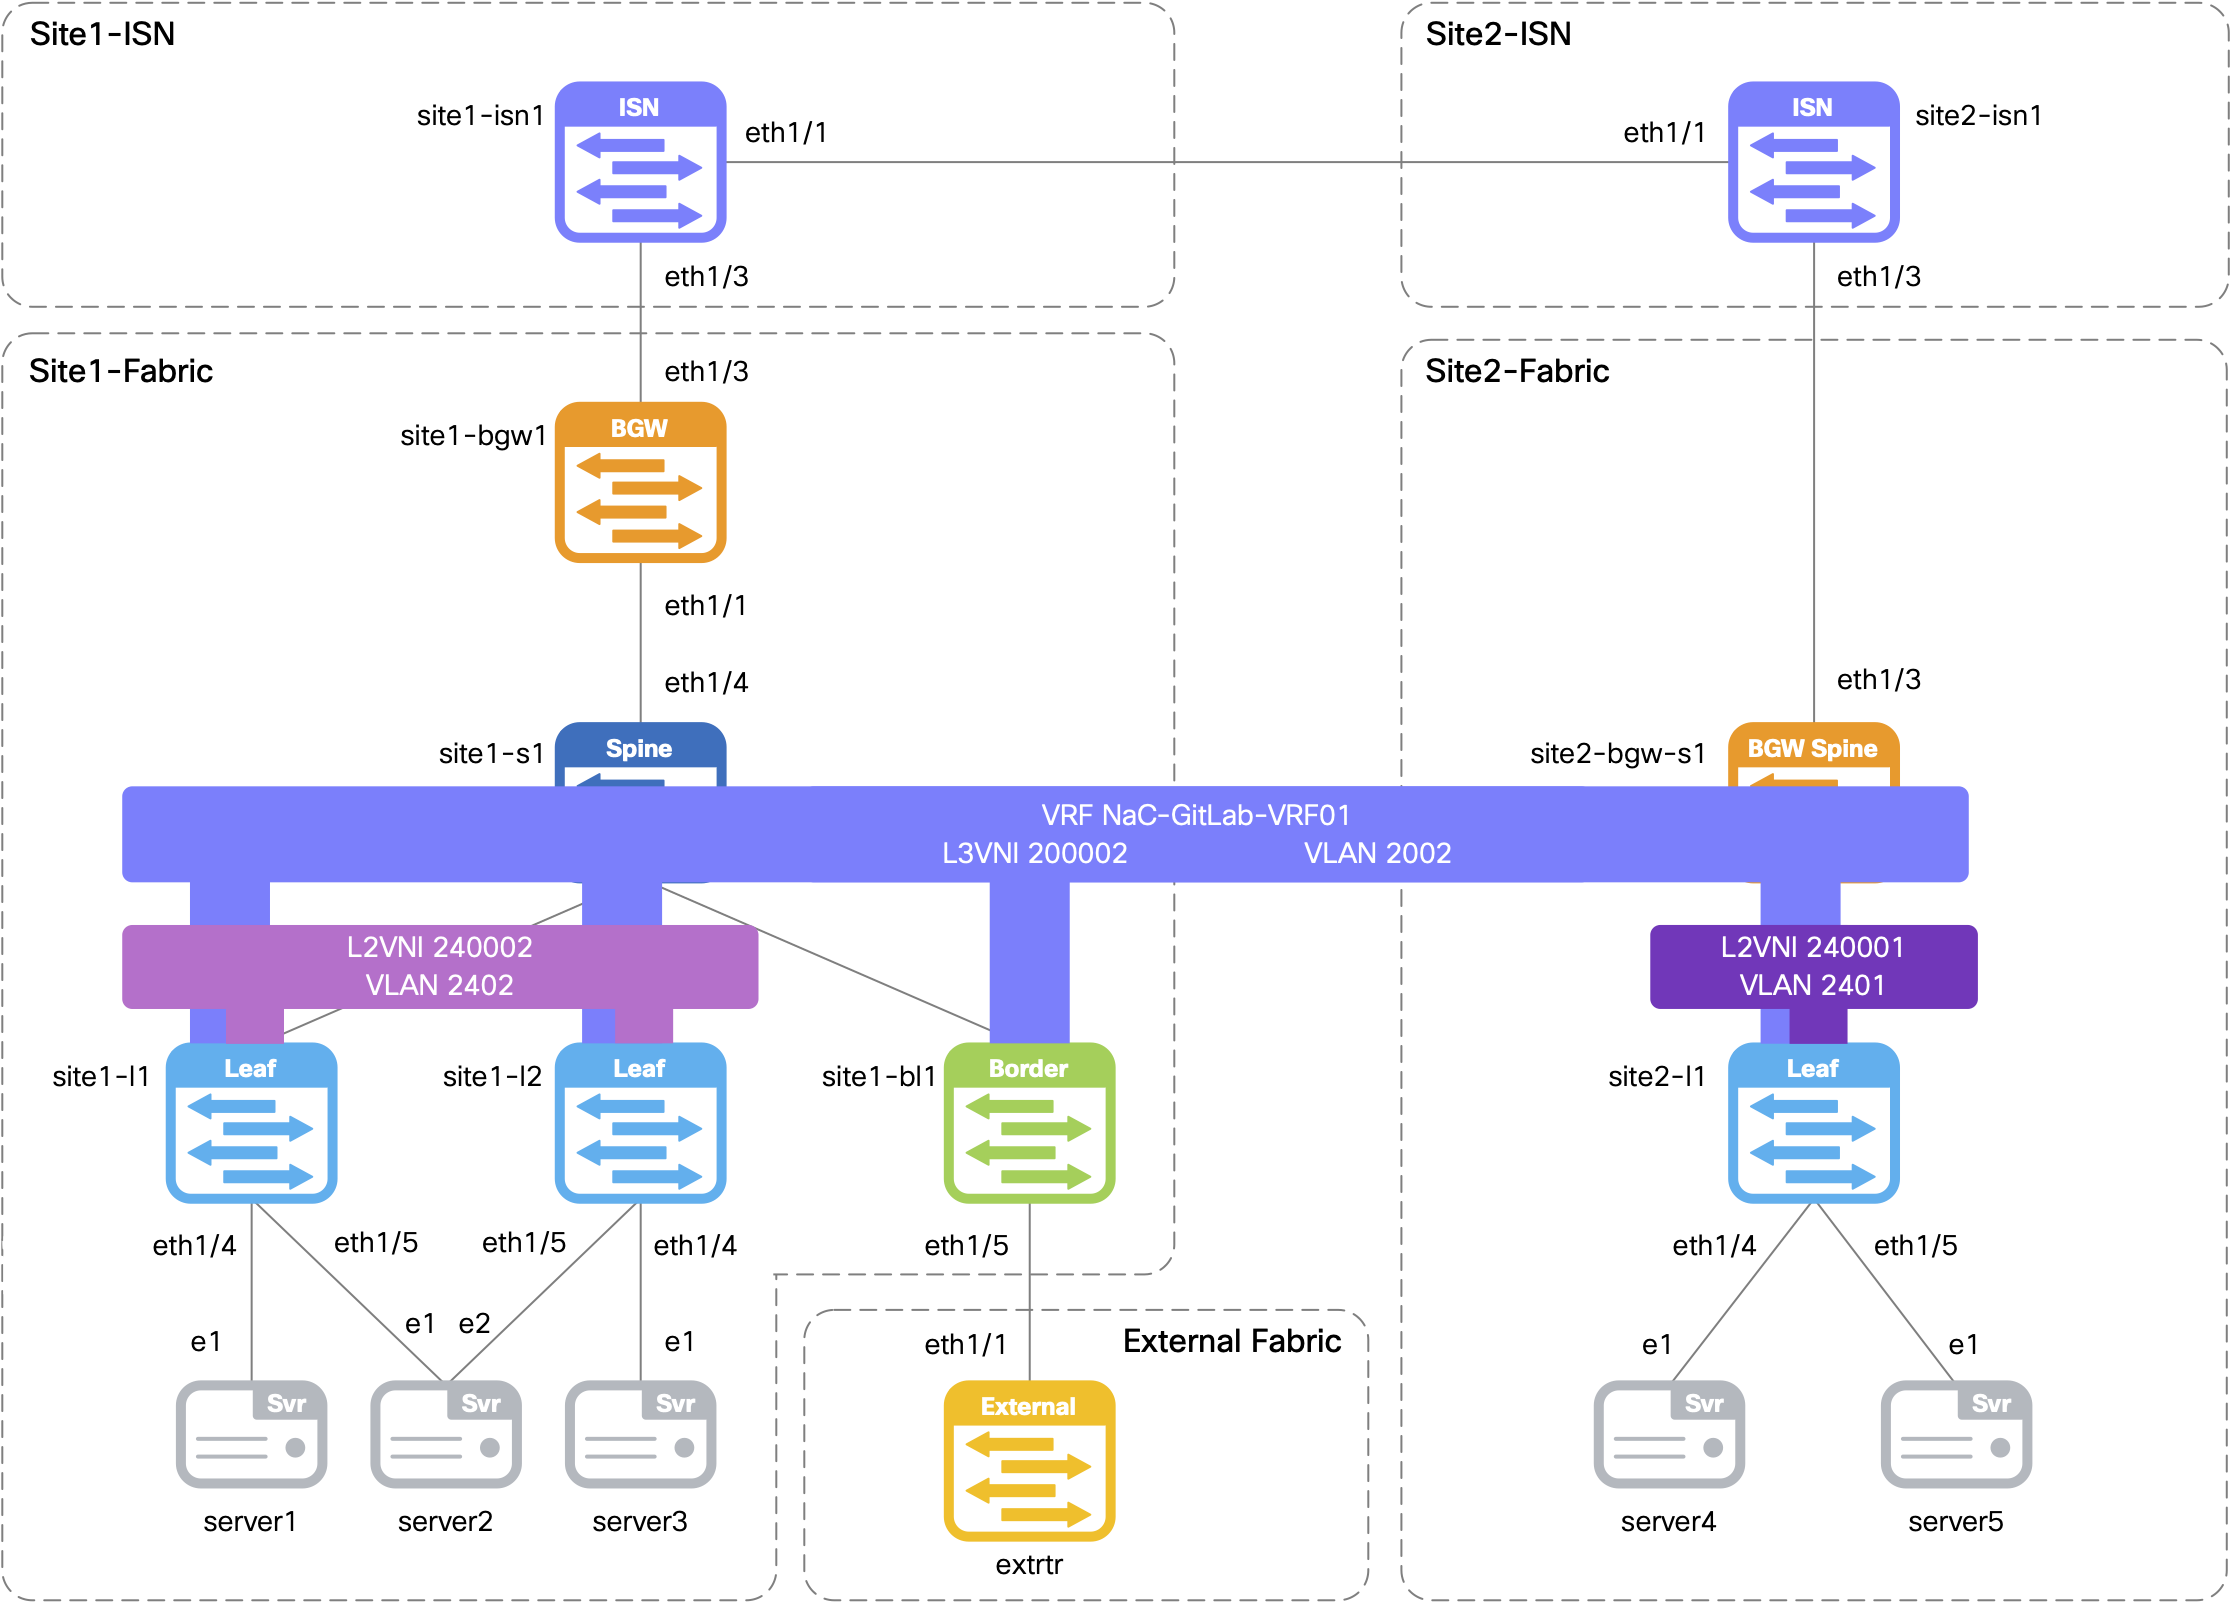
Since you have a central variable file for all of your VRFs and Networks, all you need to do is modify the file to add the new data. Normally you would open this file and add the new Networks, but to make it easy, we are going to replace the file you created earlier with the new Networks added in.
touch ~/workspace/ndlab/nac/host_vars/msd-fabric-group/new_overlay.nac.yml
cat << EOF > ~/workspace/ndlab/nac/host_vars/msd-fabric-group/new_overlay.nac.yml
---
vxlan:
multisite:
overlay:
vrfs:
- name: NaC-VRF
vrf_id: 200002
vlan_id: 2002
child_fabrics:
- name: site1-fabric
- name: site2-fabric
vrf_attach_group: all
vrf_attach_groups:
- name: all
switches:
- hostname: site1-l1
- hostname: site1-l2
- hostname: site1-bl1
- hostname: site1-bgw1
- hostname: site2-l1
- hostname: site2-bgw-s1
networks:
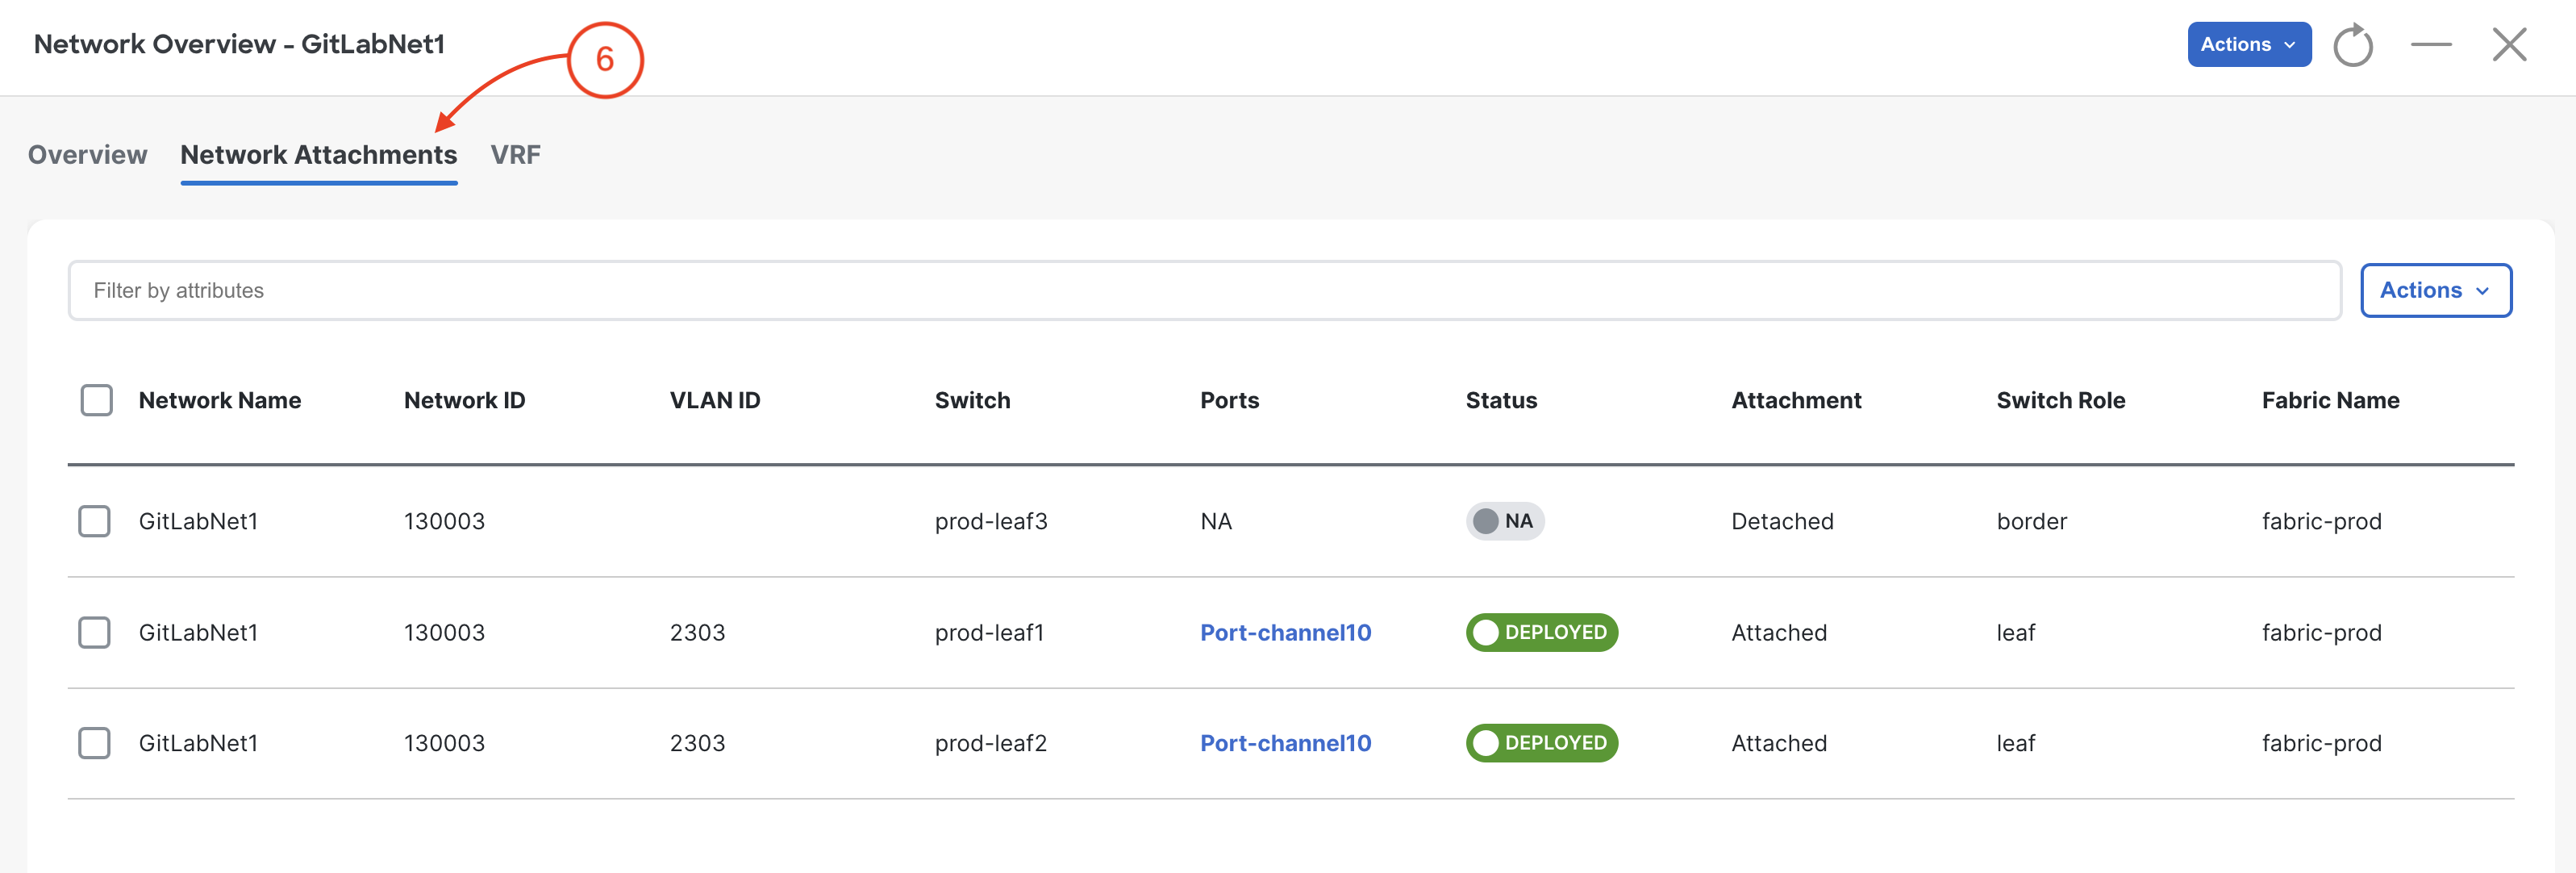
- name: NaC-GitLab-Net01
vrf_name: NaC-GitLab-VRF01
net_id: 250002
vlan_id: 2502
vlan_name: NaC-Net01_vlan2502
gw_ip_address: 192.168.3.1/24
child_fabrics:
- name: site1-fabric
- name: site2-fabric
network_attach_group: site1
- name: NaC-GitLab-Net02
vrf_name: NaC-GitLab-VRF01
net_id: 260001
vlan_id: 2601
vlan_name: NaC-Net02_vlan2601
gw_ip_address: 192.168.4.1/24
child_fabrics:
- name: site1-fabric
- name: site2-fabric
network_attach_group: site2
network_attach_groups:
- name: site1
switches:
- hostname: site1-l1
ports:
- port-channel5
- hostname: site1-l2
ports:
- port-channel5
- name: site2
switches:
- hostname: site2-l1
ports:
- ethernet1/5
EOF
overlay.yml for Committing to the GitLab Repo
git add .
git status .
The following file is staged for commit. Make sure your list matches the output below!
    On branch new_overlay
    Changes to be committed:
    (use "git restore --staged <file>..." to unstage)
            new file:   host_vars/msd-fabric-group/new_overlay.nac.yml
git commit -m "Add new Overlay"
    [new_overlay 4948e62] Add new Overlay
    1 file changed, 57 insertions(+)
    create mode 100644 host_vars/msd-fabric-group/new_overlay.nac.yml
new_overlay Branch
git push -u origin new_overlay
    Enumerating objects: 8, done.
    Counting objects: 100% (8/8), done.
    Delta compression using up to 8 threads
    Compressing objects: 100% (5/5), done.
    Writing objects: 100% (5/5), 734 bytes | 367.00 KiB/s, done.
    Total 5 (delta 3), reused 0 (delta 0), pack-reused 0
    remote:
    remote: To create a merge request for new_overlay, visit:
    remote:   http://10.15.0.159/Pod01_2025_01/LTRDCN-3439/-/merge_requests/new?merge_request%5Bsource_branch%5D=new_overlay
    remote:
    To 10.15.0.159:Pod01_2025_01/LTRDCN-3439.git
    * [new branch]      new_overlay -> new_overlay
    Branch 'new_overlay' set up to track remote branch 'new_overlay' from 'origin'.
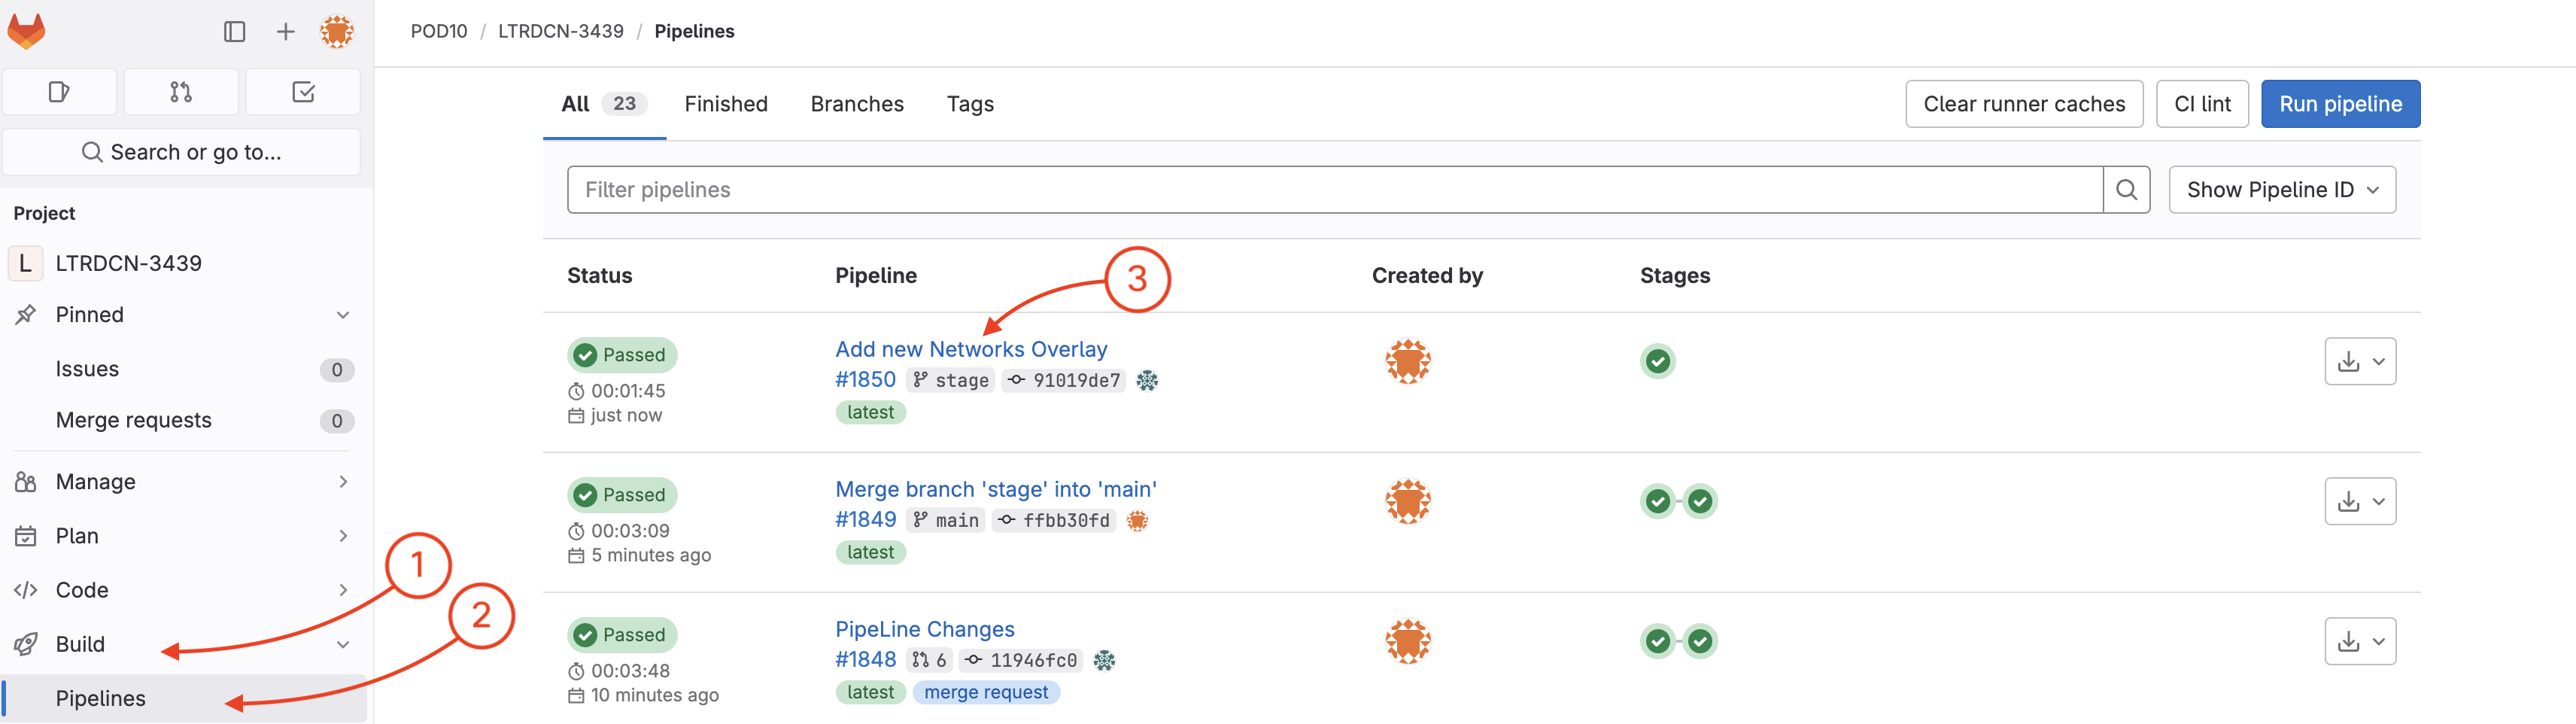
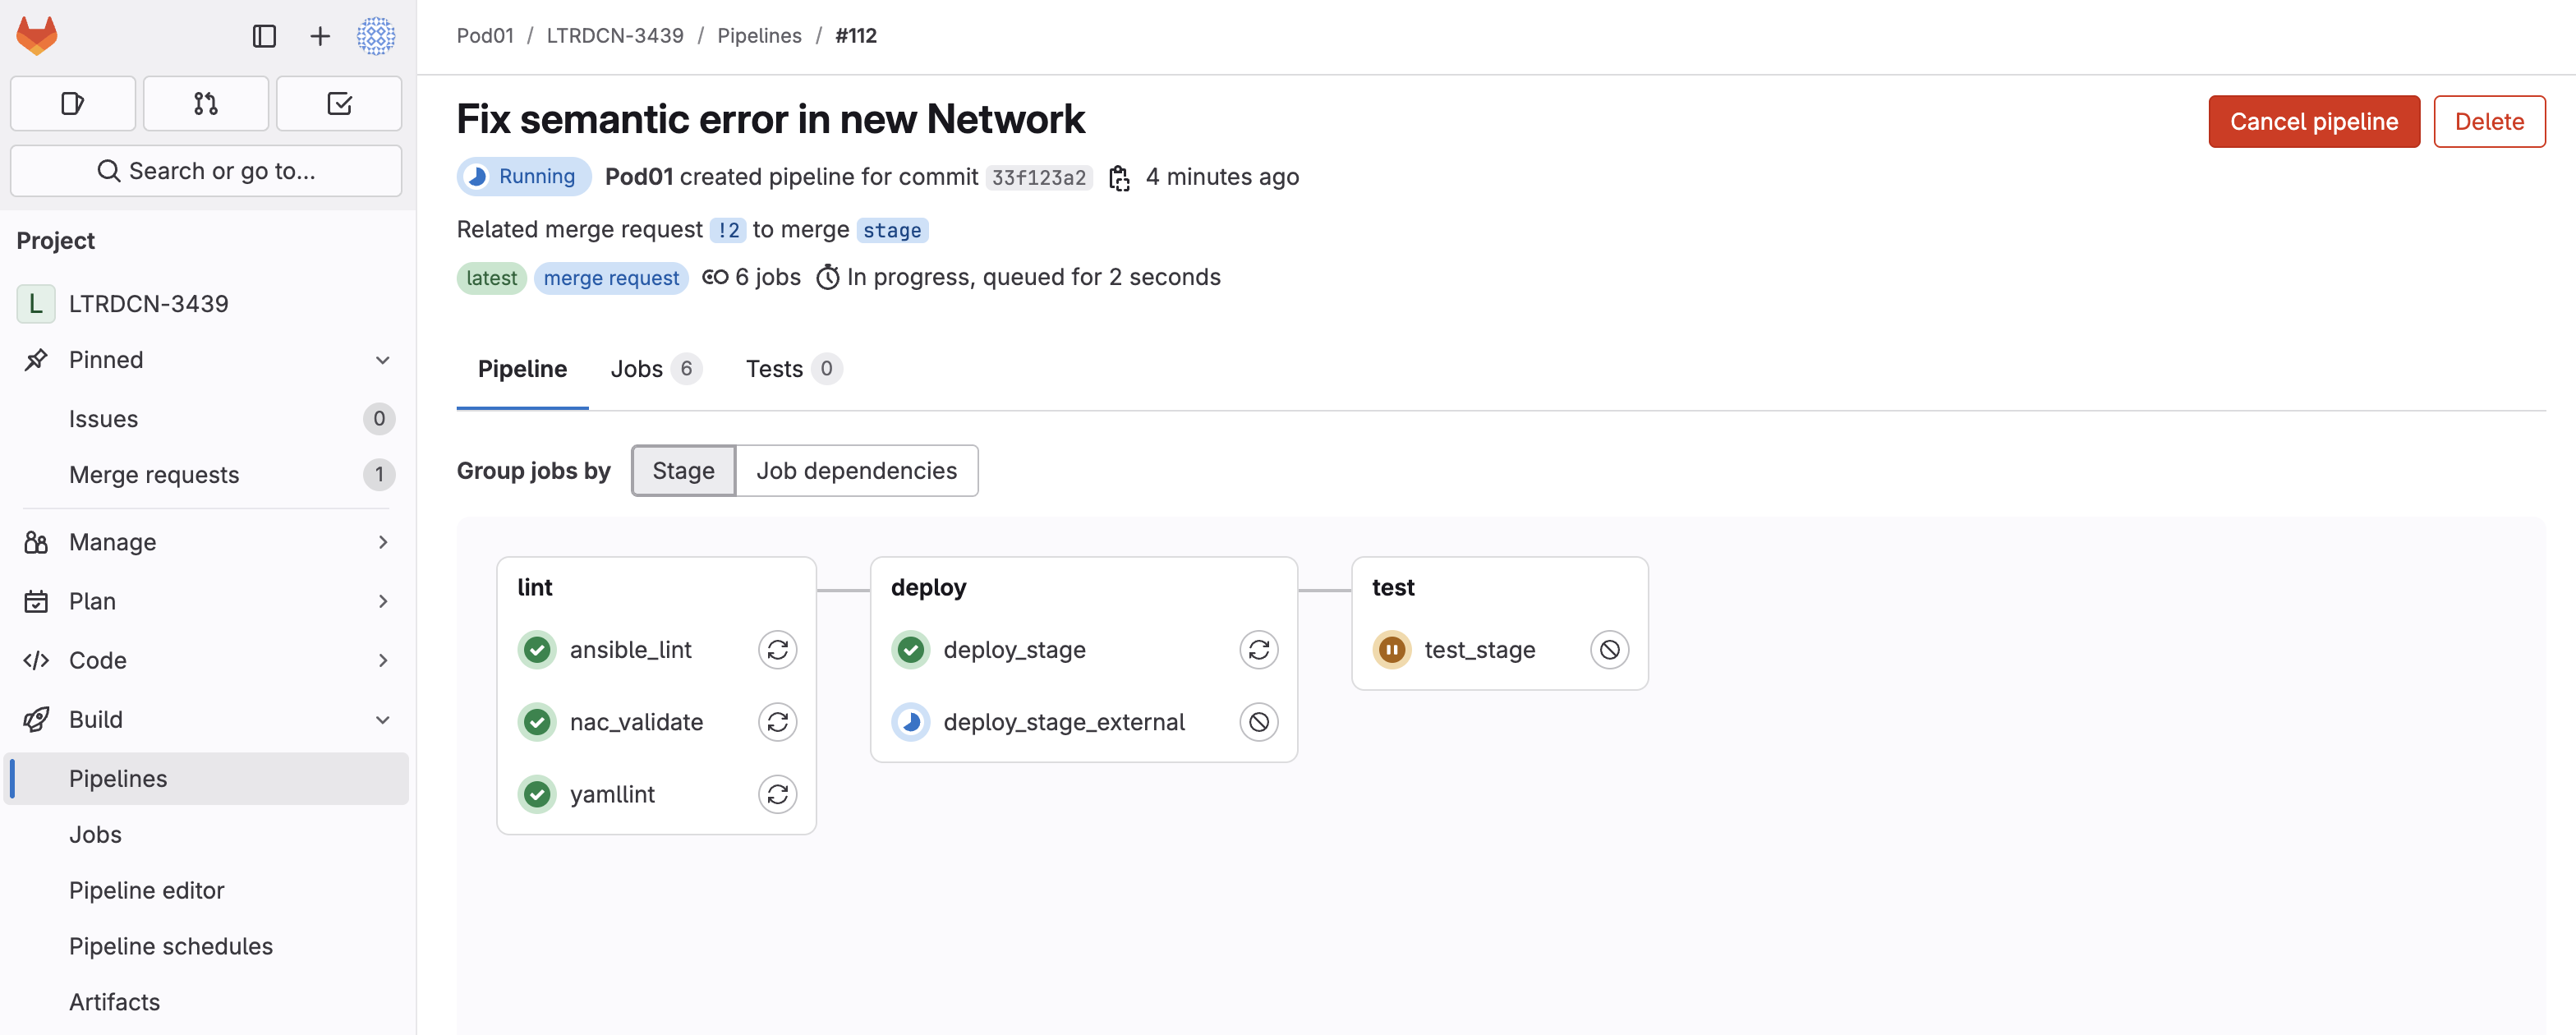
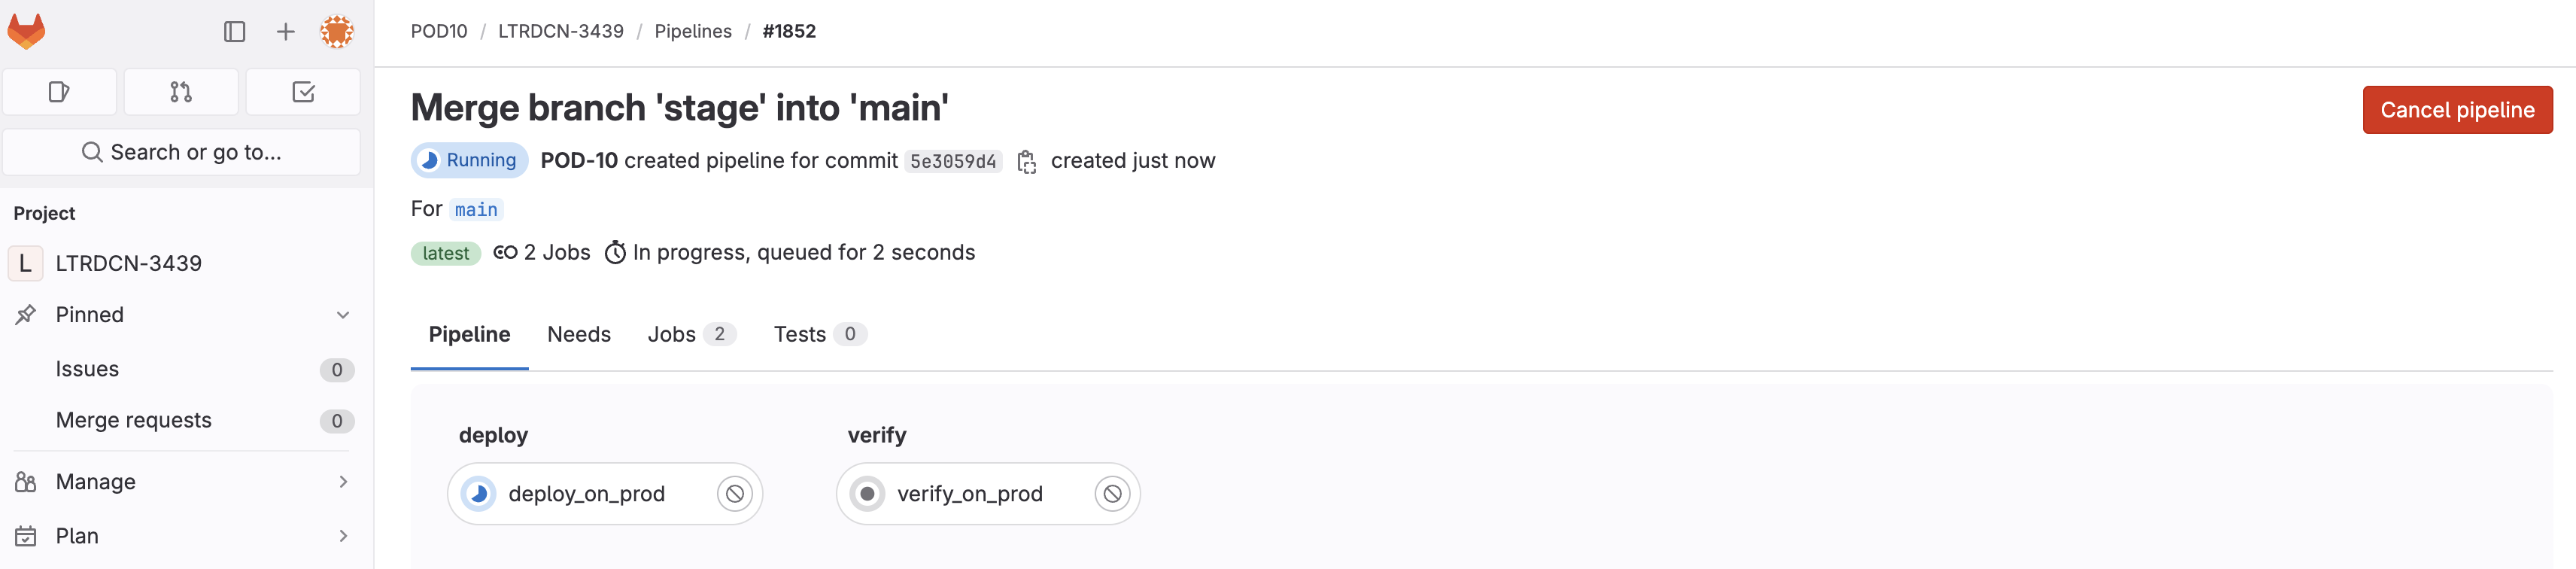
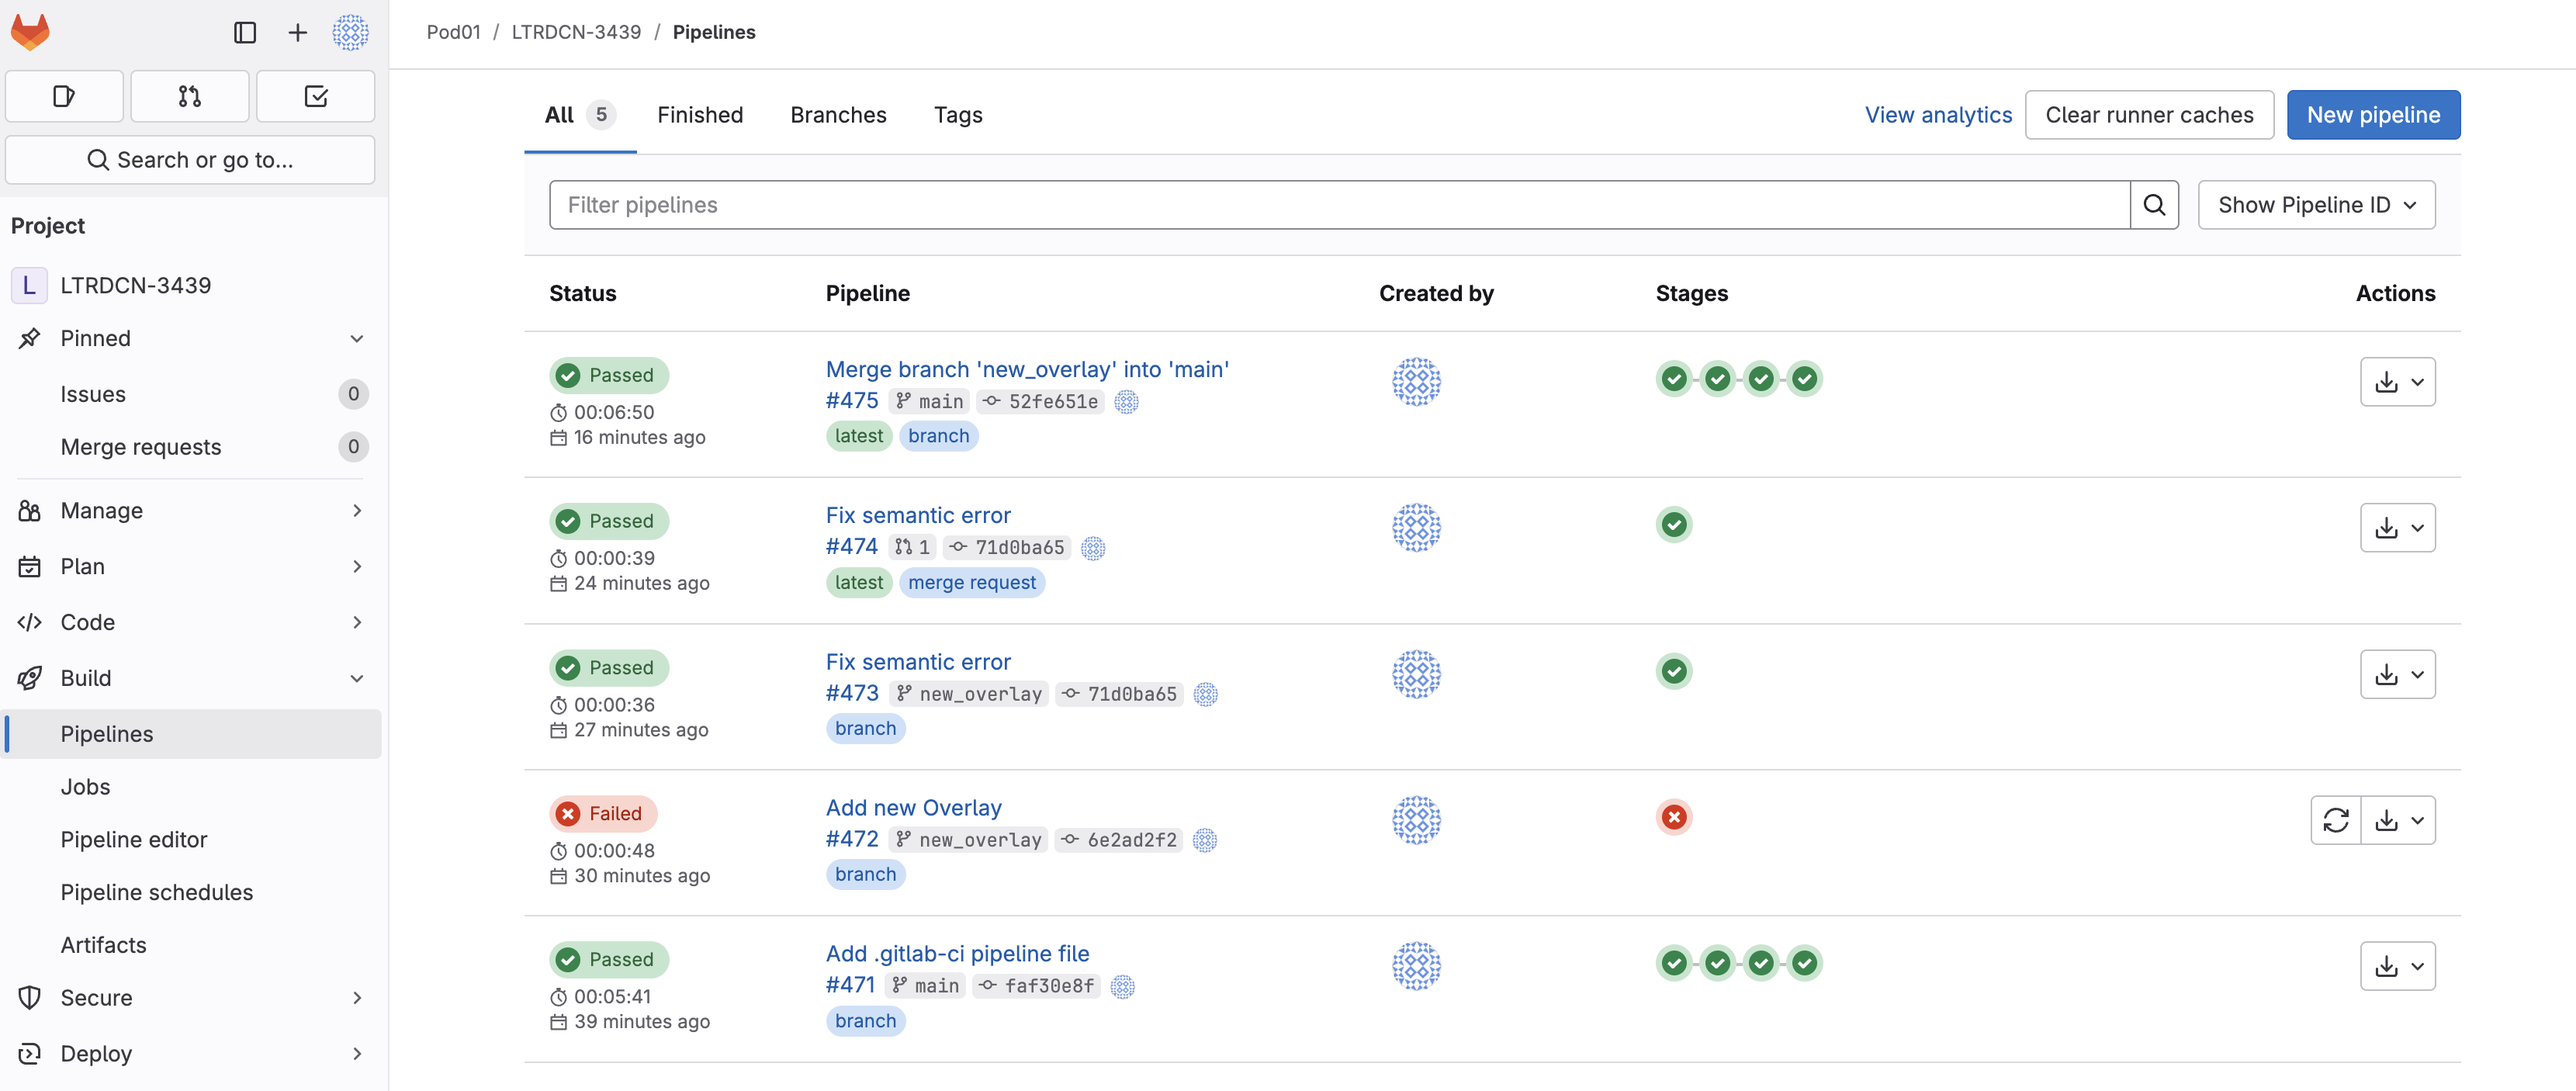
As soon as the code was committed to the new_overlay branch, Ansible Lint validation was triggered. Return to your GitLab and navigate to Pipelines:
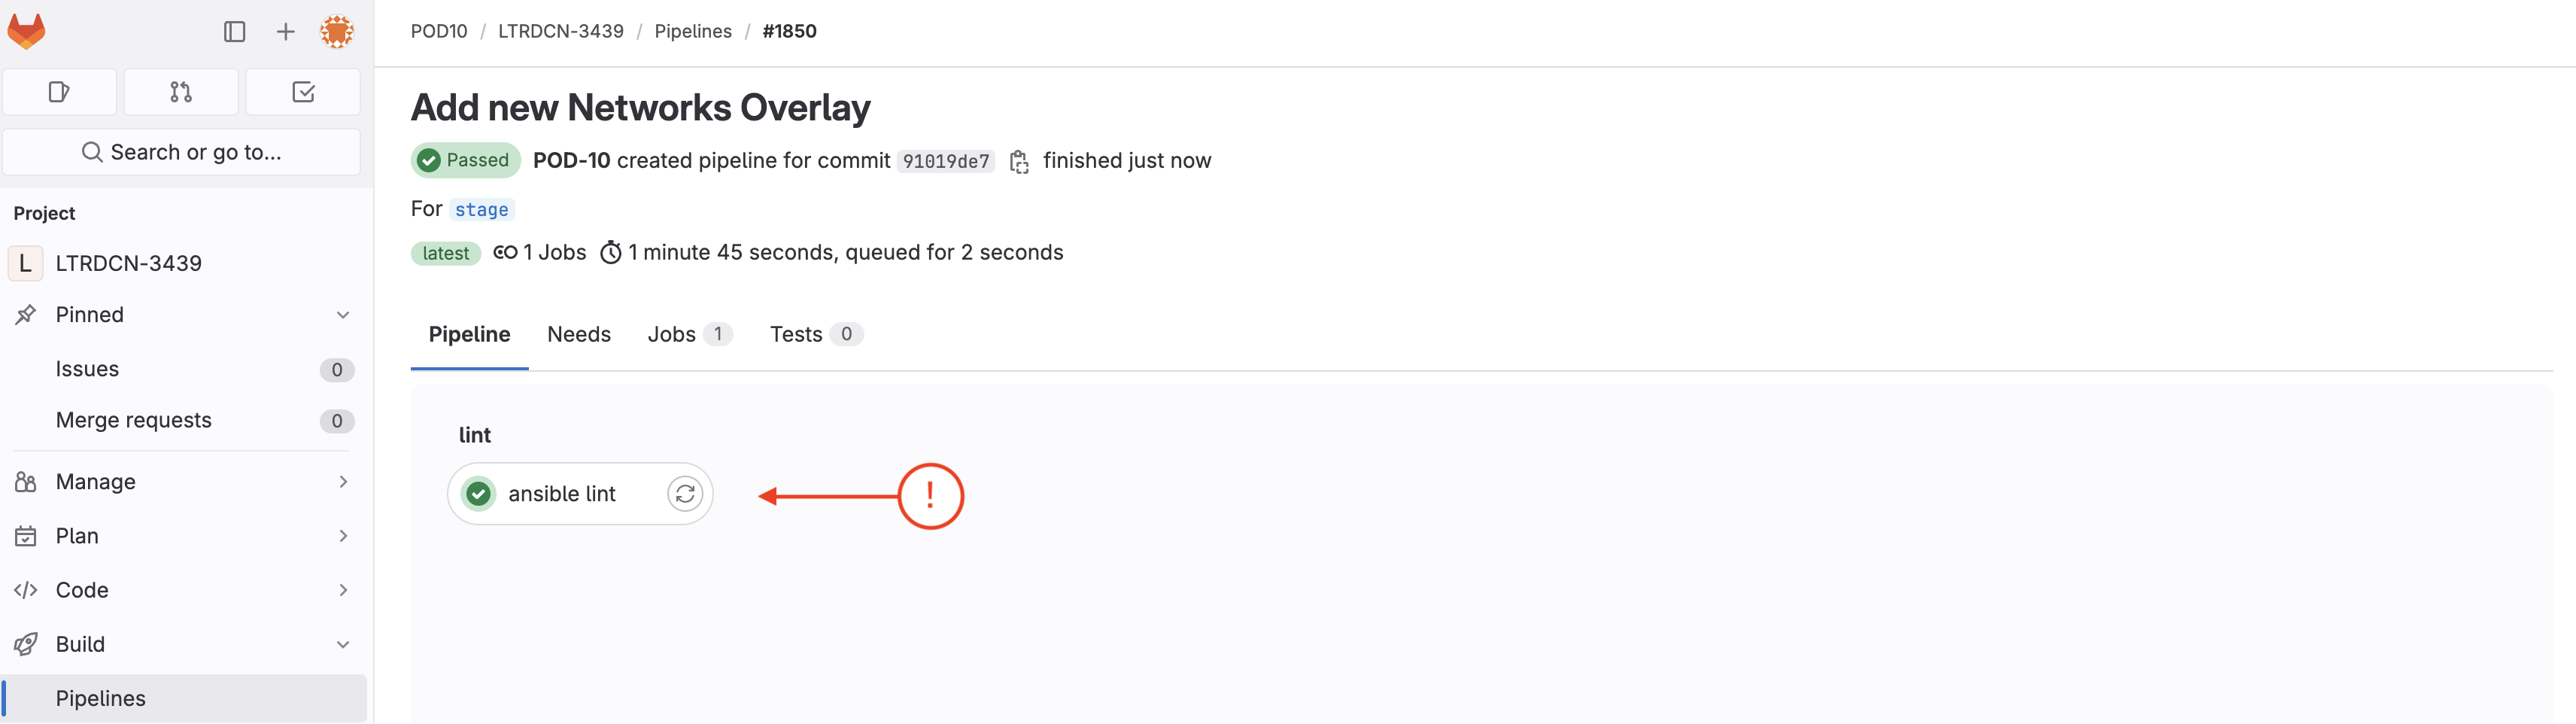

From the detailed logs of the nac_validate job, you can see the following error:
"Semantic error, rule 201: Verify VRFs and Networks cross reference items (['Network (NaC-GitLab-Net01) is referencing VRF (NaC-GitLab-VRF01) which is not defined in the service model. Add the VRF to the service model or remove the network from the service model and re-run the playbook.'
This means that the NaC-GitLab-Net01 network is referencing a VRF that does not exist in the service model. To fix this, you need to change the VRF name from NaC-VRF to NaC-GitLab-VRF01 in the new_overlay.nac.yml file so it matches the vrf_name referenced by the networks.
sed -i 's/NaC-VRF/NaC-GitLab-VRF01/g' ~/workspace/ndlab/nac/host_vars/msd-fabric-group/new_overlay.nac.yml
git commit -am "Fix semantic error"
    [new_overlay 753fe36] Fix semantic error in new Network
    1 file changed, 1 insertion(+), 1 deletion(-)
new_overlay Branch
git push -u origin new_overlay
    Enumerating objects: 9, done.
    Counting objects: 100% (9/9), done.
    Delta compression using up to 8 threads
    Compressing objects: 100% (5/5), done.
    Writing objects: 100% (5/5), 419 bytes | 419.00 KiB/s, done.
    Total 5 (delta 4), reused 0 (delta 0), pack-reused 0
    remote:
    remote: To create a merge request for new_overlay, visit:
    remote:   http://10.15.0.159/Pod01_2025_01/LTRDCN-3439/-/merge_requests/new?merge_request%5Bsource_branch%5D=new_overlay
    remote:
    To 10.15.0.159:Pod01_2025_01/LTRDCN-3439.git
    6e2ad2f..71d0ba6  new_overlay -> new_overlay
    Branch 'new_overlay' set up to track remote branch 'new_overlay' from 'origin'.
As soon as the code was committed to the new_overlay branch, Ansible Lint validation was triggered. Return to your GitLab and navigate to Pipelines:
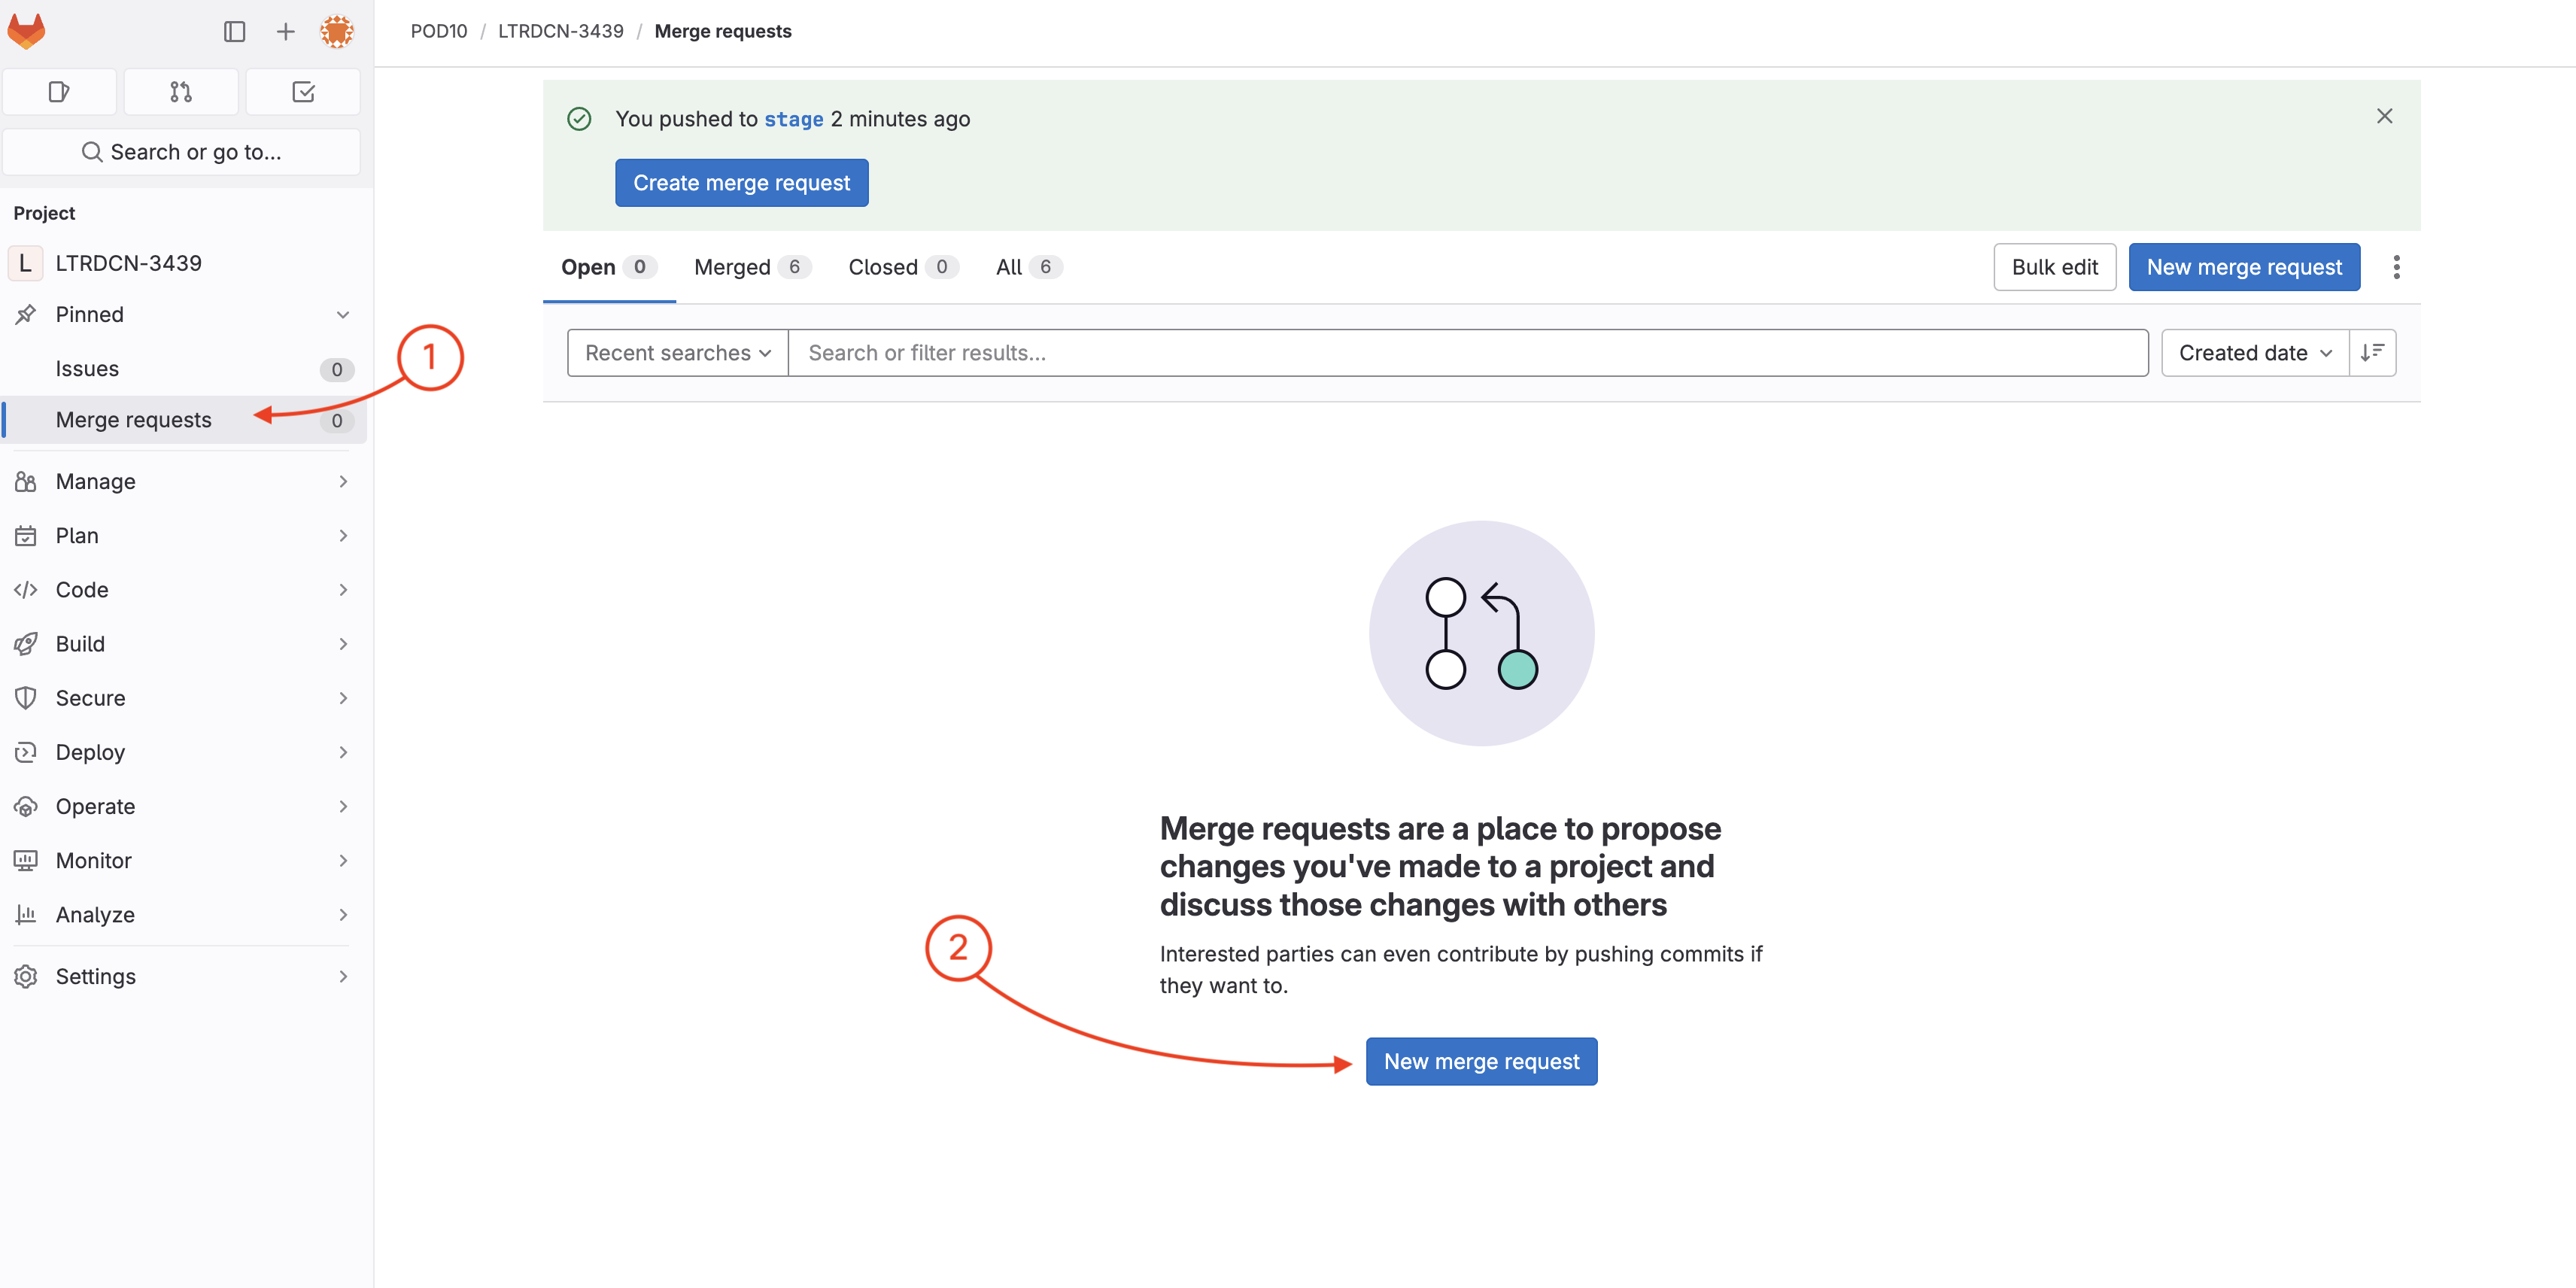

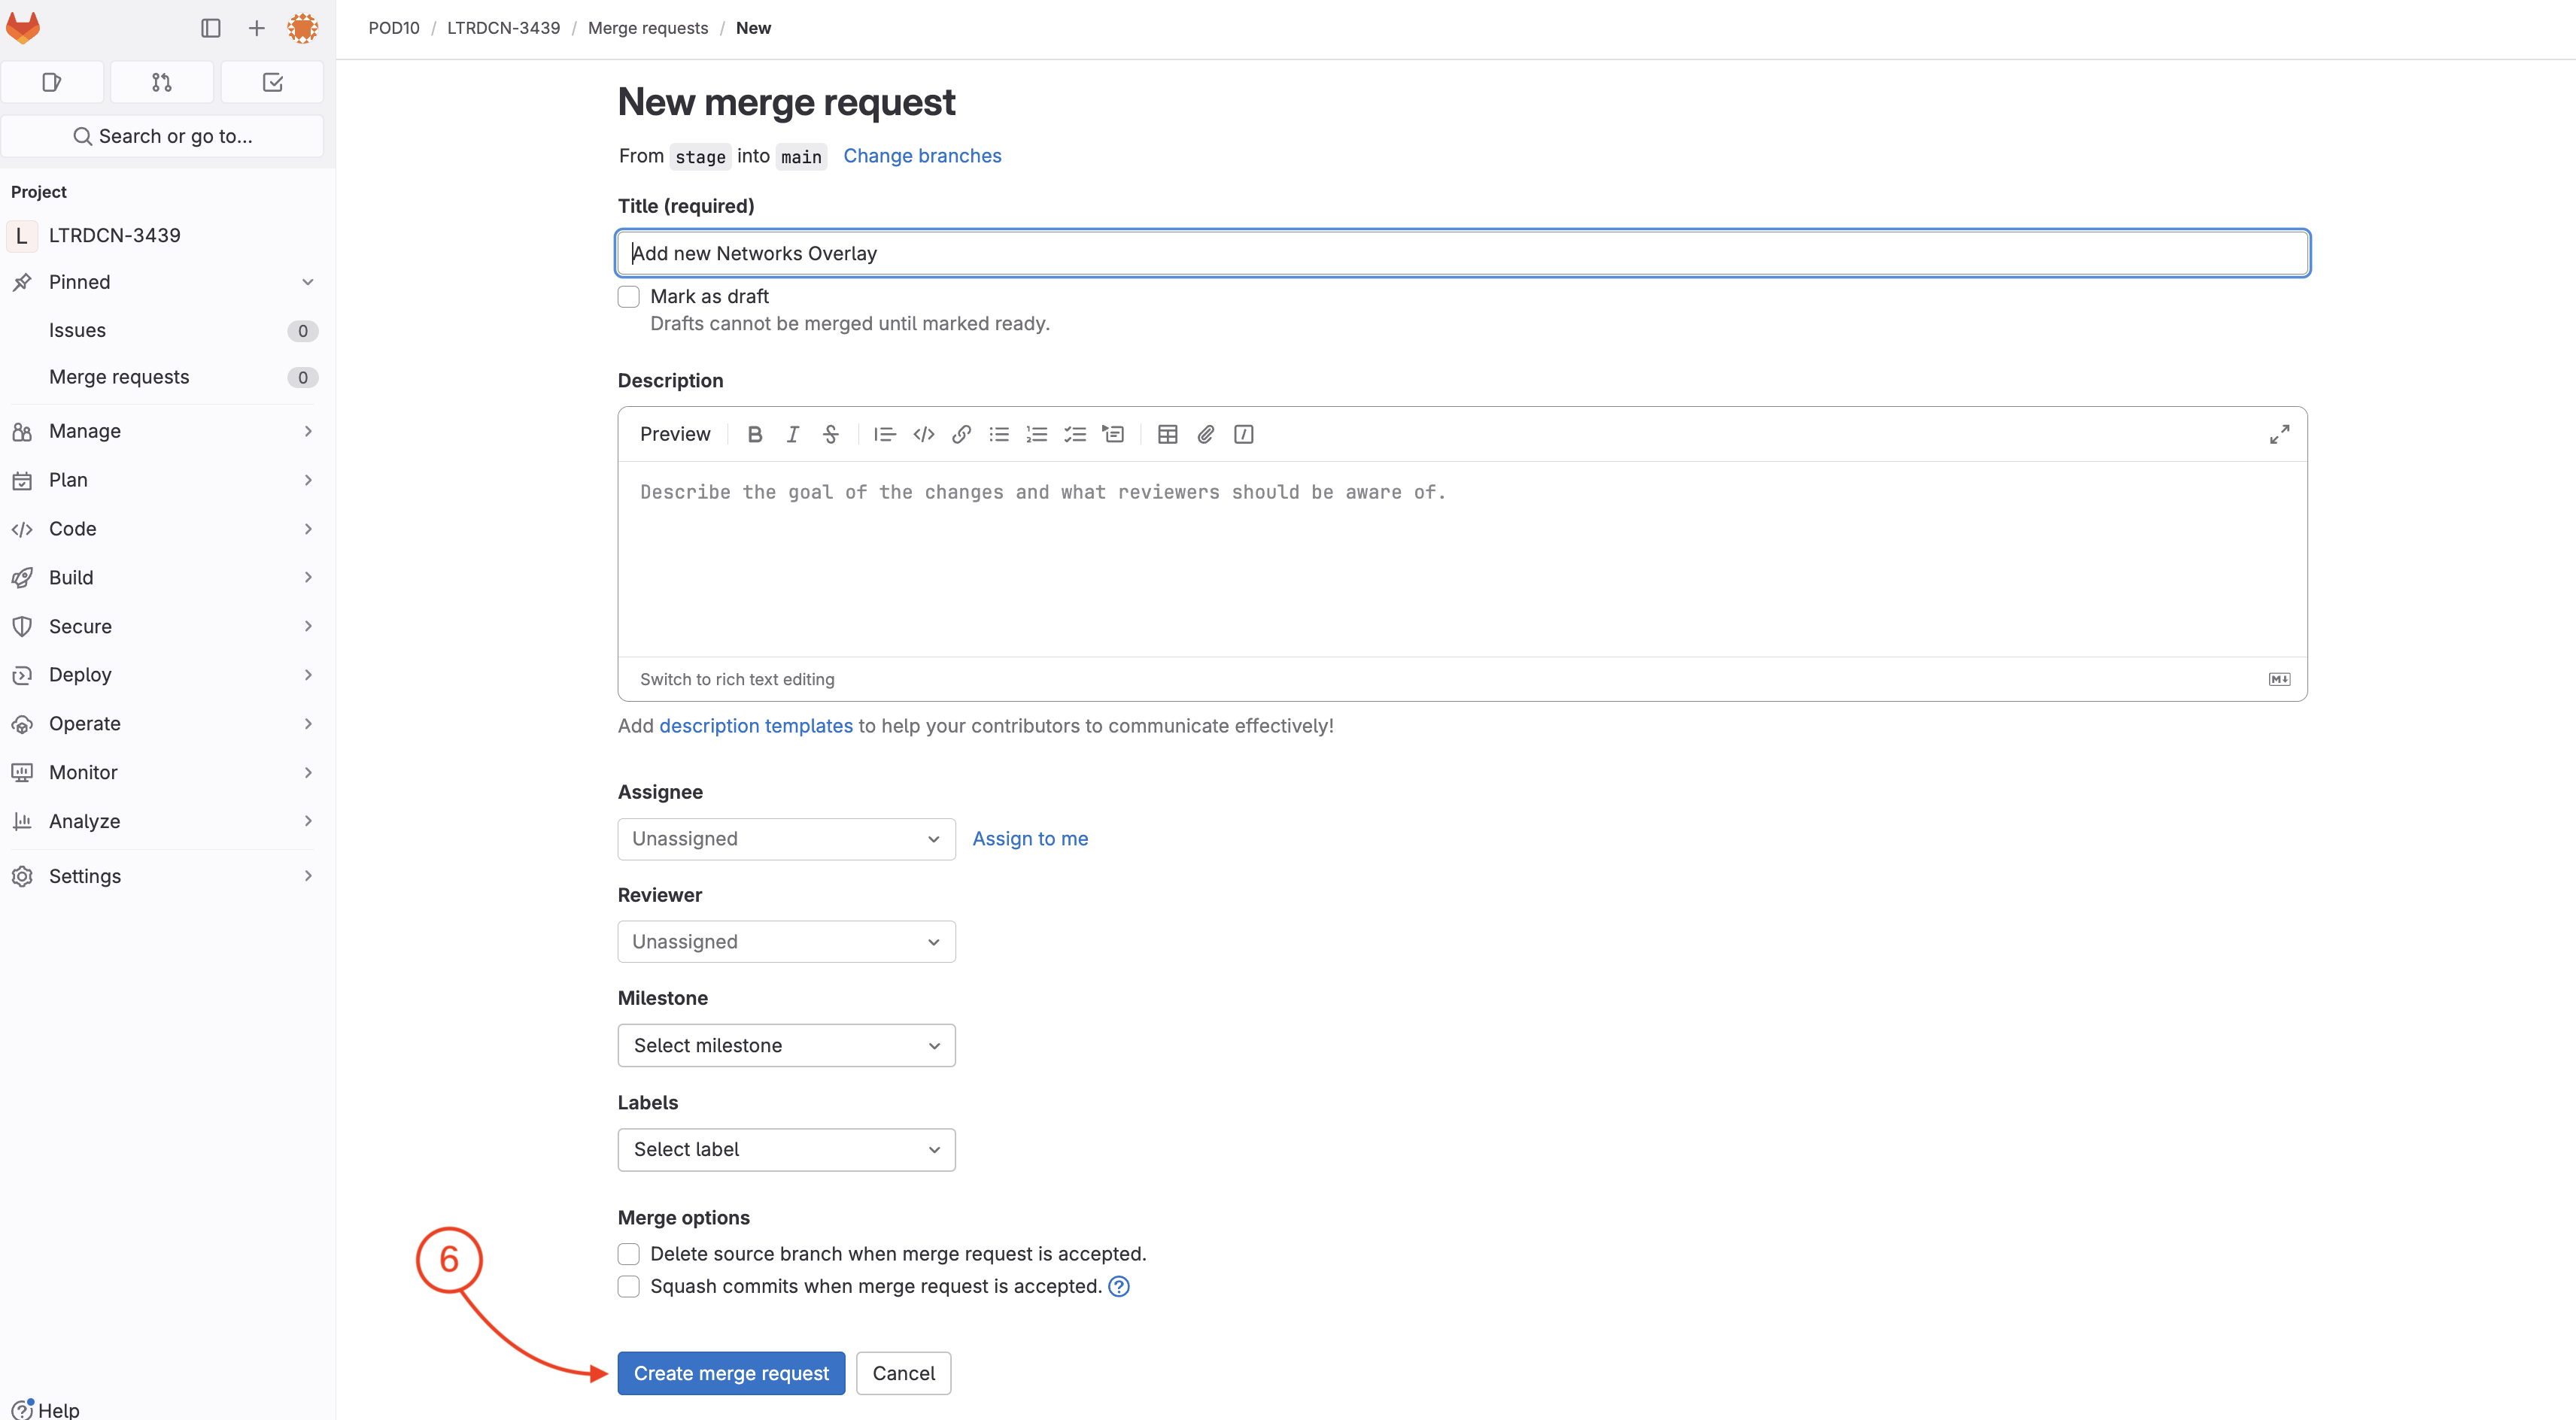
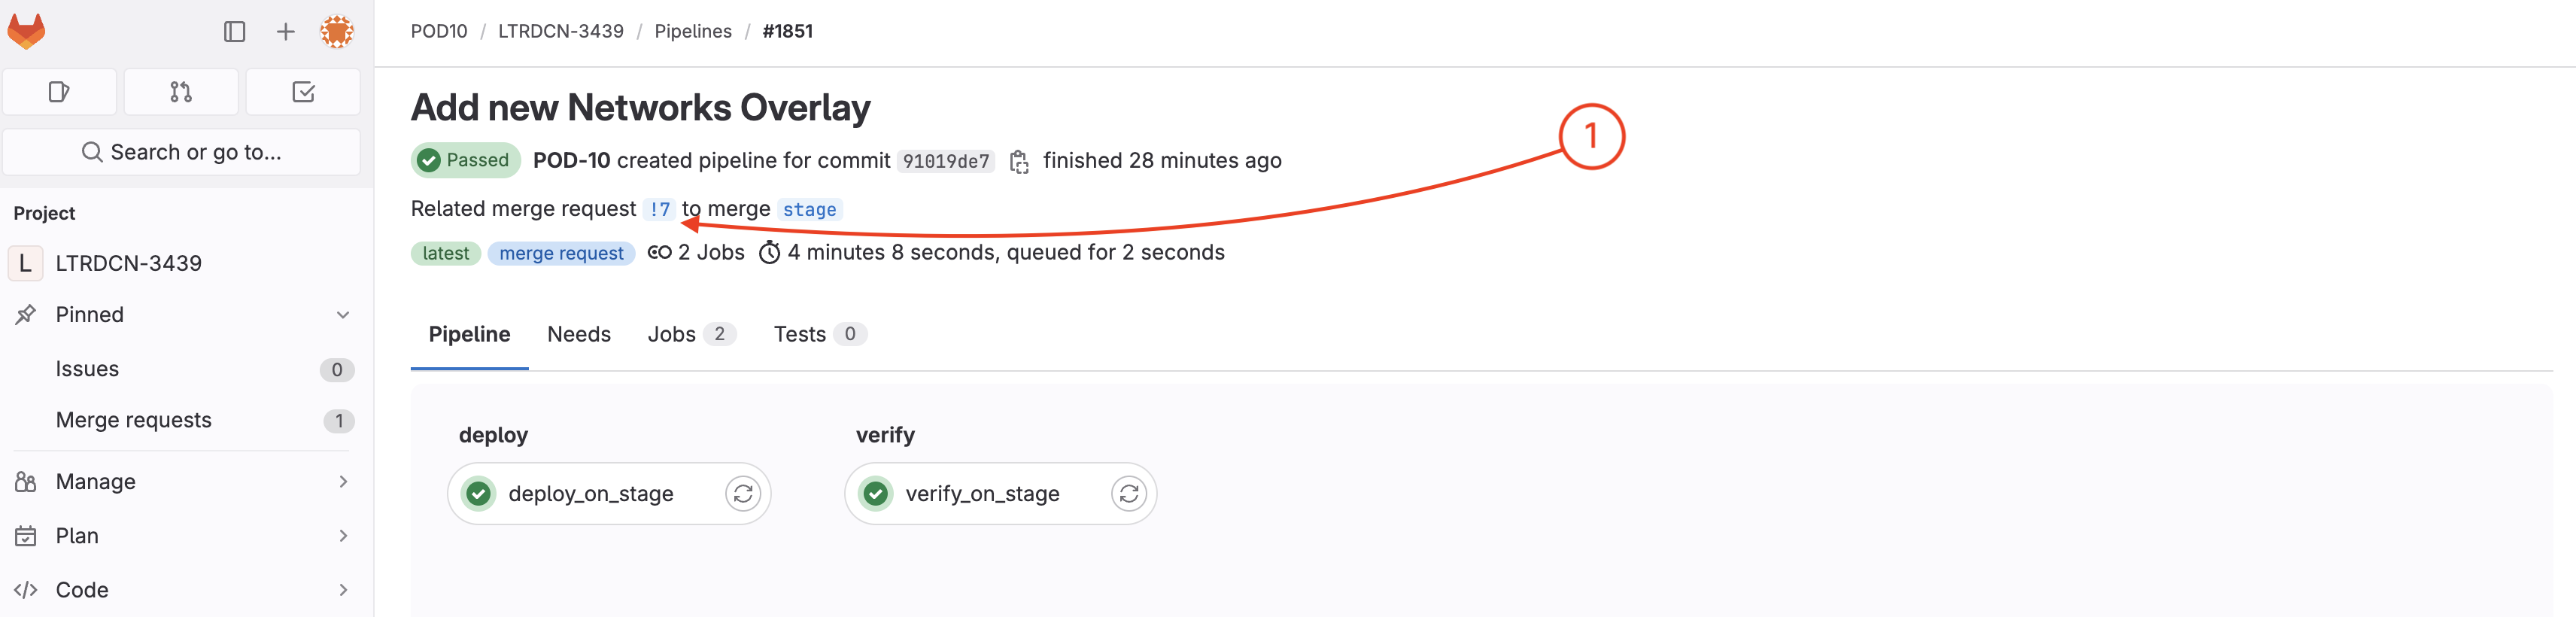
Now you need to create a merge request to verify and test the new Networks configuration against the NDFC staging environment fabric.


Related merge request !# to merge new_overlay (The link is !1 in the screenshot below).
To open the merge request page:
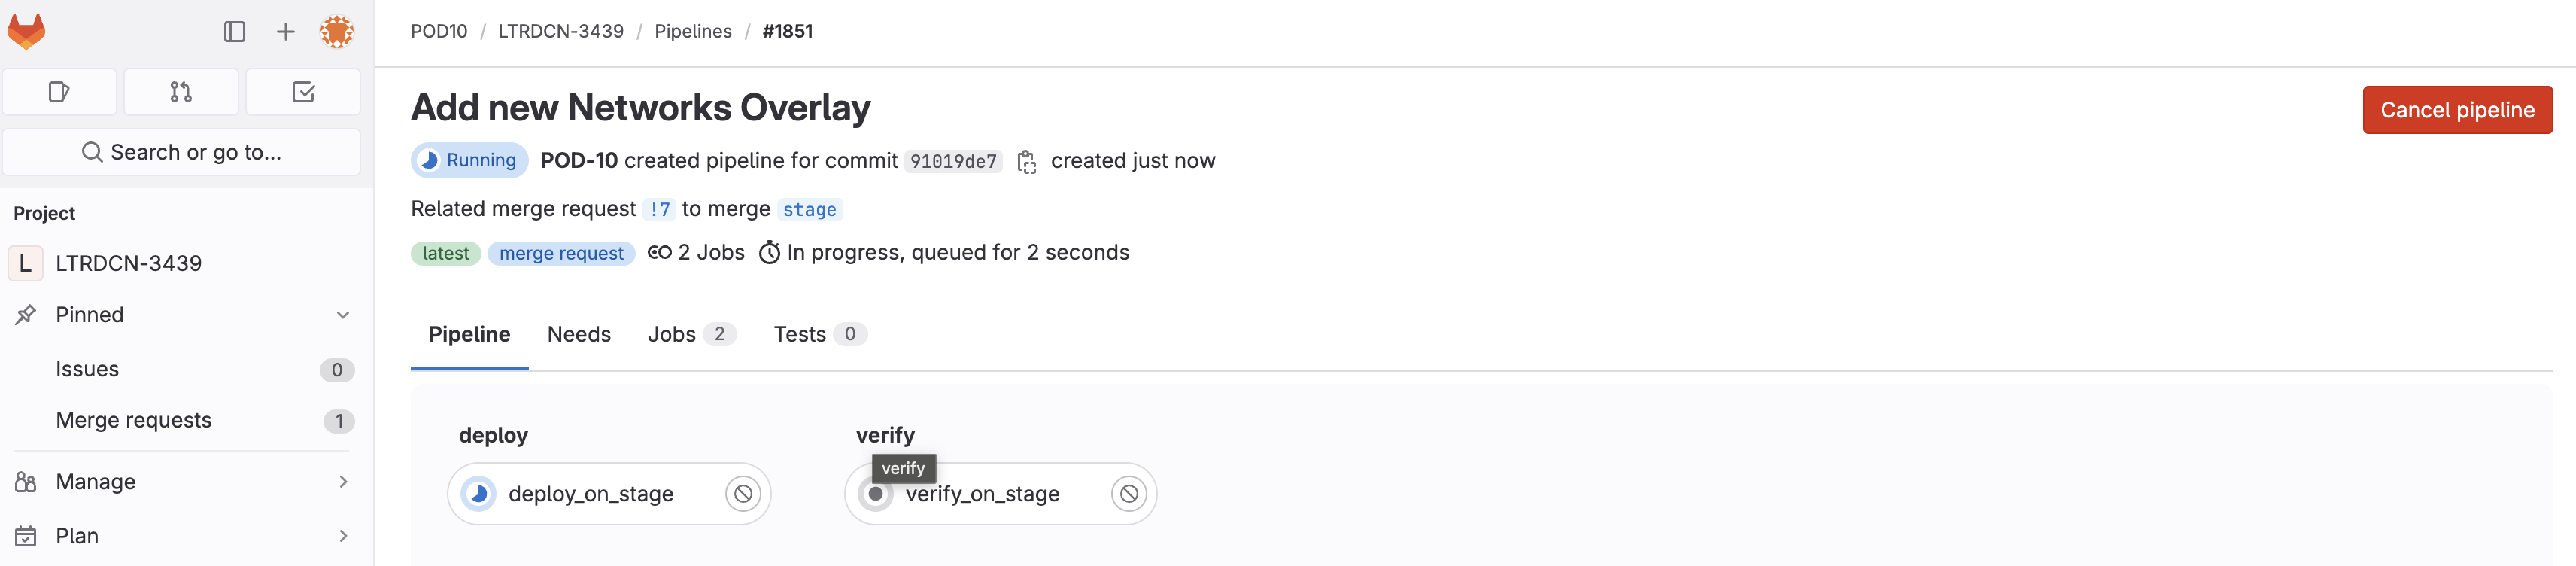
Wait until the pipeline is finished:
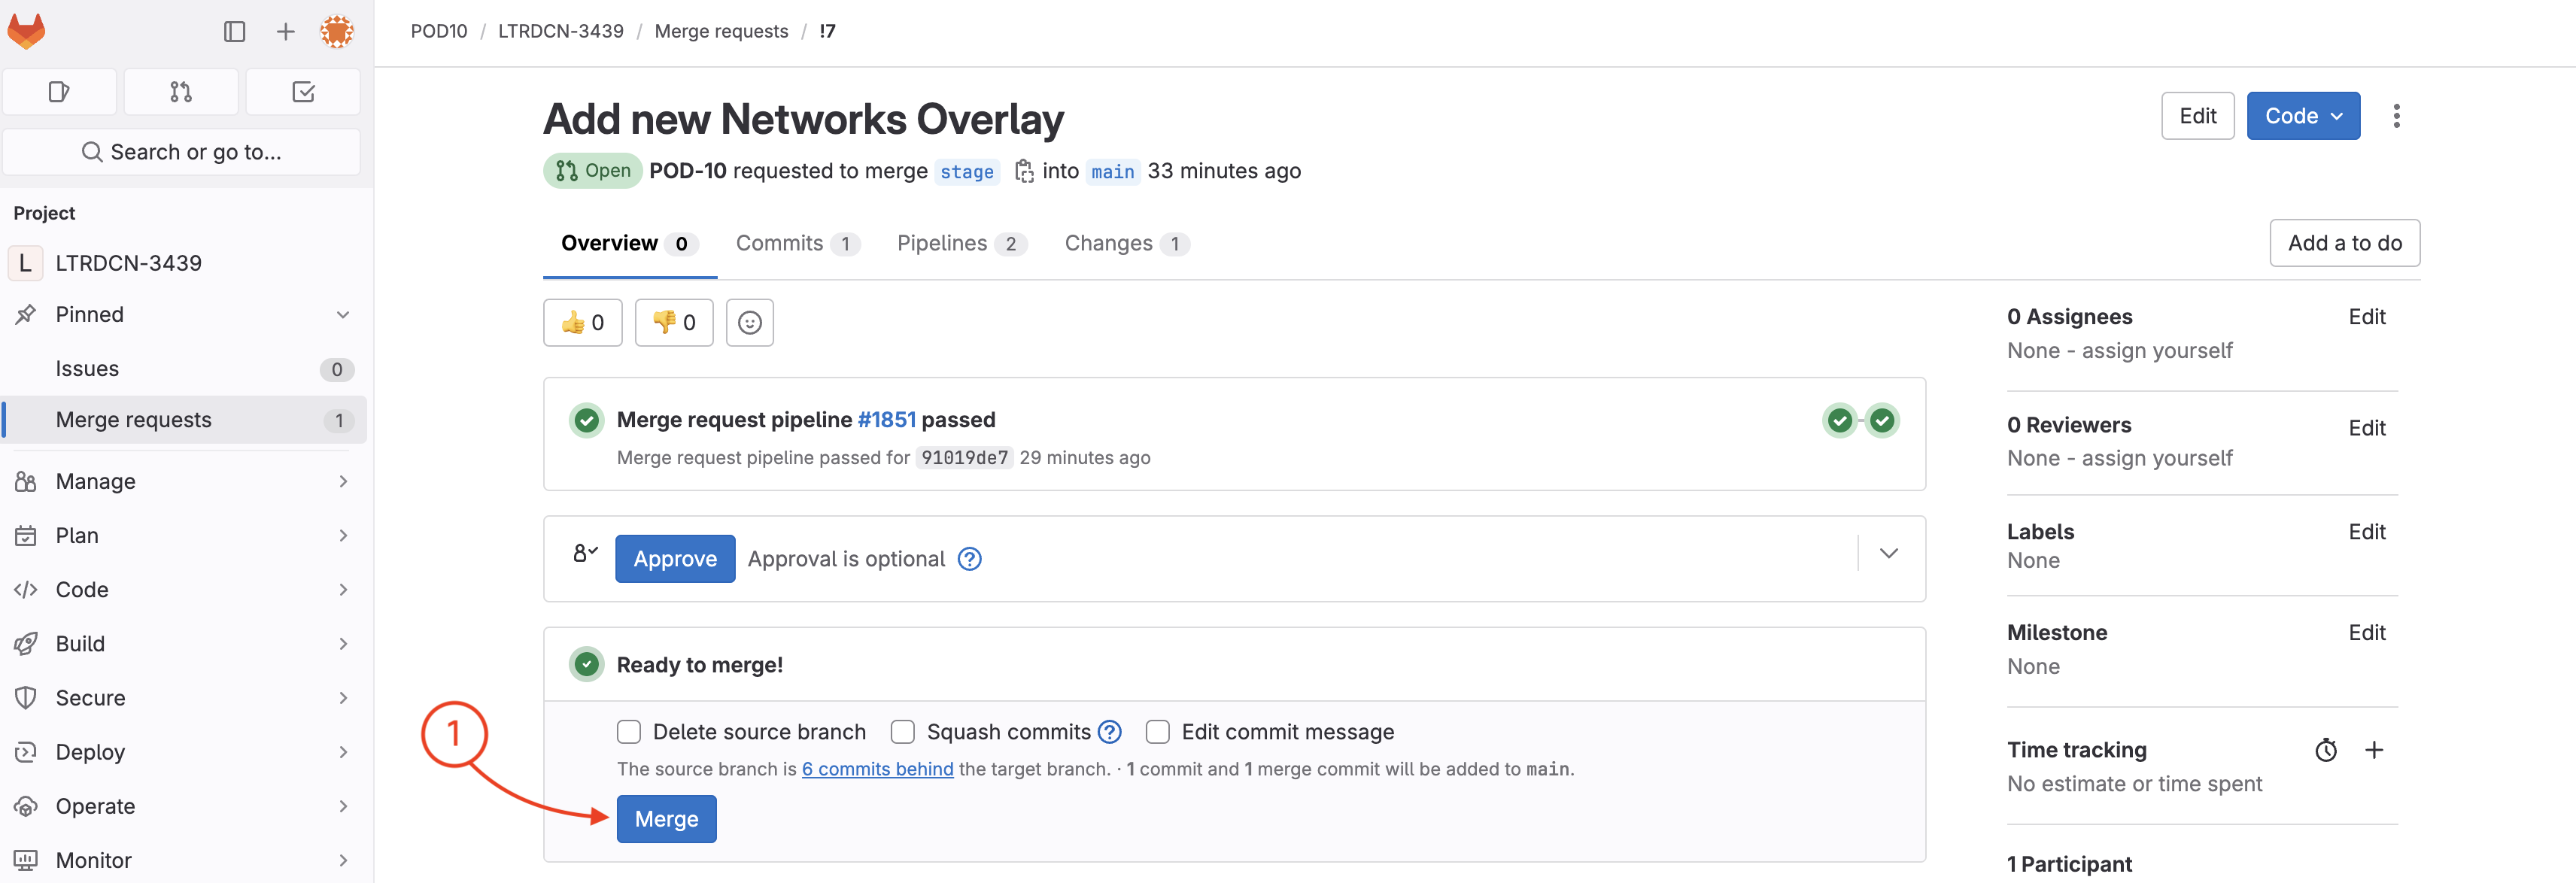
You have now modified your Fabric by updating your source code and then using the CI and CD pipelines to deploy the changes!
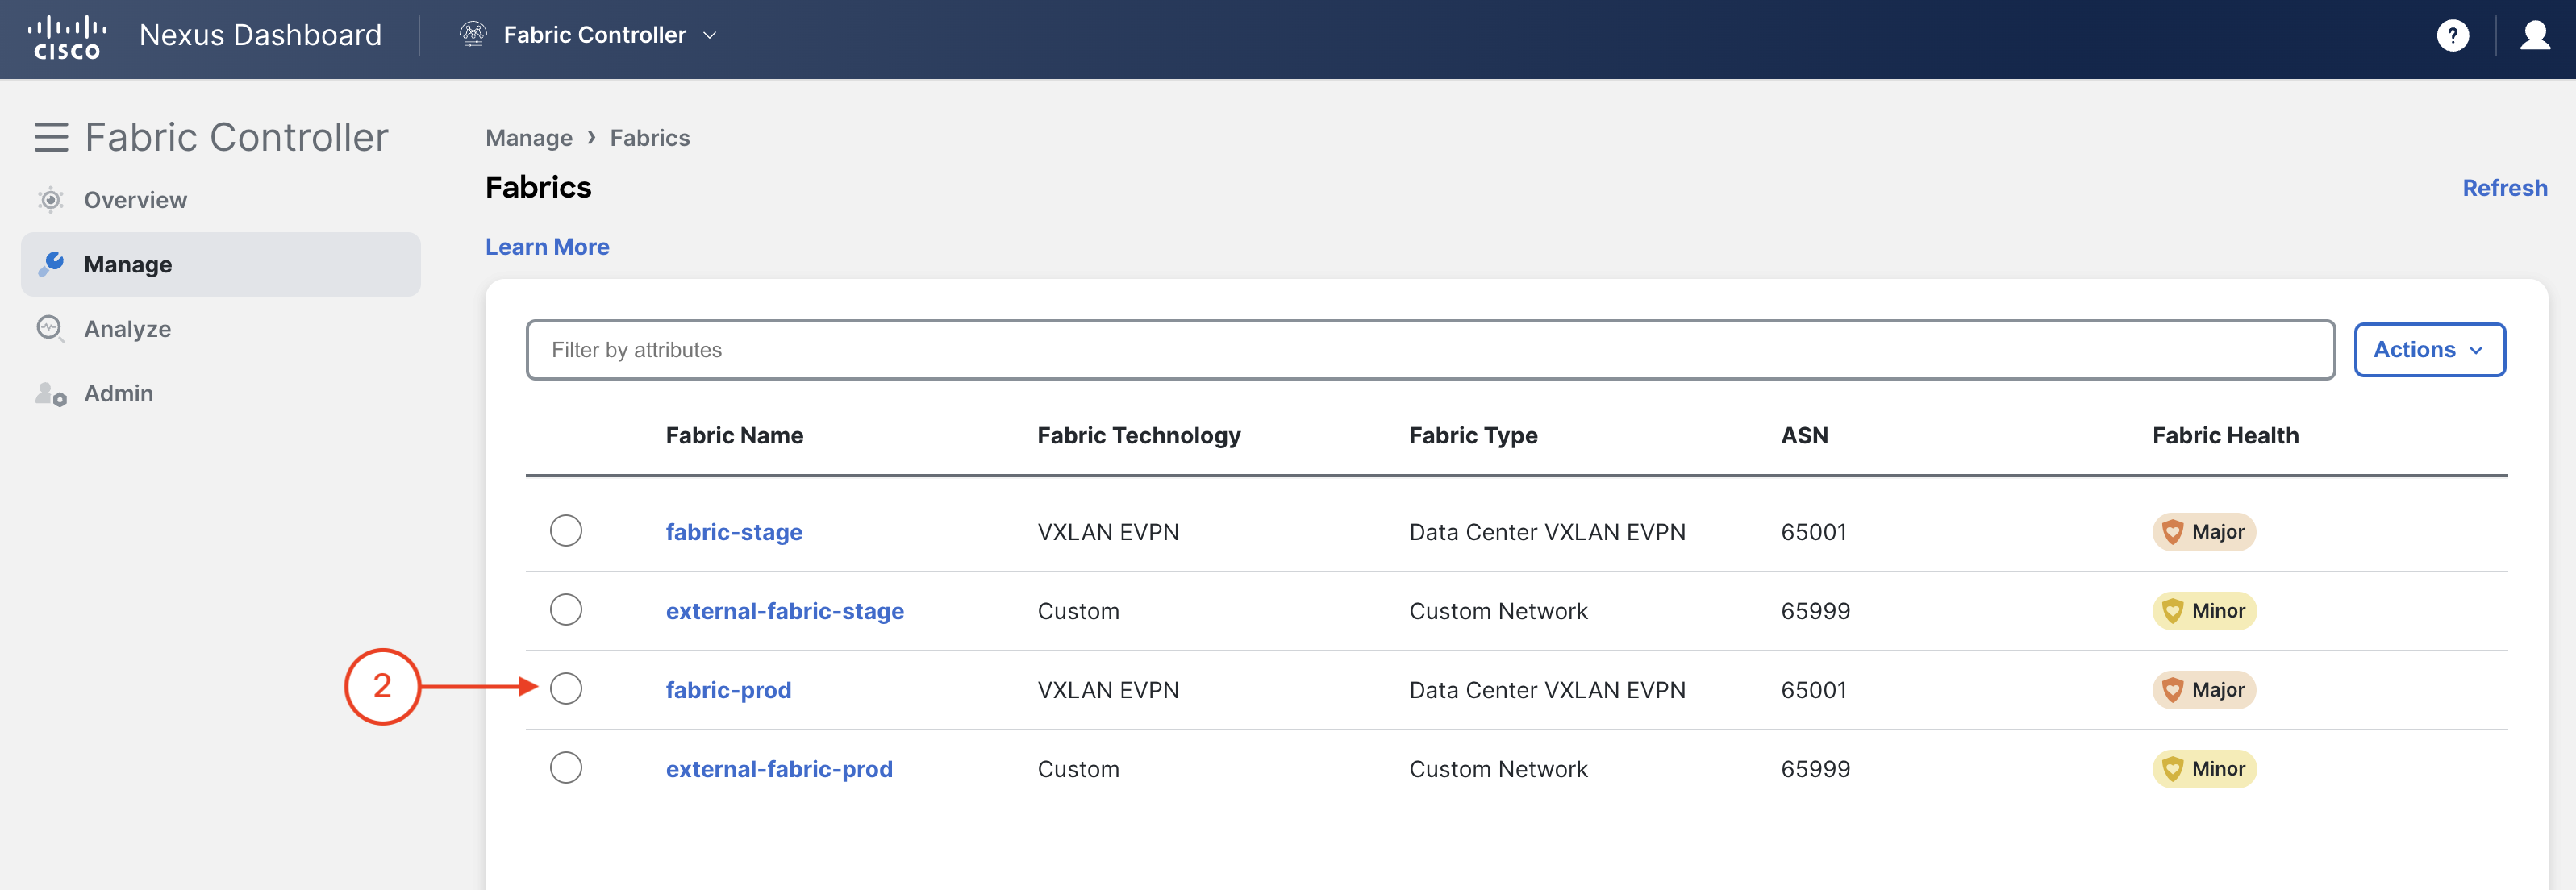
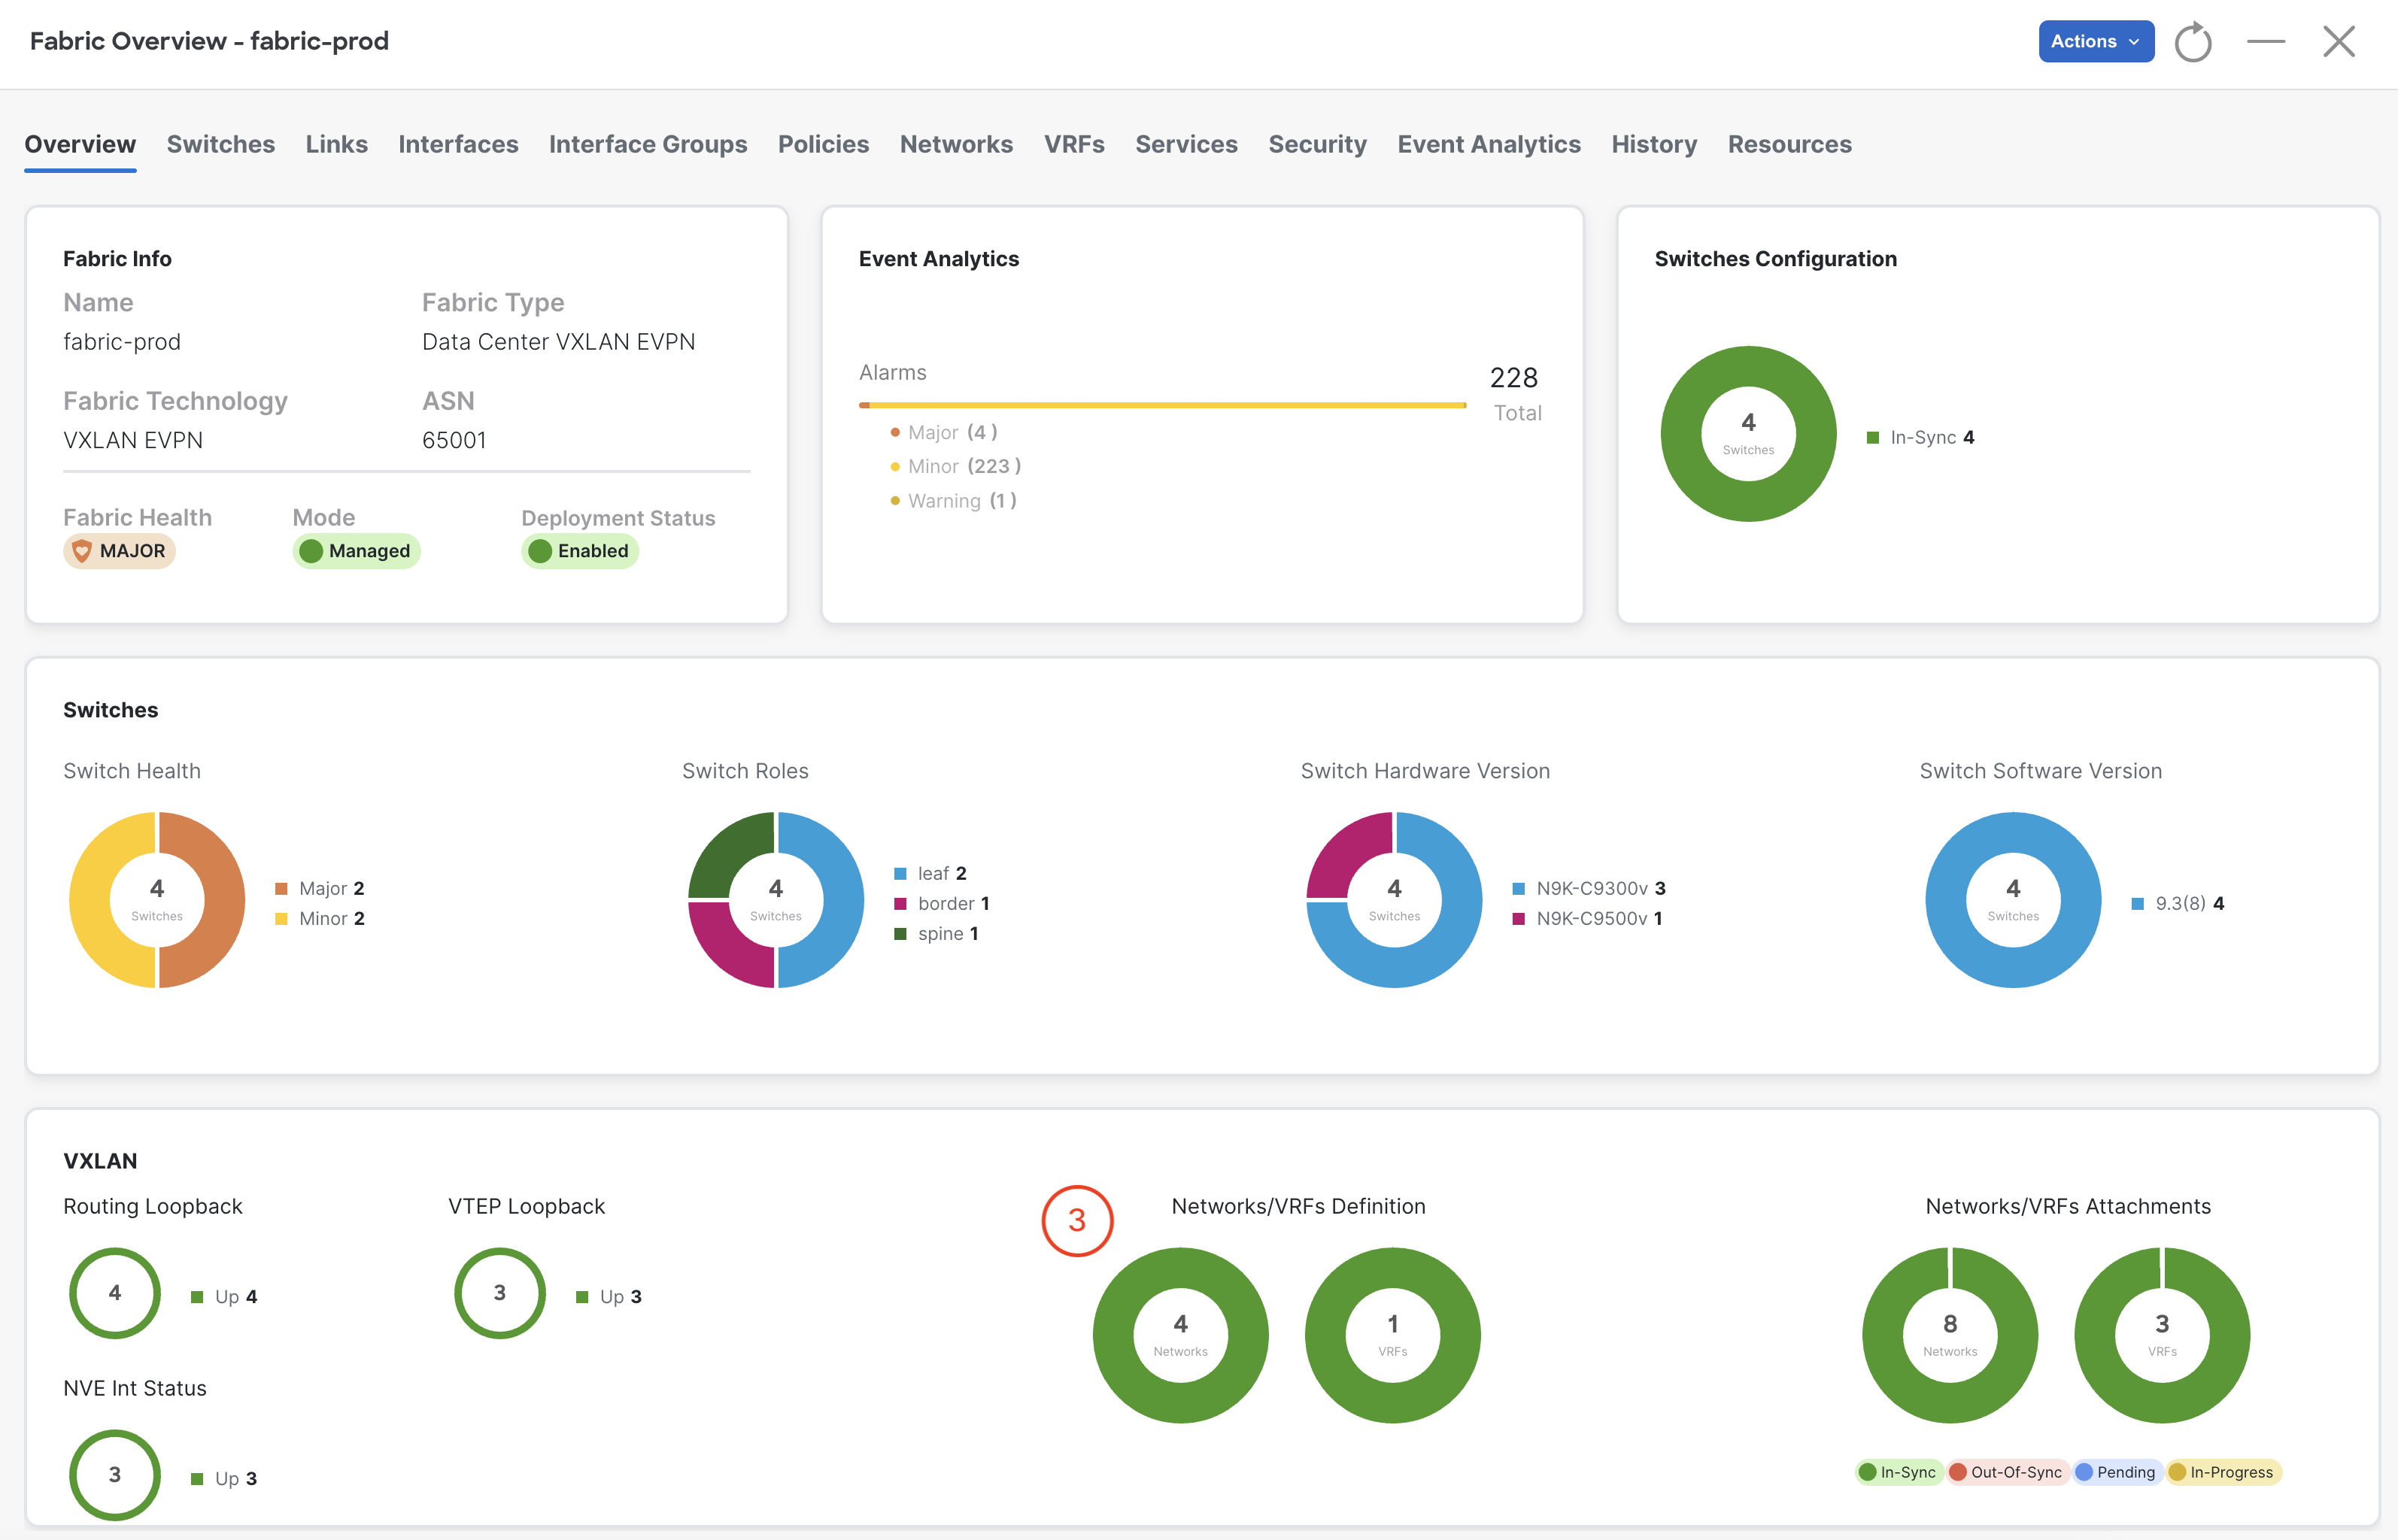
In your browser, navigate back to your NDFC instance.


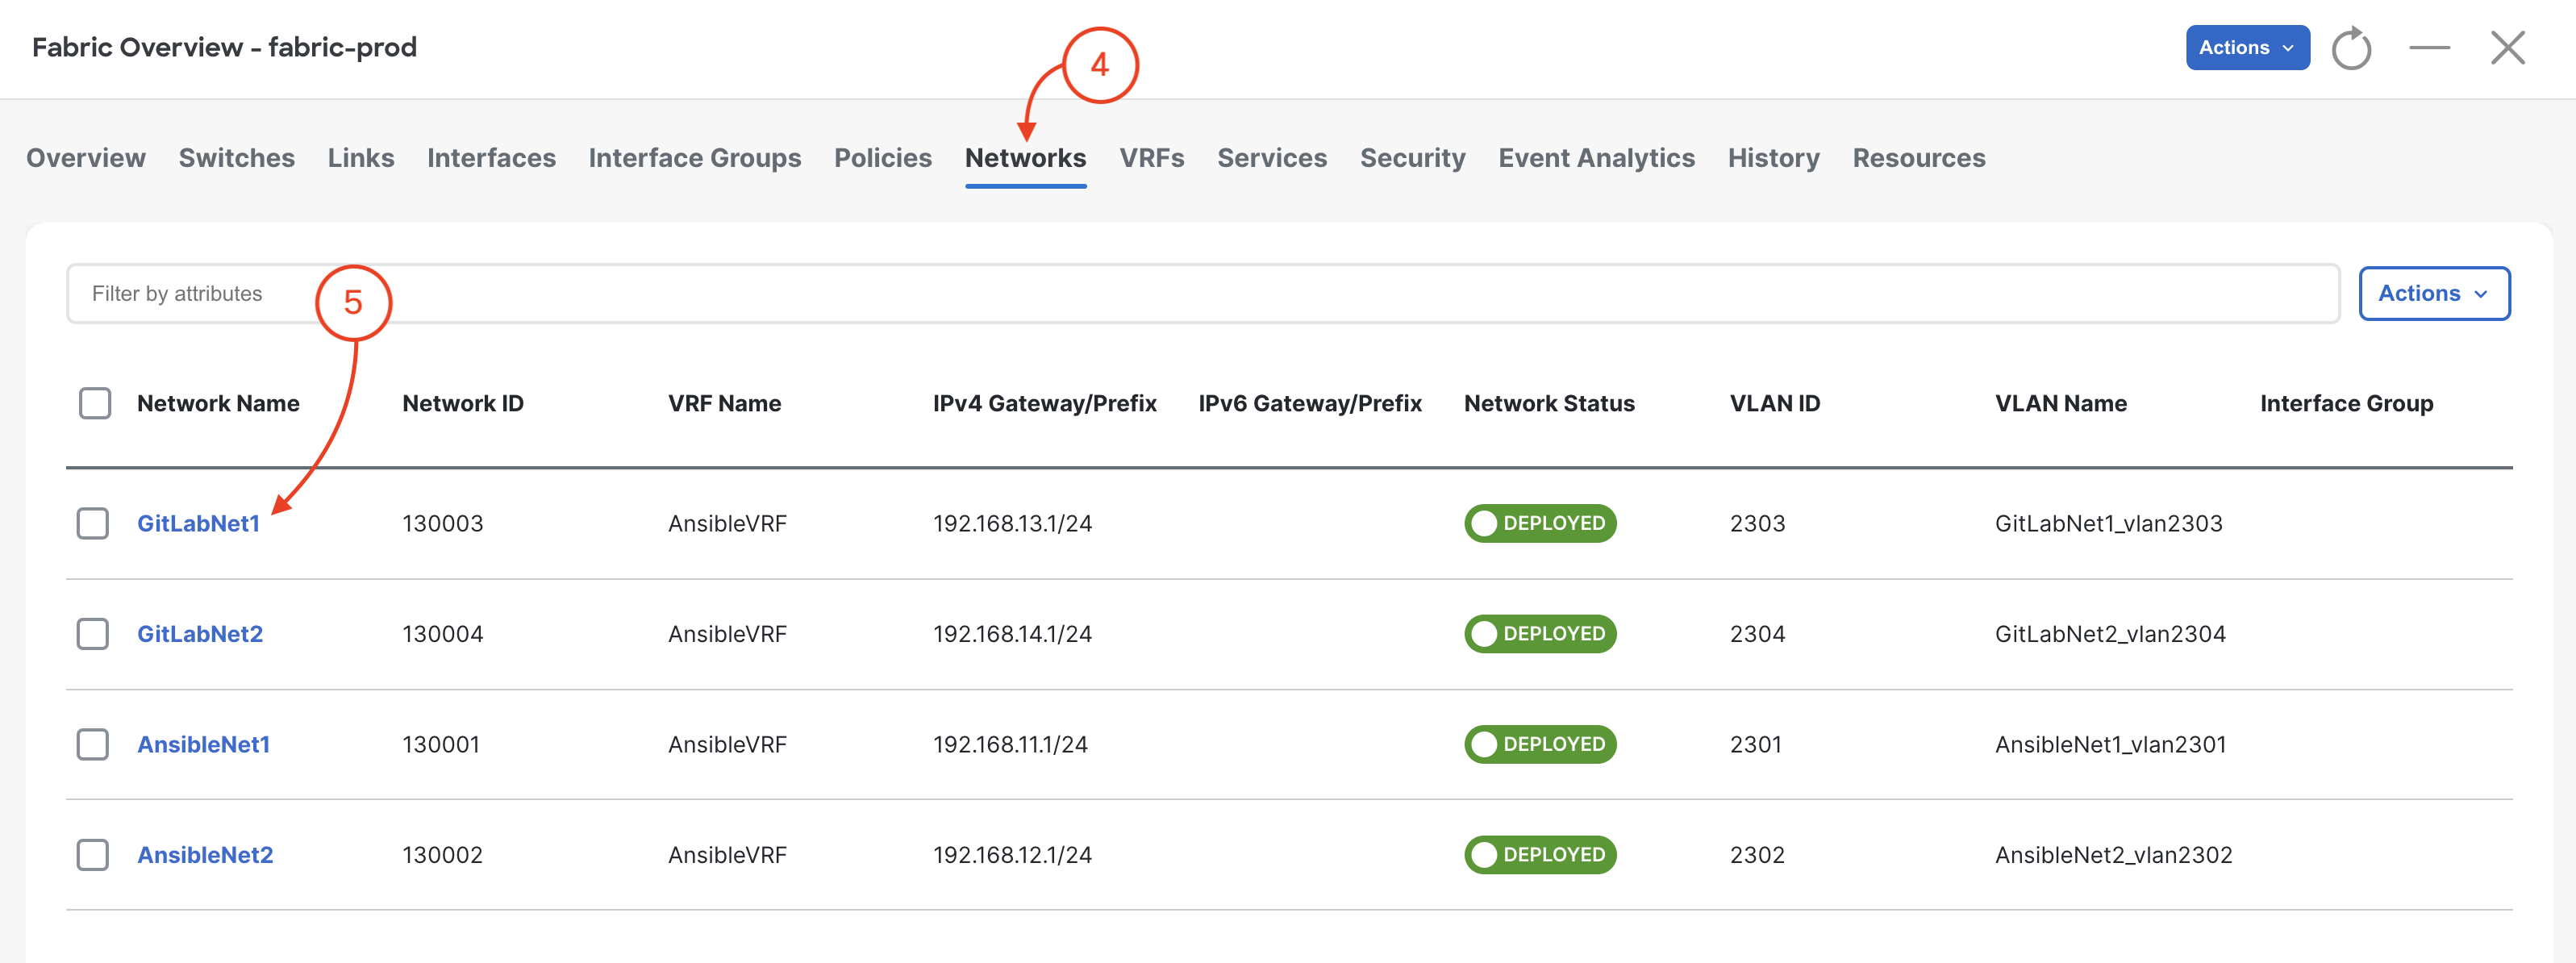
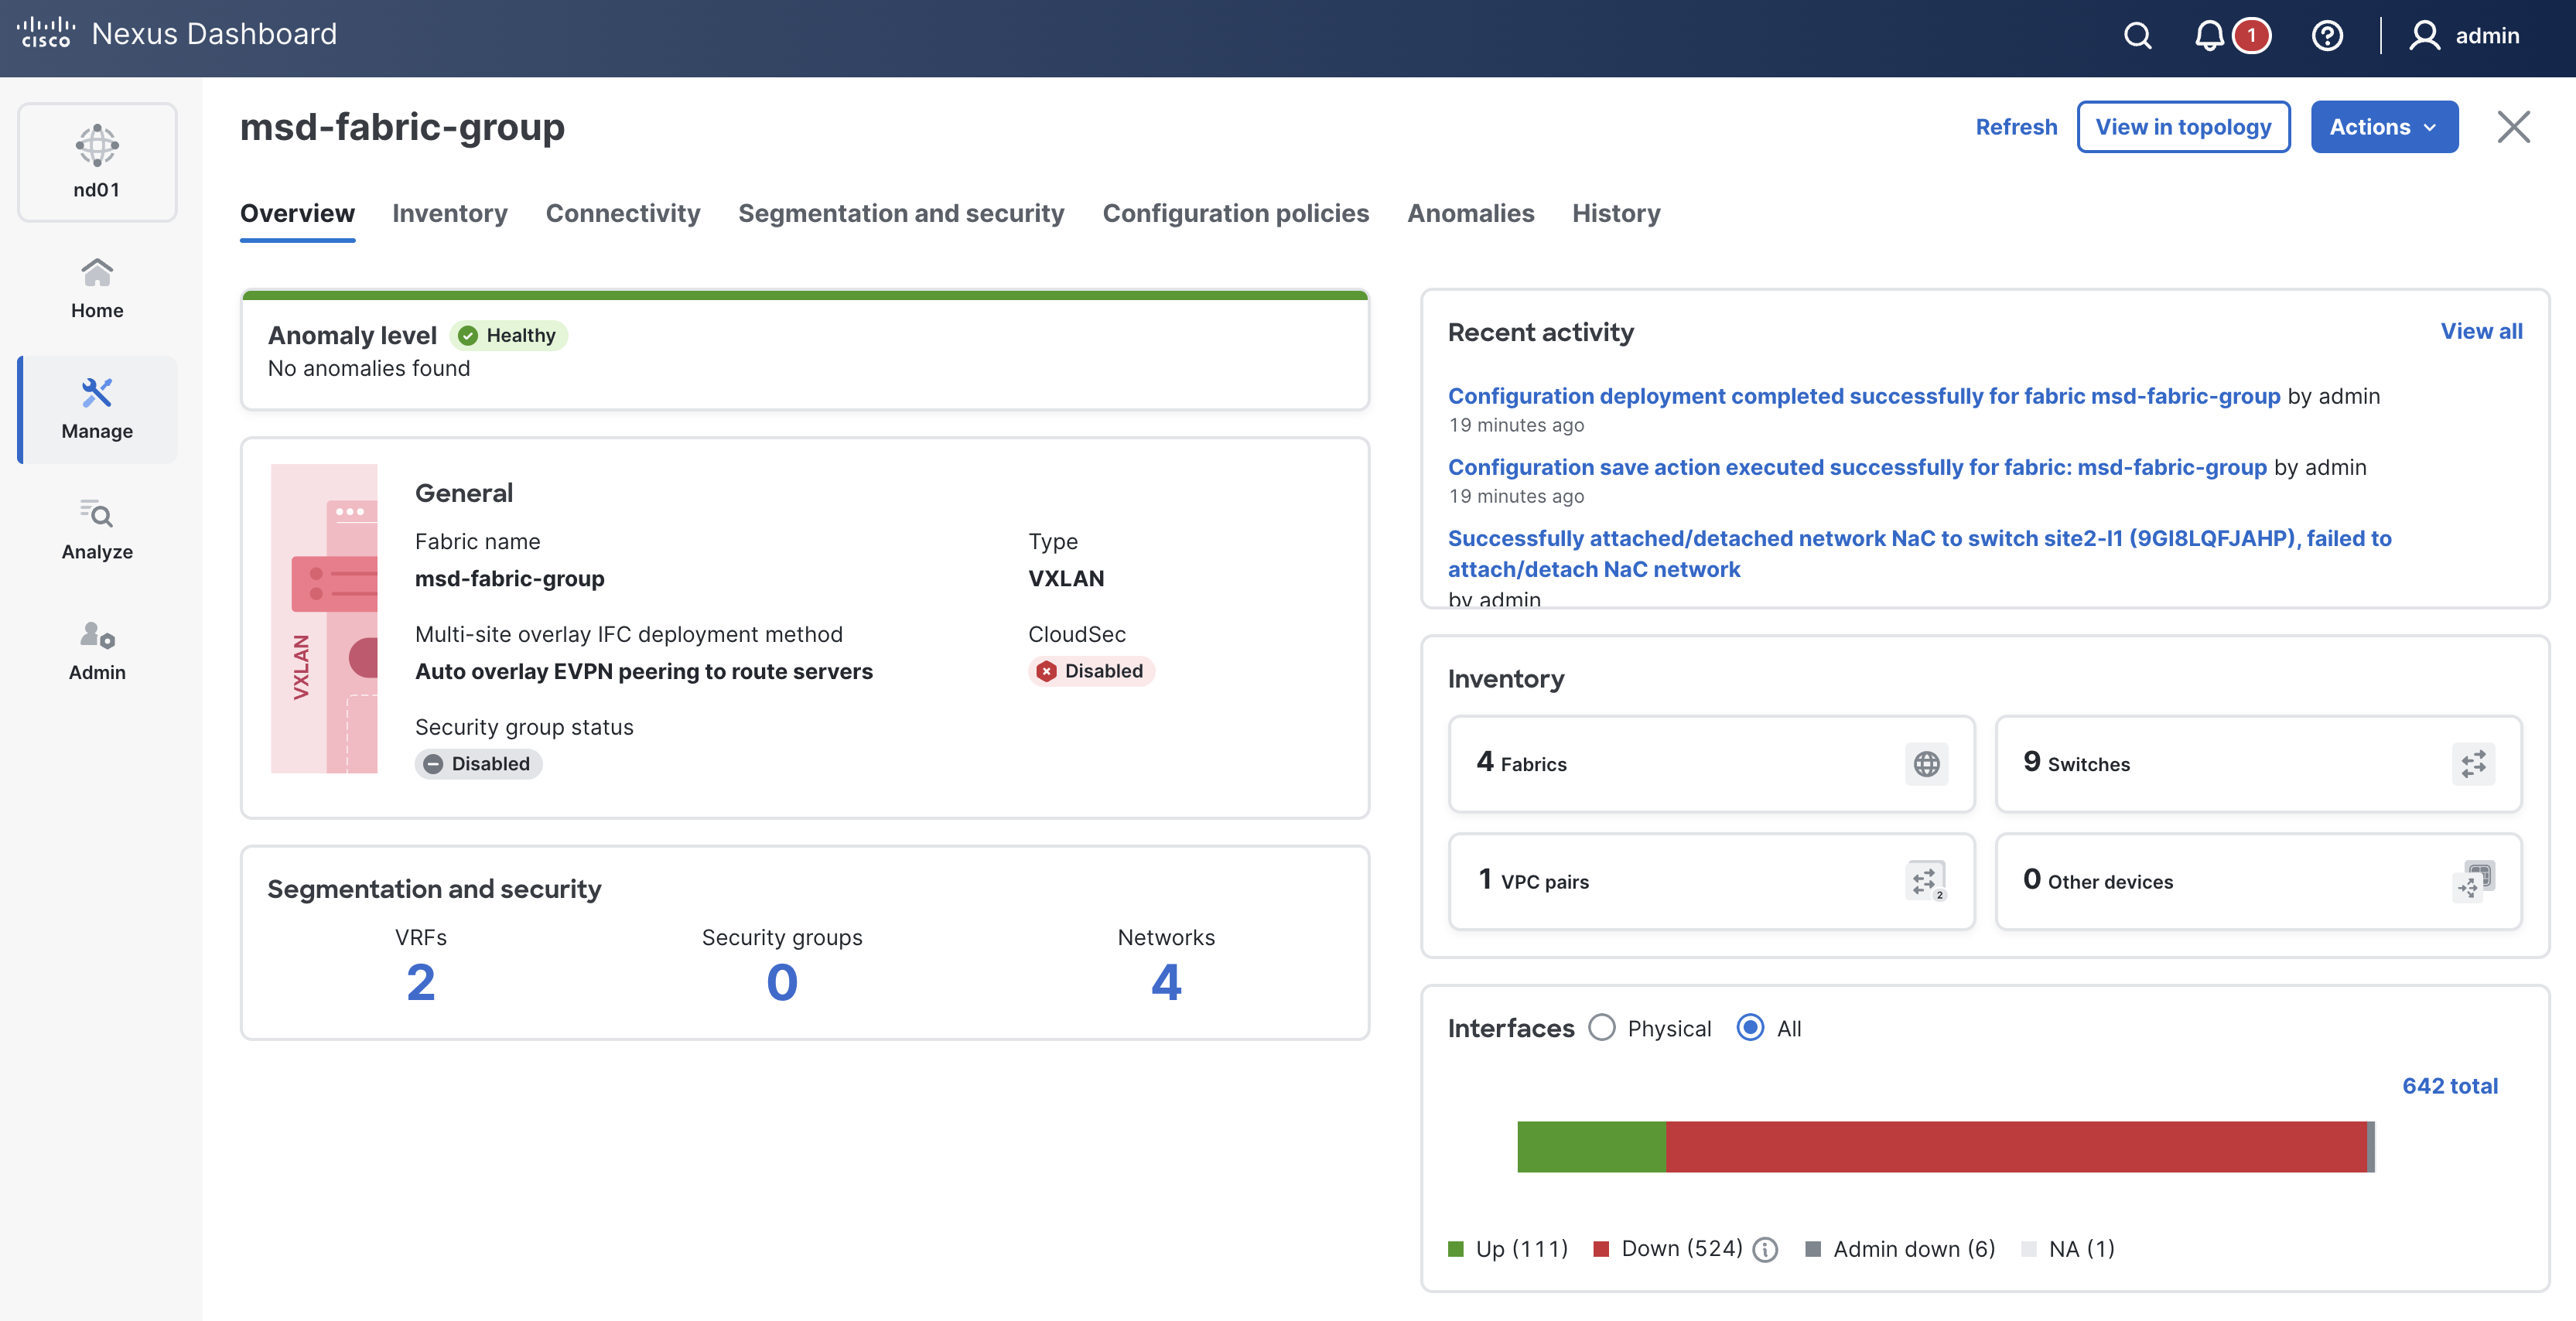
Review all pipelines run as part of this lab.
Thank you for attending Cisco Live 2026!!