You can now move on to the overlay configuration.
In this section, you will create the necessary files to configure the VRFs and Networks for your fabric.
You will start by creating the vrfs.nac.yml file.
This file will contain the VRF configuration for your fabric, which defines the VRF names, VRF IDs, VLAN IDs, and VRF attach groups for attaching to switches.
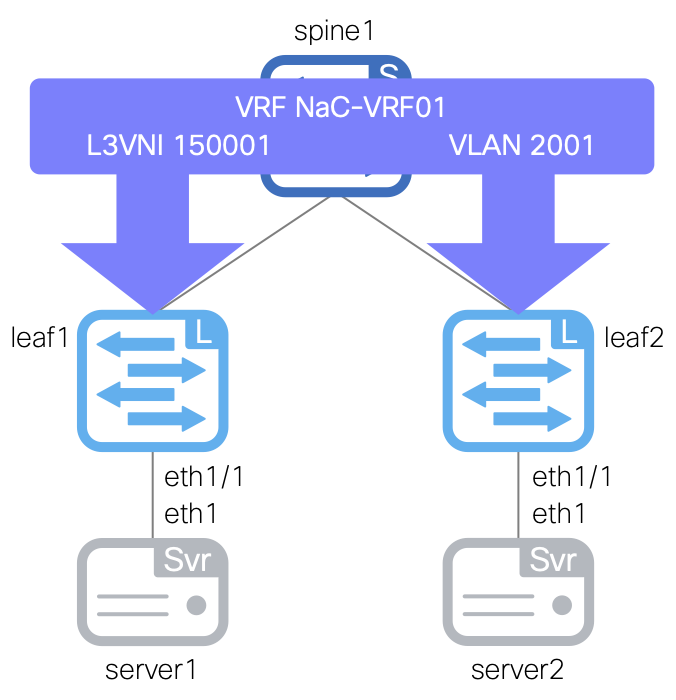
You will start by defining a single VRF named NaC-VRF01 with a VRF ID of 200001 and VLAN ID of 2001. This VRF will be attached starting with your vPC peers using the all VRF attach group which will later be used to pick up all switches in the fabric.
touch ~/workspace/ndlab/nac/host_vars/site1-fabric/vrfs.nac.yml
code-server -r ~/workspace/ndlab/nac/host_vars/site1-fabric/vrfs.nac.yml
Copy and paste the following content into the vrfs.nac.yml file that is now open in your VSCode editor.
---

vxlan:
  overlay:
    vrfs:
      - name: NaC-VRF01
        vrf_id: 200001
        vlan_id: 2001
        vrf_attach_group: all
    vrf_attach_groups:
      - name: all
        switches:
          - hostname: site1-l1
          - hostname: site1-l2
Next, you will create the networks.nac.yml file.
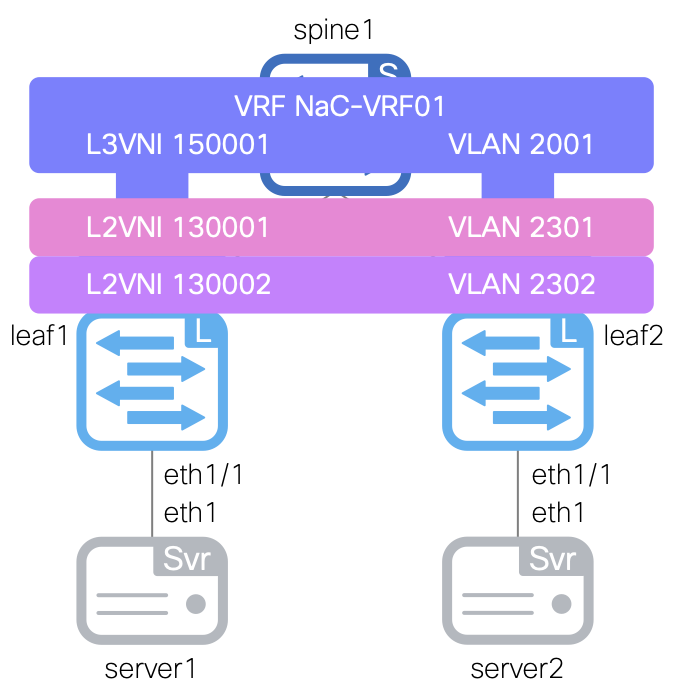
This file will contain the Network configuration for your fabric, which defines the network names, VRF names (newly created above), network IDs, VLAN IDs, VLAN names, gateway IP addresses, and network attach groups.
Your initial set of data will define two networks named NaC-Net01 and NaC-Net02, both associated with the previously created VRF NaC-VRF01 and attached to your vPC peers. You will also define two network attach groups named leaf1_leaf2_access and leaf1_leaf2_vpc to attach the networks to the appropriate interfaces on your leaf switches based on access or vPC interfaces defined in the previous section. The access group attaches to ethernet1/4 on both leaf switches, which will be configured as access ports. The vPC group attaches to port-channel5 on both leaf switches, which will be configured as trunk ports.
touch ~/workspace/ndlab/nac/host_vars/site1-fabric/networks.nac.yml
code-server -r ~/workspace/ndlab/nac/host_vars/site1-fabric/networks.nac.yml
Copy and paste the following content into the networks.nac.yml file that is now open in your VSCode editor.
---

vxlan:
  overlay:
    networks:
      - name: NaC-Net01
        vrf_name: NaC-VRF01
        net_id: 240001
        vlan_id: 2401
        vlan_name: NaC-Net01_vlan2401
        gw_ip_address: 192.168.1.1/24
        network_attach_group: leaf1_leaf2_access
      - name: NaC-Net02
        vrf_name: NaC-VRF01
        net_id: 240002
        vlan_id: 2402
        vlan_name: NaC-Net02_vlan2402
        gw_ip_address: 192.168.2.1/24
        network_attach_group: leaf1_leaf2_vpc
    network_attach_groups:
      - name: leaf1_leaf2_access
        switches:
          - hostname: site1-l1
            ports:
              - ethernet1/4
          - hostname: site1-l2
            ports:
              - ethernet1/4
      - name: leaf1_leaf2_vpc
        switches:
          - hostname: site1-l1
            ports:
              - port-channel5
          - hostname: site1-l2
            ports:
              - port-channel5
Make sure you are in your root Ansible directory.
cd ~/workspace/ndlab/nac
From the root Ansible project directory, execute the following command:
ansible-playbook -i hosts.site1.yml vxlan.yml --tags "cr_manage_vrfs, cr_manage_networks"
Upon a successful run of the playbook, your output should look as follows:
  <... SNIP ...>

  PLAY RECAP ************************************************************************************************************************************************************
  site1-fabric               : ok=39   changed=4    unreachable=0    failed=0    skipped=17   rescued=0    ignored=0


  PLAYBOOK RECAP ******************************************************************************************
  Playbook run took 0 days, 0 hours, 0 minutes, 22 seconds


  TASKS RECAP *********************************************************************************************
  Tuesday 02 June 2026  21:56:11 +0000 (0:00:00.102)       0:00:22.838 **********
  ===============================================================================
  cisco.nac_dc_vxlan.create : Execute Create Resources --------------------------------------------- 7.85s
  cisco.nac_dc_vxlan.common : Build Resources ------------------------------------------------------ 3.44s
  cisco.nac_dc_vxlan.connectivity_check : Get Cisco Nexus Dashboard Fabric Controller Version ------ 1.66s
  cisco.nac_dc_vxlan.validate : Copy Service Model Data to Host ------------------------------------ 0.80s
  cisco.nac_dc_vxlan.connectivity_check : Verify Authorization to Nexus Dashboard ------------------ 0.76s
  cisco.nac_dc_vxlan.validate : Copy Extended Service Model Data to Host --------------------------- 0.60s
  cisco.nac_dc_vxlan.validate : Move Golden Service Model Data Previous ---------------------------- 0.57s
  cisco.nac_dc_vxlan.connectivity_check : Verify Connection to Nexus Dashboard --------------------- 0.54s
  cisco.nac_dc_vxlan.validate : Stat Factory Defaults ---------------------------------------------- 0.54s
  cisco.nac_dc_vxlan.connectivity_check : Get Cisco Nexus Dashboard Version ------------------------ 0.44s
  cisco.nac_dc_vxlan.validate : Stat the Extended Service Model Data ------------------------------- 0.36s
  cisco.nac_dc_vxlan.validate : Move Extended Service Model Data Previous -------------------------- 0.35s
  cisco.nac_dc_vxlan.validate : Stat the Golden Service Model Data --------------------------------- 0.34s
  cisco.nac_dc_vxlan.common : Display Change Flag Values ------------------------------------------- 0.26s
  cisco.nac_dc_vxlan.common : Display Resource Build Summary --------------------------------------- 0.24s
  cisco.nac_dc_vxlan.create : Display Create Resources Summary ------------------------------------- 0.23s
  cisco.nac_dc_vxlan.connectivity_check : Set Cisco Nexus Dashboard Version Var -------------------- 0.22s
  cisco.nac_dc_vxlan.common : Create Fact To Store Common Role Path -------------------------------- 0.22s
  cisco.nac_dc_vxlan.validate : Display Workflow Type - Direct to Controller (DTC) ----------------- 0.22s
  cisco.nac_dc_vxlan.connectivity_check : Set Cisco Nexus Dashboard Fabric Controller Version Var --- 0.22s

  ROLES RECAP *********************************************************************************************
  Tuesday 02 June 2026  21:56:11 +0000 (0:00:00.103)       0:00:22.838 **********
  ===============================================================================
  create ------------------------------------------------------------------ 8.18s
  validate ---------------------------------------------------------------- 6.18s
  common ------------------------------------------------------------------ 4.28s
  connectivity_check ------------------------------------------------------ 3.84s
  common_global ----------------------------------------------------------- 0.04s
  ~~~~~~~~~~~~~~~~~~~~~~~~~~~~~~~~~~~~~~~~~~~~~~~~~~~~~~~~~~~~~~~~~~~~~~~~~~~~~~~
  total ------------------------------------------------------------------ 22.53s
Return to your Nexus Dashboard browser tab where the Interfaces tab should still be active.
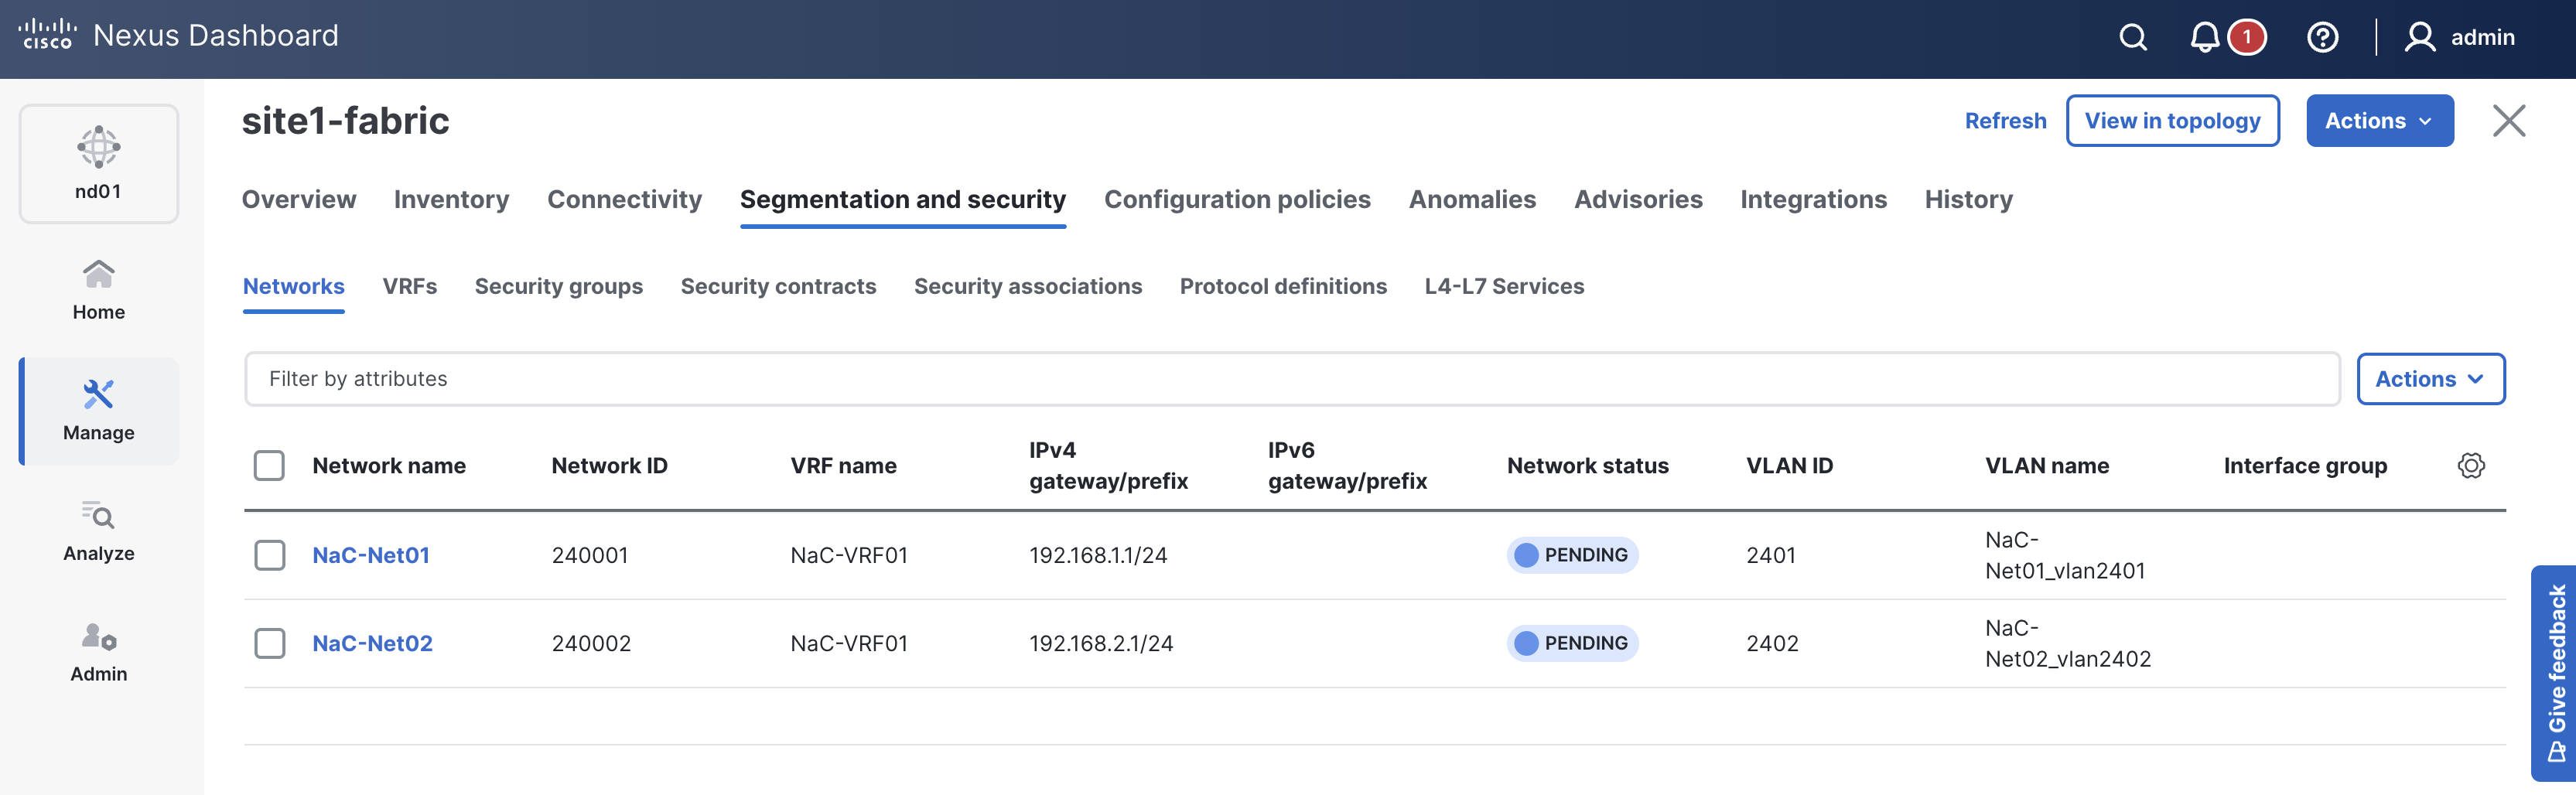
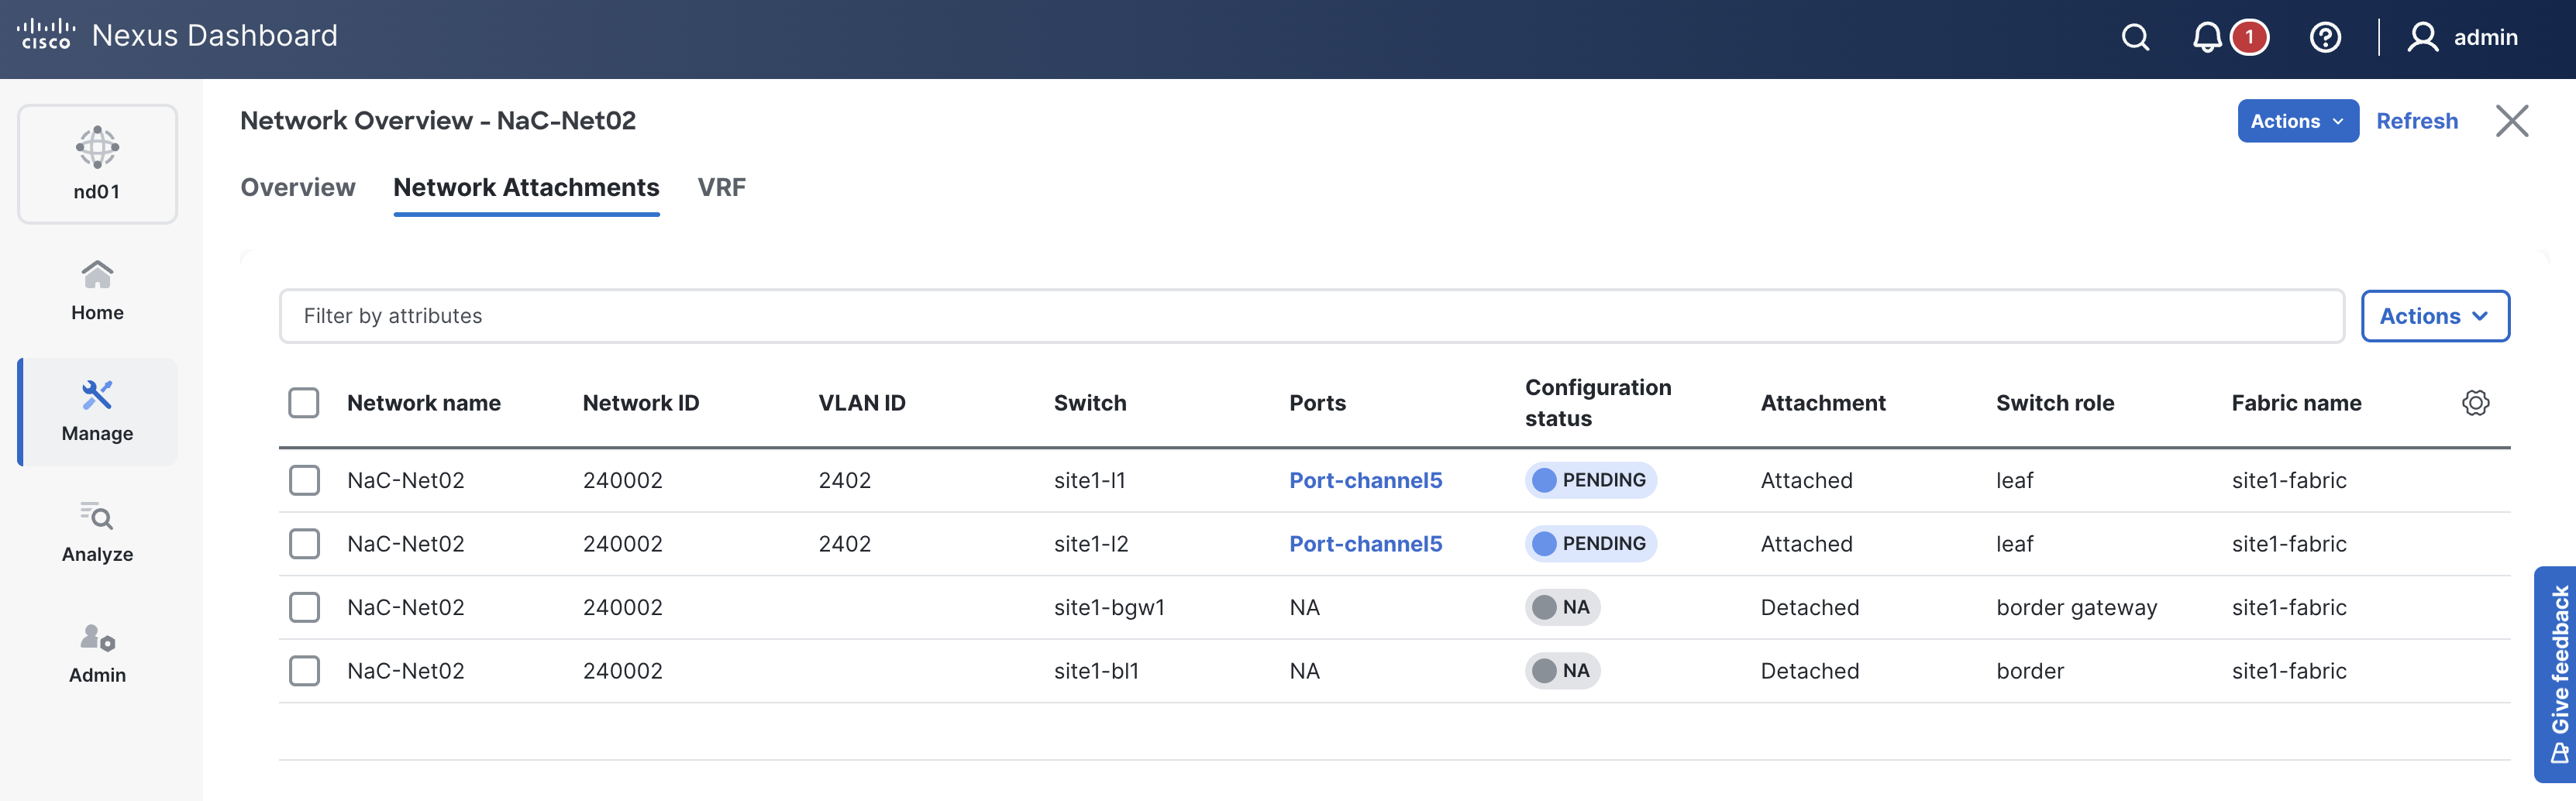
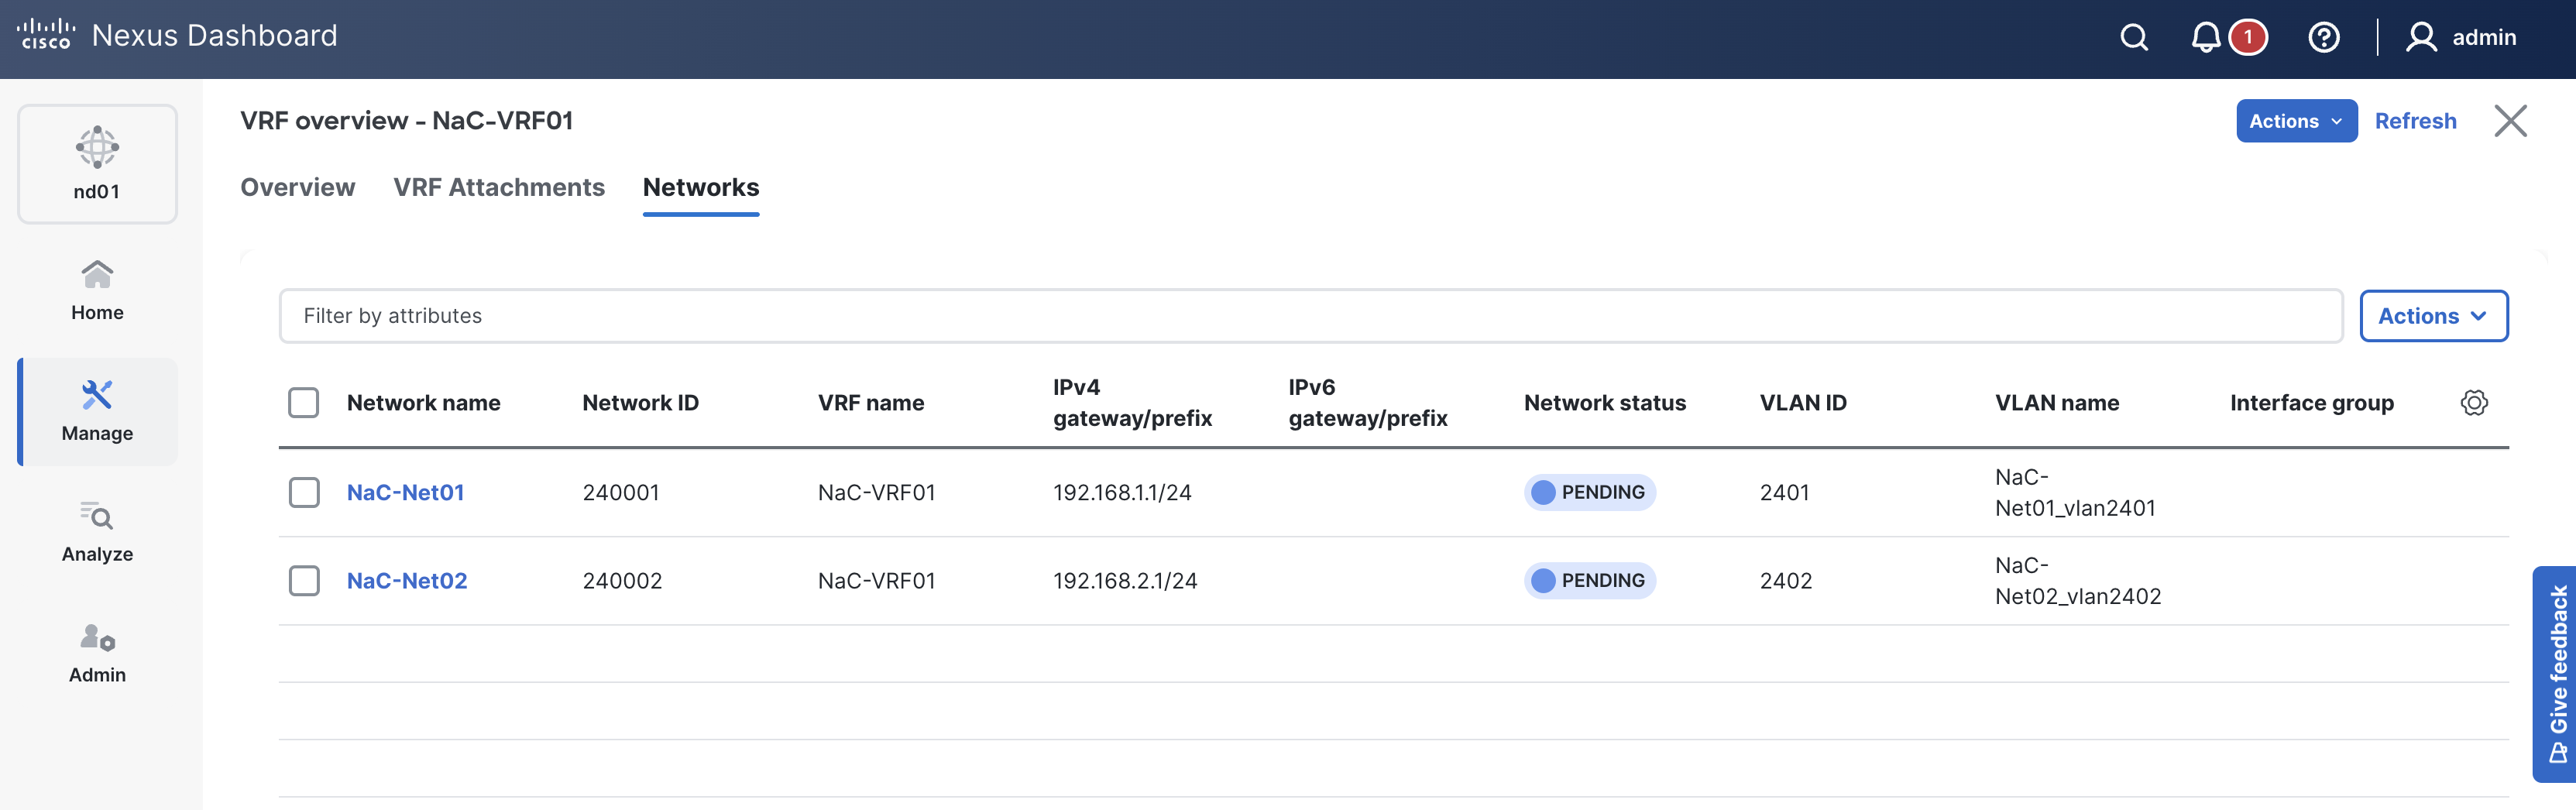
Verify the Networks NaC-Net01 and NaC-Net02 are listed.
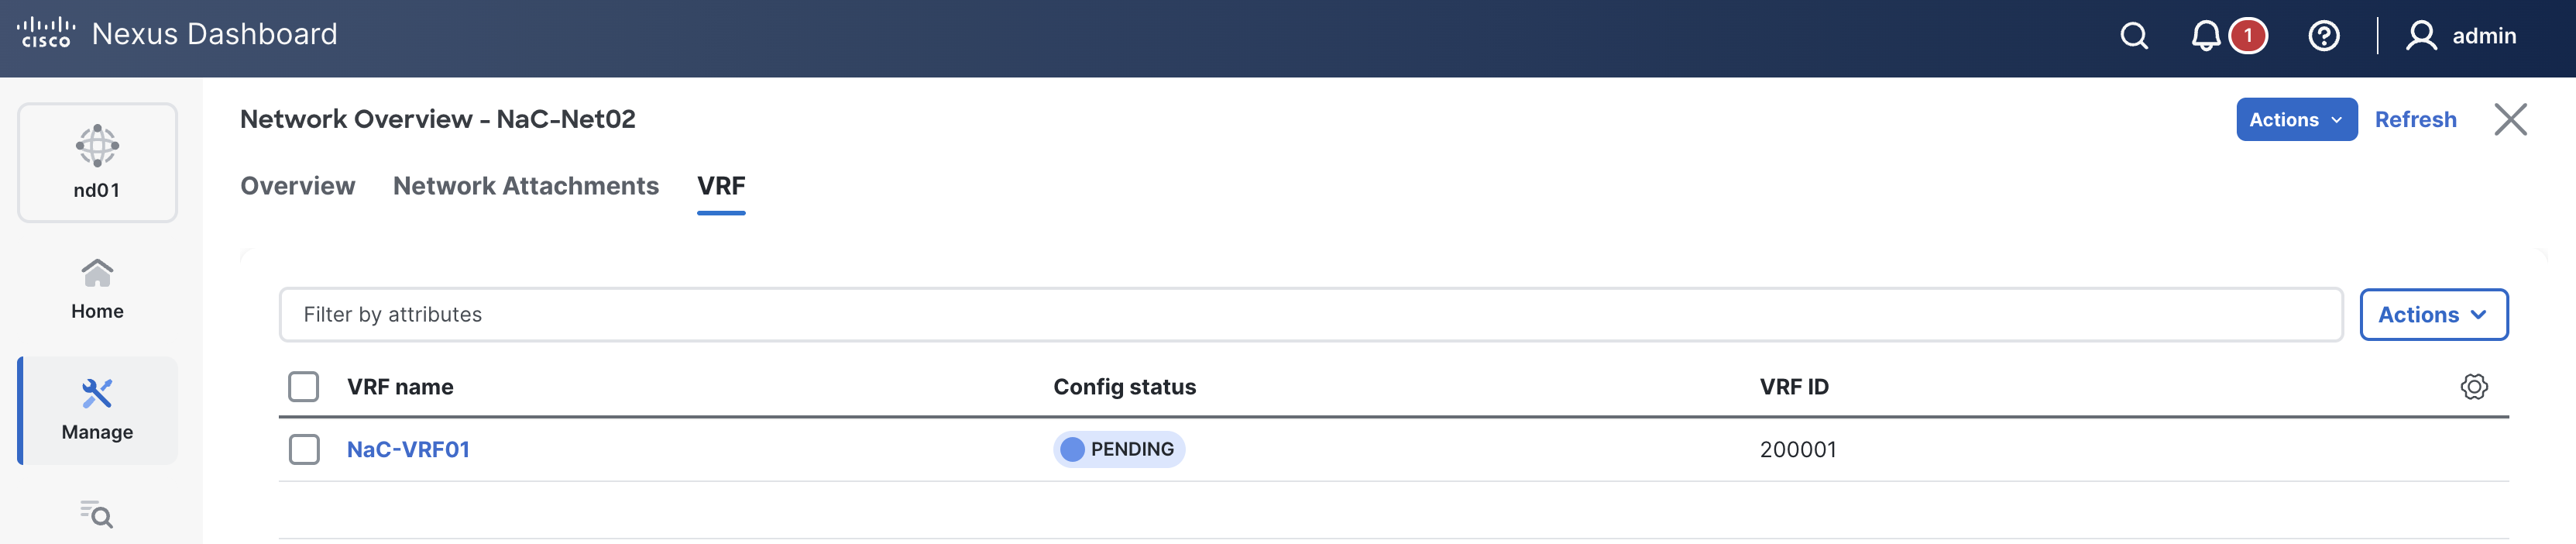
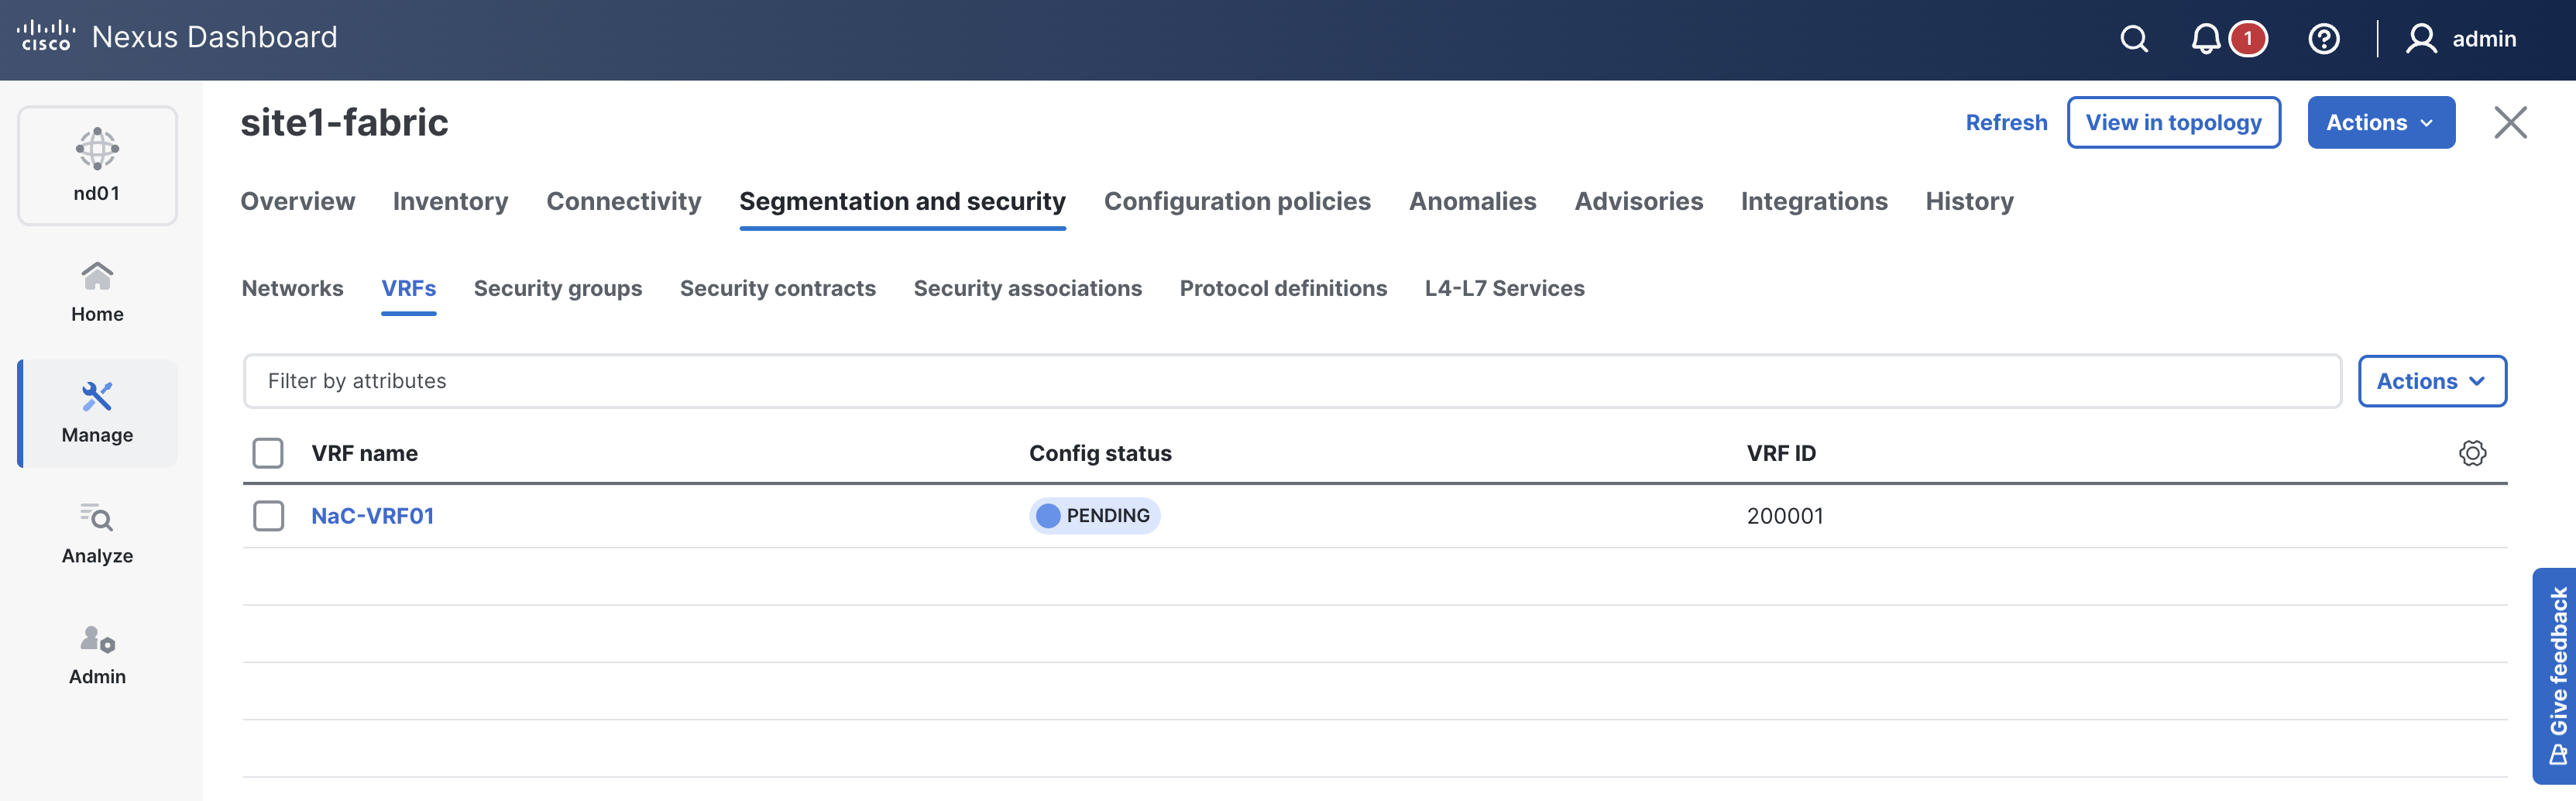
Verify the VRF NaC-VRF01 is listed.
As in previous sections, when reviewing the VRFs tab, it is expected to see VRFs in the Pending status since a deployment has not taken place yet. Again, you will deploy to your switches in the deploy role.

Navigate back to your VSCode application.
Continue to the next section to define different policies to augment the configuration that Nexus Dashboard provides.