Return to your Visual Studio Code Terminal window. Create the host_vars directory for your Site2 ISN fabric.
mkdir -p host_vars/site2-isn
For your site2-isn fabric, create a file named fabric.nac.yml in the host_vars/site2-isn directory.
This fabric has a simplified topology in this lab, so your entire fabric data model can be contained in a single file.
Note that in the data model below, the multisite section is introduced.
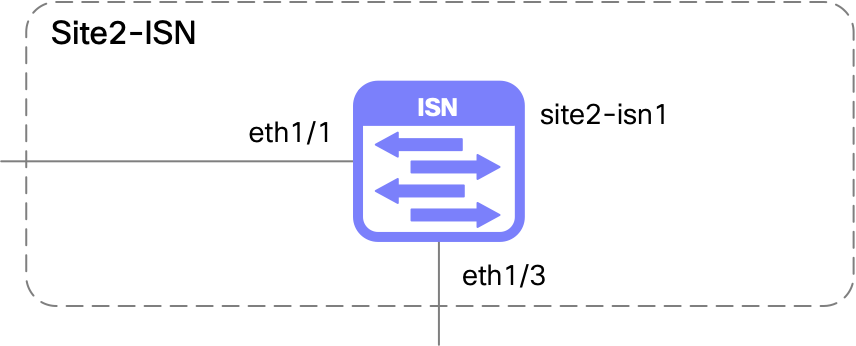
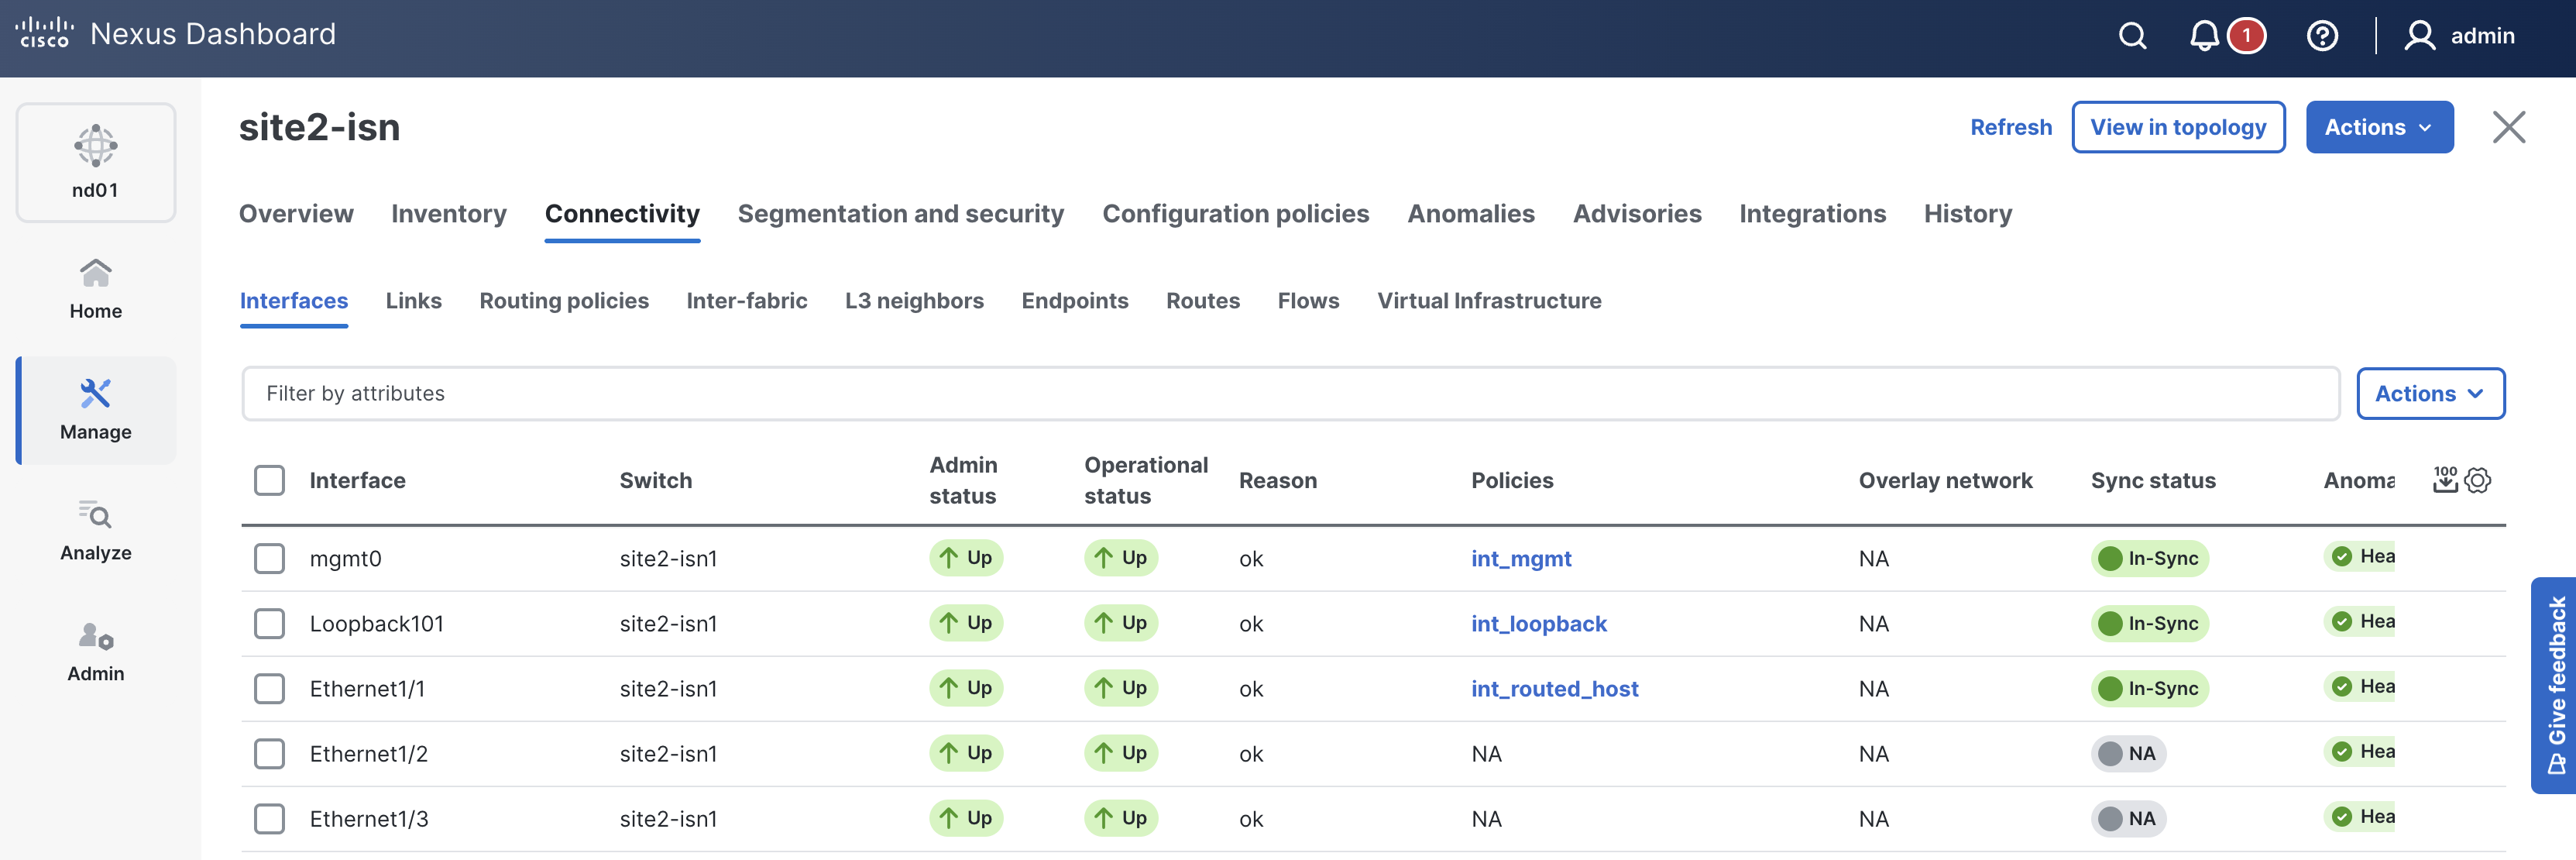
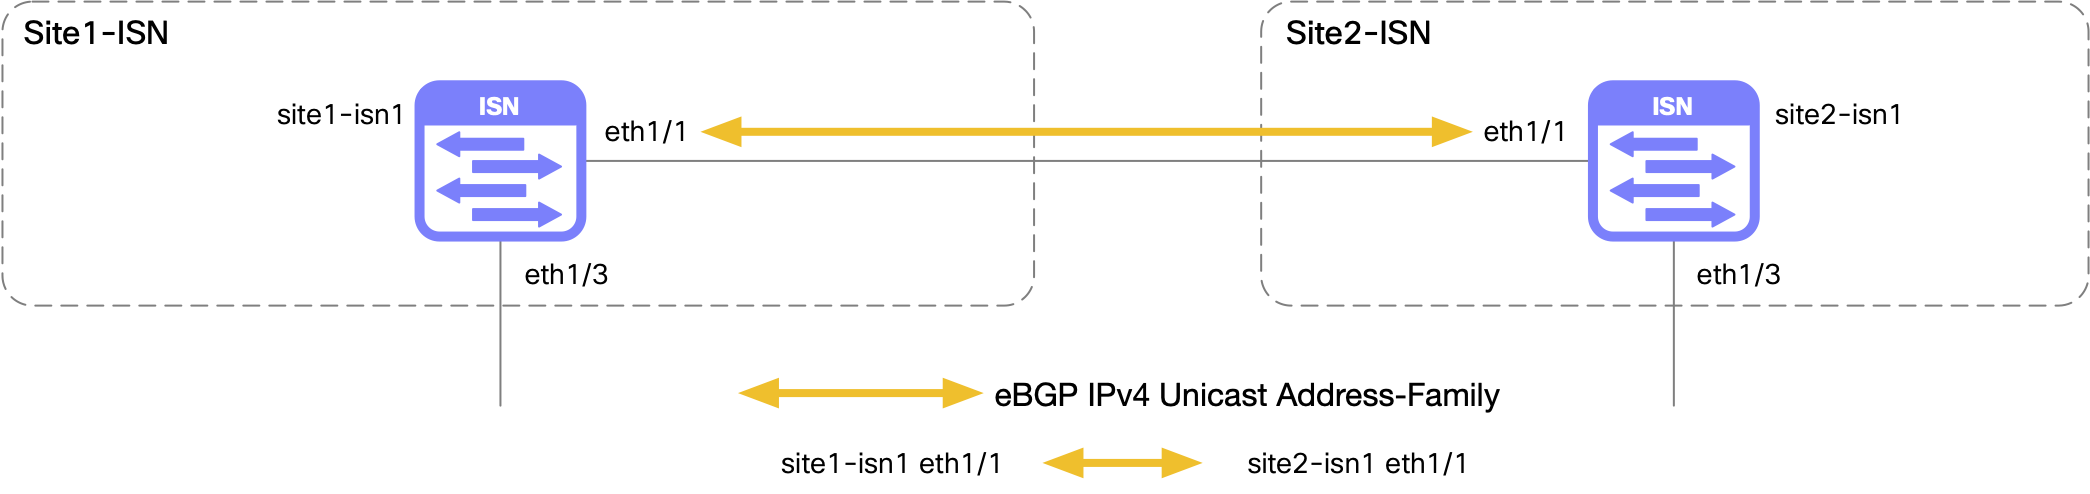
You still define the topology of the fabric switches, interfaces, and policies as before. The interfaces defined on the ISN switch include a loopback interface for the route server and a routed interface to connect to Site1 ISN. In the policy section, an external BGP neighbor policy is defined to peer with Site1 ISN using an ND policy template. With regard to interface Ethernet1/3 in the diagram, this interface is not defined in the data model as the settings you will use for Multi-Site (MSD) will be applied automatically by ND when the Multi-Site extension is enabled later in the lab.
touch ~/workspace/ndlab/nac/host_vars/site2-isn/fabric.nac.yml
code-server -r ~/workspace/ndlab/nac/host_vars/site2-isn/fabric.nac.yml
Copy and paste the following content into the fabric.nac.yml file that is now open in your VSCode editor.
---

vxlan:
  fabric:
    name: site2-isn
    type: ISN
  multisite:
    isn:
      bgp_asn: "65201"
  topology:
    switches:
      - name: site2-isn1
        serial_number: 93Y9AIDEDQ3
        role: core_router
        management:
          default_gateway_v4: 10.15.9.1
          management_ipv4_address: 10.15.9.23
        interfaces:
          - name: Loopback101
            mode: loopback
            description: Route Server Loopback
            enabled: true
            ipv4_address: 10.201.201.201
            ipv4_route_tag: 54321
          - name: Ethernet1/1
            mode: routed
            description: To Site1 ISN1 Eth1/1
            enabled: true
            ipv4_address: 10.0.0.1/31
  policy:
    policies:
      - name: ebgp_neighbor
        template_name: ext_bgp_neighbor
        template_vars:
          asn: "65201"
          NEIGHBOR_ASN: "65101"
          NEIGHBOR_IP: "10.0.0.0"
          IF_NAME: "Ethernet1/1"
          ENABLE_LOG_NEIGHBOR_CHANGE: true
    groups:
      - name: isn
        policies:
          - name: ebgp_neighbor
    switches:
      - name: site2-isn1
        groups:
          - isn
Like previous fabrics, Site2 ISN will leverage the same ND group and ND instance, but specify the Site2 ISN fabric as a logical host.
touch ~/workspace/ndlab/nac/hosts.site2_isn.yml
cat << EOF >> ~/workspace/ndlab/nac/hosts.site2_isn.yml
---
# Inventory Information For Site2 ISN Fabric
nd:
  hosts:
    site2-isn:
      ansible_host: 10.15.0.35
EOF
Make sure you are in your root Ansible directory.
cd ~/workspace/ndlab/nac
From the root Ansible project directory execute the following command:
ansible-playbook -i hosts.site2_isn.yml vxlan.yml
Upon a successful run of the playbook your output should look as follows:
  <... SNIP ...>

  PLAY RECAP **************************************************************************************************************************************************************************
  site2-isn                  : ok=45   changed=4    unreachable=0    failed=0    skipped=20   rescued=0    ignored=0


  PLAYBOOK RECAP ******************************************************************************************
  Playbook run took 0 days, 0 hours, 1 minutes, 42 seconds


  TASKS RECAP *********************************************************************************************
  Wednesday 03 June 2026  00:39:57 +0000 (0:00:00.057)       0:01:42.017 ********
  ===============================================================================
  cisco.nac_dc_vxlan.create : Execute Create Resources -------------------------------------------- 57.82s
  cisco.nac_dc_vxlan.deploy : Execute Deploy of Resources ----------------------------------------- 28.46s
  cisco.nac_dc_vxlan.common : Build Resources ------------------------------------------------------ 2.31s
  cisco.nac_dc_vxlan.connectivity_check : Get Cisco Nexus Dashboard Fabric Controller Version ------ 1.63s
  cisco.nac_dc_vxlan.remove : Execute Remove Resources --------------------------------------------- 1.32s
  cisco.nac_dc_vxlan.deploy : Execute Deploy of Resources ------------------------------------------ 1.30s
  cisco.nac_dc_vxlan.connectivity_check : Verify Authorization to Nexus Dashboard ------------------ 0.76s
  cisco.nac_dc_vxlan.validate : Copy Service Model Data to Host ------------------------------------ 0.76s
  cisco.nac_dc_vxlan.validate : Copy Extended Service Model Data to Host --------------------------- 0.63s
  cisco.nac_dc_vxlan.connectivity_check : Verify Connection to Nexus Dashboard --------------------- 0.52s
  cisco.nac_dc_vxlan.validate : Stat Factory Defaults ---------------------------------------------- 0.49s
  cisco.nac_dc_vxlan.connectivity_check : Get Cisco Nexus Dashboard Version ------------------------ 0.47s
  cisco.nac_dc_vxlan.validate : Stat the Extended Service Model Data ------------------------------- 0.32s
  cisco.nac_dc_vxlan.validate : Stat the Golden Service Model Data --------------------------------- 0.31s
  cisco.nac_dc_vxlan.remove : Log Deploy During Remove Info Message -------------------------------- 0.26s
  cisco.nac_dc_vxlan.common : Display Change Flag Values ------------------------------------------- 0.23s
  cisco.nac_dc_vxlan.common : Create Fact To Store Common Role Path -------------------------------- 0.22s
  cisco.nac_dc_vxlan.create : Display Create Resources Summary ------------------------------------- 0.22s
  cisco.nac_dc_vxlan.connectivity_check : Set Cisco Nexus Dashboard Fabric Controller Version Var --- 0.21s
  cisco.nac_dc_vxlan.remove : Display Remove Resources Summary ------------------------------------- 0.20s

  ROLES RECAP *********************************************************************************************
  Wednesday 03 June 2026  00:39:57 +0000 (0:00:00.058)       0:01:42.017 ********
  ===============================================================================
  create ----------------------------------------------------------------- 58.09s
  deploy ----------------------------------------------------------------- 29.87s
  validate ---------------------------------------------------------------- 5.08s
  connectivity_check ------------------------------------------------------ 3.78s
  common ------------------------------------------------------------------ 3.04s
  remove ------------------------------------------------------------------ 1.83s
  common_global ----------------------------------------------------------- 0.04s
  ~~~~~~~~~~~~~~~~~~~~~~~~~~~~~~~~~~~~~~~~~~~~~~~~~~~~~~~~~~~~~~~~~~~~~~~~~~~~~~~
  total ----------------------------------------------------------------- 101.72s
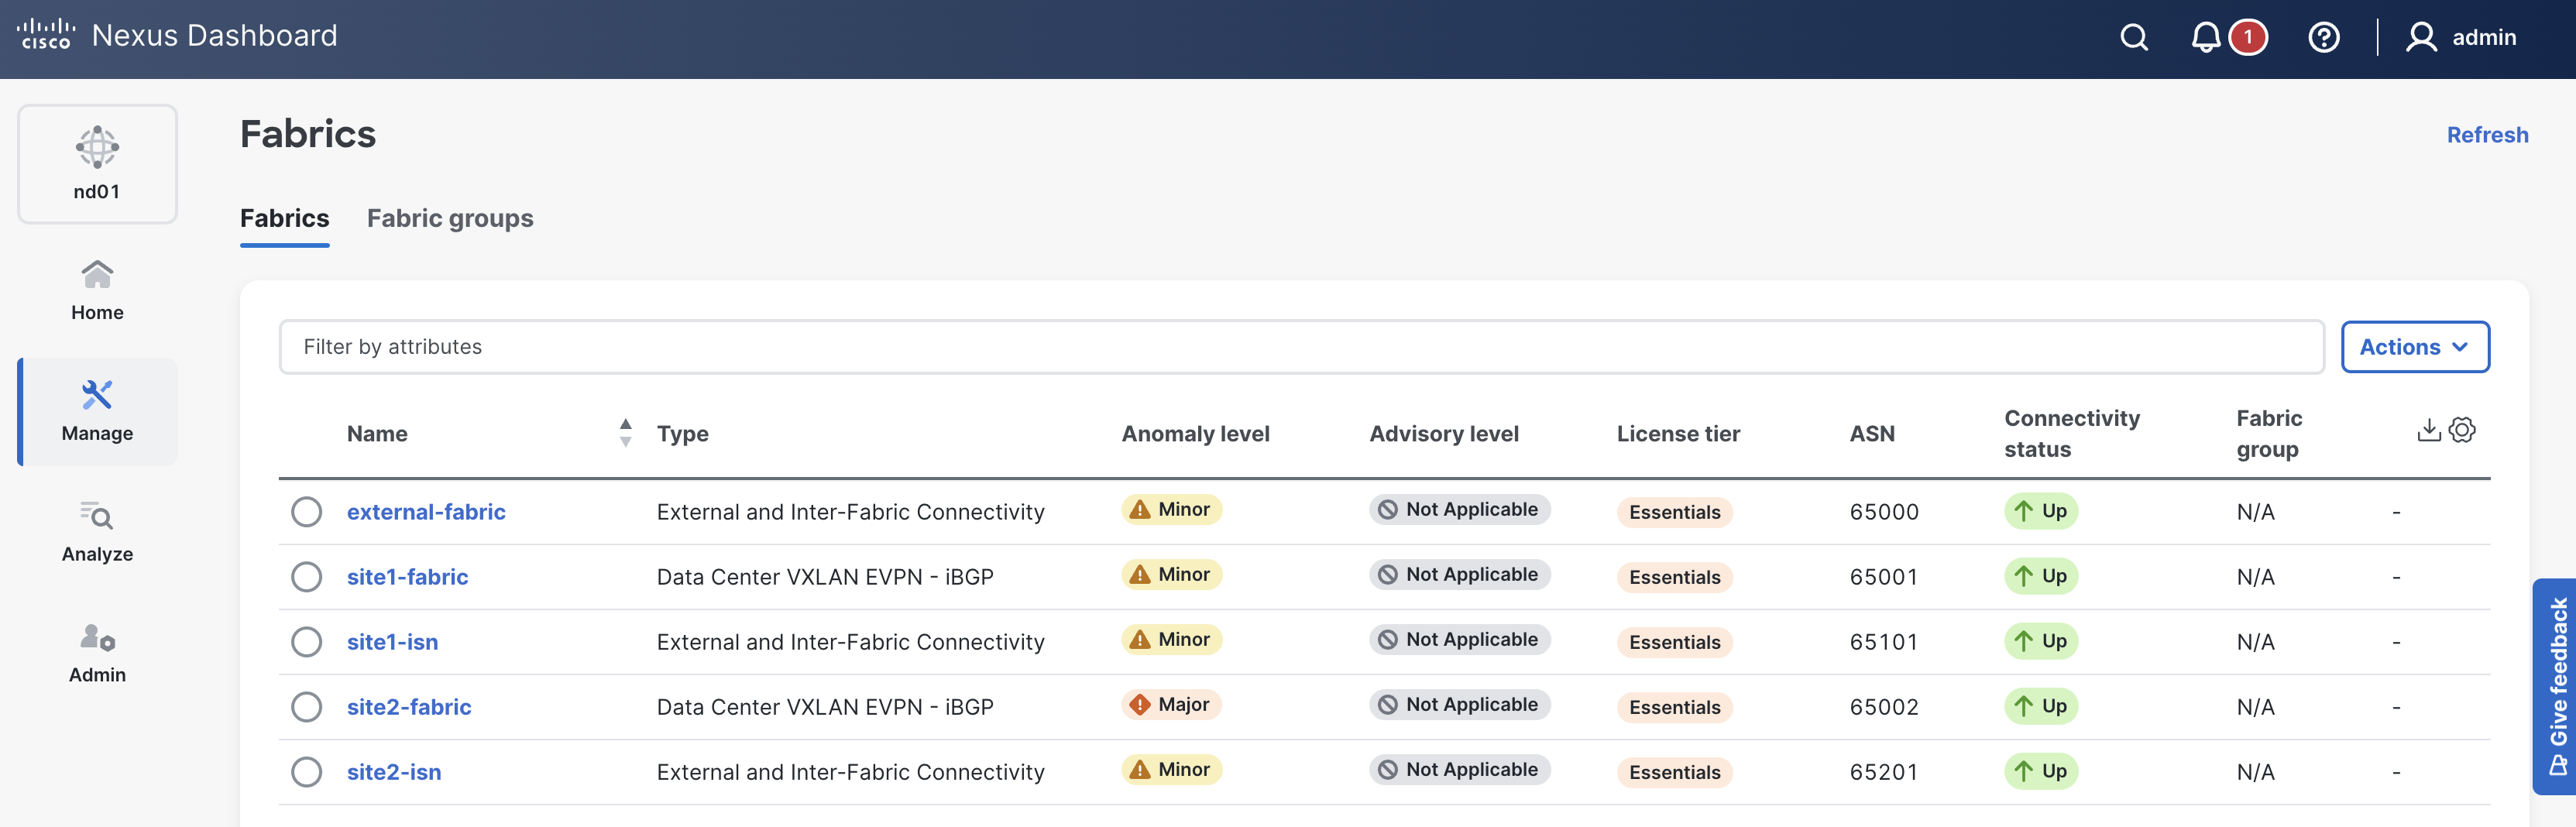
site2-isn in the list of fabrics; click it.
If your site2-isn is not showing, please try clicking the Refresh button in the top-right of the Fabrics pane.
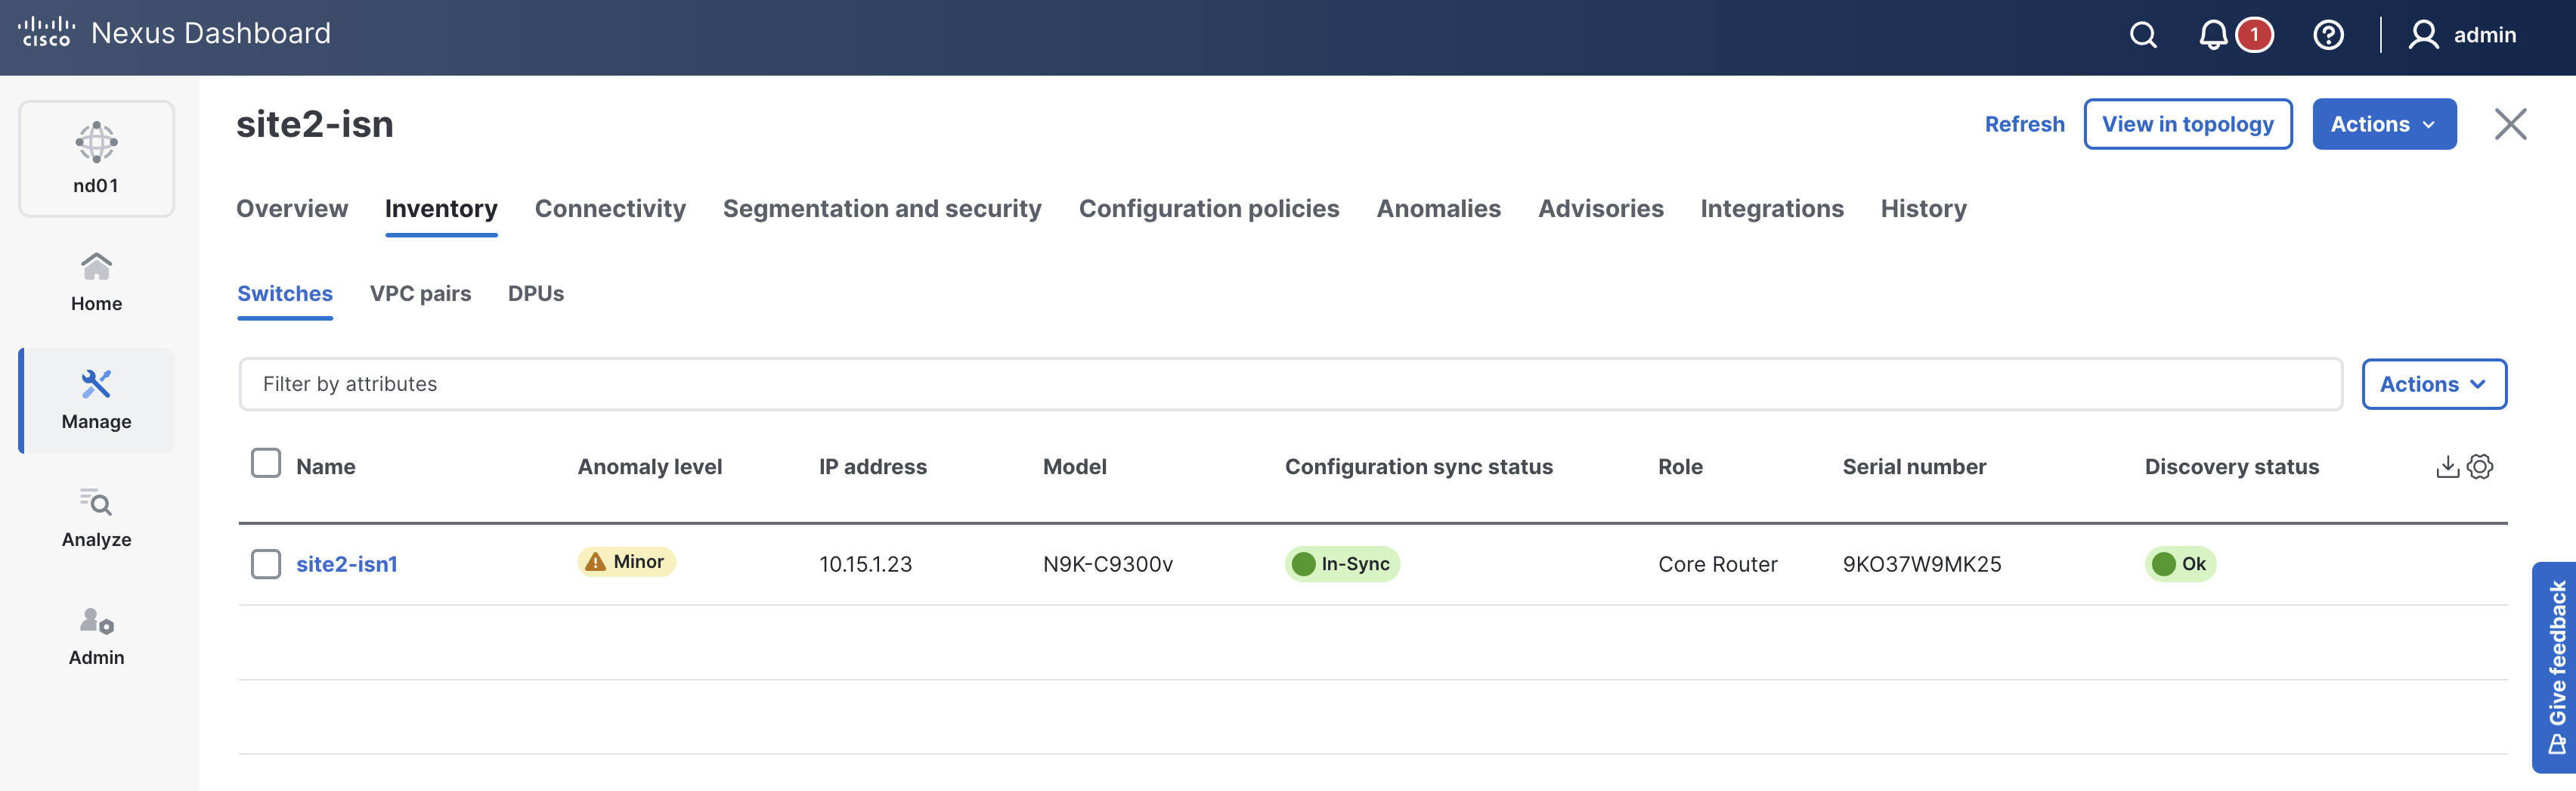
In-Sync. If not, please click the Refresh button near the Actions button

Navigate back to your VSCode application.
Please continue to the next section to model and bring all your fabrics into a Multi-Site (MSD) fabric group to manage overlay extensions between sites.